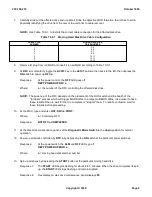
14.
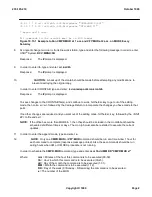
At the MCC, to obtain the defect table listing, type and enter:
DUMP:MHD=a:DEFECT:MFGR;
Where:
a
= Member number of the replaced moving head disk.
Response:
DUMP MHD a DEFECT TABLE COMPLETED
15.
Compare the manufacturer's defect table, delivered with the disk, with the one generated by the system. Are
they the same?
If
YES
, proceed to Step 17.
If
NO
, continue with the next step.
16.
NOTE 1:
The defect table generated by the system may be corrupted due to improper installation
of the new disk drive.
NOTE 2:
If the disk drive being installed is a used one coming from storage then the defect table that is
provided may be out of date. In this case use the defect table generated by the system.
What type of disk is being installed?
If
NEW
, then repeat from Step 1, to rule out improper drive installation.
If
USED
, then save new defect table, discard the old one, and continue with next step.
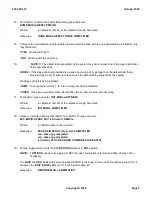
17.
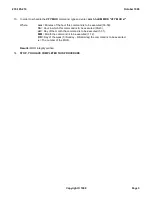
At the MCC, type and enter:
INIT:MHD=a:VFY,NEW;
Where:
a
= Member number of the replaced moving head disk.
Response:
INIT MHD a COMPLETED
18.
If disk is a software backup disk (MHD 14 or MHD 15), type and enter:
EXC:ENVIR:UPROC,FN="/etc/rcvtoc",ARGS=x;
Where:
x
= MHD number to be restored
Response:
EXC ENVIR UPROC /etc/rcvtoc COMPLETED
vcp: disk copy completed
vcp: disk copy completed
/etc/rcvtoc VTOC READ AND COMPARE SUCCESSFUL
19.
At disk, toggle and/or verify that the
RST/ROS
switch is in
RST
position.
NOTE:
If
RST/ROS
needs to be toggled to RST the disk should start to restore and Step 20 may not be
necessary.
The
RQIP
and
OOS
LEDs will remain on while the MHD is restoring. At the end of the restore period (10-15
minutes), the
RQIP & OOS
LEDs go off. If not, perform Step 20.
Response:
RESTORE MHD a COMPLETED
235-105-210
October 1999
Copyright © 1999
Page 3
Summary of Contents for 5ESS-2000
Page 96: ...235 105 210 October 1999 Copyright 1999 Page 2 ...
Page 184: ...235 105 210 October 1999 Copyright 1999 Page 3 ...
Page 300: ...13 STOP YOU HAVE COMPLETED THIS PROCEDURE 235 105 210 October 1999 Copyright 1999 Page 55 ...
Page 339: ...7 STOP YOU HAVE COMPLETED THIS PROCEDURE 235 105 210 October 1999 Copyright 1999 Page 13 ...
Page 342: ...235 105 210 October 1999 Copyright 1999 Page 2 ...
Page 359: ...235 105 210 October 1999 Copyright 1999 Page 5 ...
Page 609: ...2 STOP YOU HAVE COMPLETED THIS PROCEDURE 235 105 210 October 1999 Copyright 1999 Page 12 ...
Page 676: ...235 105 210 October 1999 Copyright 1999 Page 9 ...
Page 792: ...3 STOP YOU HAVE COMPLETED THIS PROCEDURE 235 105 210 October 1999 Copyright 1999 Page 9 ...
Page 799: ...Figure 11 36 3 1 Cleaning Points 235 105 210 October 1999 Copyright 1999 Page 7 ...
Page 801: ...235 105 210 October 1999 Copyright 1999 Page 9 ...
Page 839: ...2 STOP YOU HAVE COMPLETED THIS PROCEDURE 235 105 210 October 1999 Copyright 1999 Page 16 ...
Page 999: ...2 STOP YOU HAVE COMPLETED THIS PROCEDURE 235 105 210 October 1999 Copyright 1999 Page 13 ...
Page 1008: ...Figure 11 55 1 CTSNS DIP Switch Settings 235 105 210 October 1999 Copyright 1999 Page 2 ...
Page 1011: ...235 105 210 October 1999 Copyright 1999 Page 5 ...
Page 1053: ...235 105 210 October 1999 Copyright 1999 Page 15 ...
Page 1289: ...Figure 15 17 2 AMATPS Data Link 235 105 210 October 1999 Copyright 1999 Page 2 ...
Page 1292: ...235 105 210 October 1999 Copyright 1999 Page 5 ...
Page 1303: ...9 STOP YOU HAVE COMPLETED THIS PROCEDURE 235 105 210 October 1999 Copyright 1999 Page 2 ...
Page 1360: ...Figure 15 47 2 Typical SCANS III Link Diagram 235 105 210 October 1999 Copyright 1999 Page 2 ...
Page 1372: ...235 105 210 October 1999 Copyright 1999 Page 2 ...
Page 1374: ...235 105 210 October 1999 Copyright 1999 Page 4 ...
Page 1421: ...Table 1 1 O M Checklist 235 105 210 October 1999 Copyright 1999 Page 3 ...

