14.
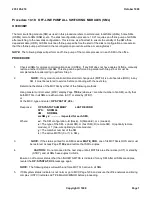
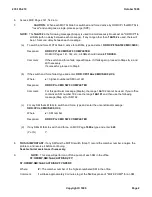
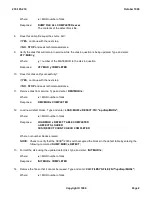
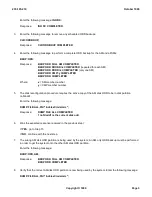
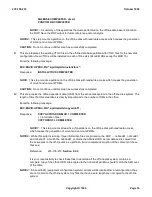
Enter the following message to determine if Automatic MHD Configuration is allowed:
OP:MHD:CFG;
Response:
AUTO MHD CONFIGURATION NOT PERMITTED
15.
Was the expected response received in the preceding step?
If
YES
, go to Step 18.
If
NO
, continue with the next step.
16.
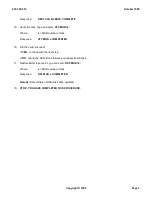
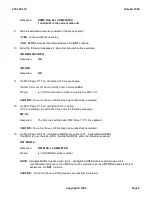
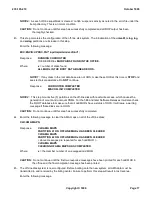
Enter the following message to inhibit Automatic MHD Configuration during the disk reconfiguration
procedure.
INH:AUTOCFG;
Response:
OK
17.
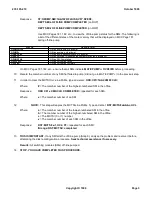
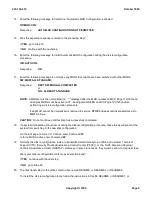
Enter the following message to normalize any MHDs that might have been switched with other MHDs:
SW:MHD=ALL:STANDARD;
Response:
REPT SW MHD ALL COMPLETED
or
NG - ALREADY STANDARD
NOTE:
All MHDs must be normalized (no ``*'' displayed after the MHD number on MCC Page 179/180) and
all duplex MHDs must be active (ACT - backlighted GREEN on MCC Page 123/125) before
performing a disk reconfiguration procedure.
If any MHD cannot be normalized or restored to service,
STOP
and seek technical assistance. Do
NOT
continue.
CAUTION:
Do not continue until this step has successfully completed.
18.
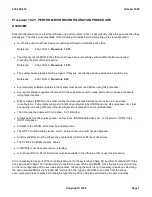
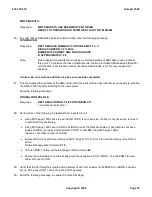
If a system initialization should occur during the disk reconfiguration procedure, these forces will prevent the
system from switching to the new disk configuration.
On the EAI page, to force CU 0 active, enter Command
10
to force MHD 0 active enter Command
20
19.
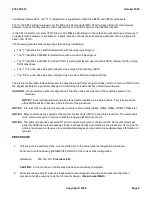
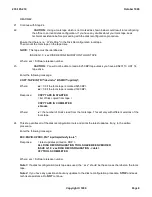
Normally the disk reconfiguration tools are transmitted electronically to an office by Customer Technical
Support (CTS) [formerly Product Engineering Control Center (PECC)], or the North American Regional
Technical Assistance Center (NARTAC). However, in some rare cases, they could be sent via magnetic tape.
Were your disk reconfiguration tools received electronically?
If
YES
, continue with the next step.
If
NO
, go to Step 22.
20.
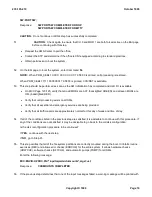
The files transmitted to the office contain a file named README, or README1, or README2.
To install the disk reconfiguration tools, follow the instructions in this file README, or README1, or
235-105-210
October 1999
Copyright © 1999
Page 5
Summary of Contents for 5ESS-2000
Page 96: ...235 105 210 October 1999 Copyright 1999 Page 2 ...
Page 184: ...235 105 210 October 1999 Copyright 1999 Page 3 ...
Page 300: ...13 STOP YOU HAVE COMPLETED THIS PROCEDURE 235 105 210 October 1999 Copyright 1999 Page 55 ...
Page 339: ...7 STOP YOU HAVE COMPLETED THIS PROCEDURE 235 105 210 October 1999 Copyright 1999 Page 13 ...
Page 342: ...235 105 210 October 1999 Copyright 1999 Page 2 ...
Page 359: ...235 105 210 October 1999 Copyright 1999 Page 5 ...
Page 609: ...2 STOP YOU HAVE COMPLETED THIS PROCEDURE 235 105 210 October 1999 Copyright 1999 Page 12 ...
Page 676: ...235 105 210 October 1999 Copyright 1999 Page 9 ...
Page 792: ...3 STOP YOU HAVE COMPLETED THIS PROCEDURE 235 105 210 October 1999 Copyright 1999 Page 9 ...
Page 799: ...Figure 11 36 3 1 Cleaning Points 235 105 210 October 1999 Copyright 1999 Page 7 ...
Page 801: ...235 105 210 October 1999 Copyright 1999 Page 9 ...
Page 839: ...2 STOP YOU HAVE COMPLETED THIS PROCEDURE 235 105 210 October 1999 Copyright 1999 Page 16 ...
Page 999: ...2 STOP YOU HAVE COMPLETED THIS PROCEDURE 235 105 210 October 1999 Copyright 1999 Page 13 ...
Page 1008: ...Figure 11 55 1 CTSNS DIP Switch Settings 235 105 210 October 1999 Copyright 1999 Page 2 ...
Page 1011: ...235 105 210 October 1999 Copyright 1999 Page 5 ...
Page 1053: ...235 105 210 October 1999 Copyright 1999 Page 15 ...
Page 1289: ...Figure 15 17 2 AMATPS Data Link 235 105 210 October 1999 Copyright 1999 Page 2 ...
Page 1292: ...235 105 210 October 1999 Copyright 1999 Page 5 ...
Page 1303: ...9 STOP YOU HAVE COMPLETED THIS PROCEDURE 235 105 210 October 1999 Copyright 1999 Page 2 ...
Page 1360: ...Figure 15 47 2 Typical SCANS III Link Diagram 235 105 210 October 1999 Copyright 1999 Page 2 ...
Page 1372: ...235 105 210 October 1999 Copyright 1999 Page 2 ...
Page 1374: ...235 105 210 October 1999 Copyright 1999 Page 4 ...
Page 1421: ...Table 1 1 O M Checklist 235 105 210 October 1999 Copyright 1999 Page 3 ...

