11.36.4 NCR 006-3503341 DAT and NCR 006-3300608 DAT
OVERVIEW
The UN376 and UN376B cirucit packs uses the NCR 006-3503341 DAT. The UN376C circuit pack uses the NCR
006-3300608 DAT. The tape heads should be cleaned after every 25 hours of operation. The tape heads should
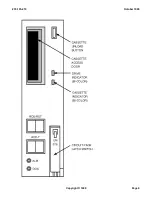
also be cleaned if ``Caution'' is signaled by the following indicators:
Condition
Cassette
Drive
Indicator
Indicator
Caution
UN376,B
Green
Alternating Flashing
Green and Amber
UN376C
Any state
Pulse Amber
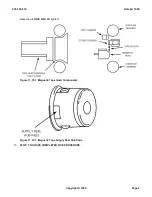
See Figure 11.36.4-1 .
A 4 mm cleaning cassette (
Hewlett-Packard
®
P/N C5709A or equivalent) is required for cleaning the drive.
NOTE:
The 4mm cleaning cassette can be purchased through the following locations:
CDW, 800-598-4239
Insight, 800-359-0633
Micro Warehouse, 800-981-9207
1.
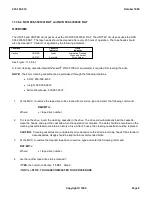
At the MCC, to remove the tape drive to be cleaned from service, type and enter the following command:
RMV:MT=
x
;
Where:
x
= tape drive number.
2.
To clean the drive, insert the cleaning cassette in the drive. The drive will automatically load the cassette,
clean the heads, and eject the cassette when the operation is complete. The date should be recorded on the
cleaning cassette label to maintain a history of use. After 25 uses, the cleaning cassette should be replaced.
CAUTION:
Cleaning cassettes are considerably more abrasive to the drive's recording heads than standard
data cassettes. Usage should be kept within recommended limits.
3.
At the MCC, to restore the cleaned tape drive to service, type and enter the following command:
RST:MT=
x
;
Where:
x
= tape drive number.
4.
Are there other tape drives to be cleaned?
If
YES
, then return to Section
11.36.1
, Step 2.
If
NO
then
STOP. YOU HAVE COMPLETED THIS PROCEDURE
.
235-105-210
October 1999
Copyright © 1999
Page 8
Summary of Contents for 5ESS-2000
Page 96: ...235 105 210 October 1999 Copyright 1999 Page 2 ...
Page 184: ...235 105 210 October 1999 Copyright 1999 Page 3 ...
Page 300: ...13 STOP YOU HAVE COMPLETED THIS PROCEDURE 235 105 210 October 1999 Copyright 1999 Page 55 ...
Page 339: ...7 STOP YOU HAVE COMPLETED THIS PROCEDURE 235 105 210 October 1999 Copyright 1999 Page 13 ...
Page 342: ...235 105 210 October 1999 Copyright 1999 Page 2 ...
Page 359: ...235 105 210 October 1999 Copyright 1999 Page 5 ...
Page 609: ...2 STOP YOU HAVE COMPLETED THIS PROCEDURE 235 105 210 October 1999 Copyright 1999 Page 12 ...
Page 676: ...235 105 210 October 1999 Copyright 1999 Page 9 ...
Page 792: ...3 STOP YOU HAVE COMPLETED THIS PROCEDURE 235 105 210 October 1999 Copyright 1999 Page 9 ...
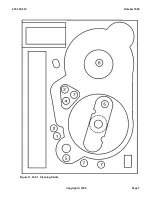
Page 799: ...Figure 11 36 3 1 Cleaning Points 235 105 210 October 1999 Copyright 1999 Page 7 ...
Page 801: ...235 105 210 October 1999 Copyright 1999 Page 9 ...
Page 839: ...2 STOP YOU HAVE COMPLETED THIS PROCEDURE 235 105 210 October 1999 Copyright 1999 Page 16 ...
Page 999: ...2 STOP YOU HAVE COMPLETED THIS PROCEDURE 235 105 210 October 1999 Copyright 1999 Page 13 ...
Page 1008: ...Figure 11 55 1 CTSNS DIP Switch Settings 235 105 210 October 1999 Copyright 1999 Page 2 ...
Page 1011: ...235 105 210 October 1999 Copyright 1999 Page 5 ...
Page 1053: ...235 105 210 October 1999 Copyright 1999 Page 15 ...
Page 1289: ...Figure 15 17 2 AMATPS Data Link 235 105 210 October 1999 Copyright 1999 Page 2 ...
Page 1292: ...235 105 210 October 1999 Copyright 1999 Page 5 ...
Page 1303: ...9 STOP YOU HAVE COMPLETED THIS PROCEDURE 235 105 210 October 1999 Copyright 1999 Page 2 ...
Page 1360: ...Figure 15 47 2 Typical SCANS III Link Diagram 235 105 210 October 1999 Copyright 1999 Page 2 ...
Page 1372: ...235 105 210 October 1999 Copyright 1999 Page 2 ...
Page 1374: ...235 105 210 October 1999 Copyright 1999 Page 4 ...
Page 1421: ...Table 1 1 O M Checklist 235 105 210 October 1999 Copyright 1999 Page 3 ...


