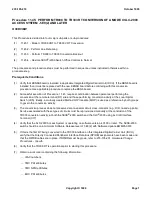
Procedure 11.44: CONVERT SM-2000 CORE 40 TO CORE 60
5E10(1) AND LATER
SOFTWARE RELEASE
OVERVIEW
This procedure converts a live Switching Module-2000 (SM-2000) equipped with CORE40 (UN540 version)
hardware to CORE60 (UN560 version) hardware.
The CORE60 hardware consists of the UN560 processor core circuit pack which replaces the UN540 processor
core circuit pack on each side of the Module Controller/Time Slot Interchange (MCTSI). The CORE60 provides the
core processor with 64 MB of on-board random access memory (RAM). This will replace 64 MB of existing memory.
Prerequisite Conditions
(1)
The Bus Service Node (BSN) circuit pack on both MCTSI sides of the target SM-2000 must be a KBN8B or
later version. Update the target SM-2000 if necessary before starting this procedure.
(2)
Execution of this procedure is recommended during low periods of traffic.
(3)
Electrostatic Discharge (ESD) protection requirements must be followed.
PROCEDURE
1.
Perform SM-2000 Core Conversion Procedure - 5E10 Software Release & Later
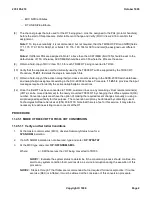
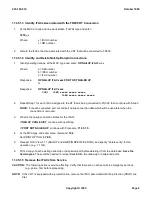
11.44.1 Verify and Set Initial Conditions
1.
At the MCC observe Summary Status Area for a
SYS NORM
indication.
2.
If a
SYS NORM
indication is not obtained, type and enter:
OP:SYSSTAT
3.
At the MCC type and enter:
OP:OFFNORM,SM=
a
Where:
a = SM-2000 number
Comment:
Evaluate system response to determine if system status is acceptable to continue. Specific
attention is required for areas that can cause SM-2000 isolation or service impact during this
SM-2000 Core conversion procedure. Correct any deficiency as required.
CAUTION:
Steps 4 and 5 are recommended but not required. Local practices should control their use. If
REX is inhibited, it must be allowed at the conclusion of this growth procedure.
4.
At the MCC type and enter:
INH:REX,SM =
a
Where:
a = SM-2000 number
5.
At the MCC type and enter:
OP:REXINH
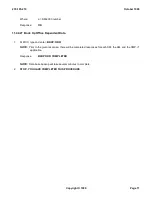
Response:
The inhibit status will be printed.
235-105-210
October 1999
Copyright © 1999
Page 1
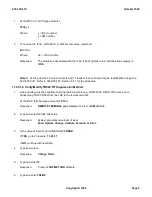
Summary of Contents for 5ESS-2000
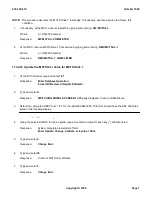
Page 96: ...235 105 210 October 1999 Copyright 1999 Page 2 ...
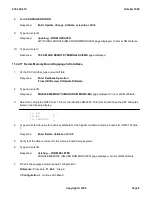
Page 184: ...235 105 210 October 1999 Copyright 1999 Page 3 ...
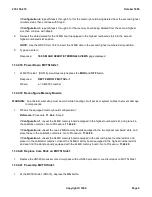
Page 300: ...13 STOP YOU HAVE COMPLETED THIS PROCEDURE 235 105 210 October 1999 Copyright 1999 Page 55 ...
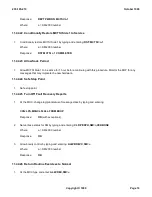
Page 339: ...7 STOP YOU HAVE COMPLETED THIS PROCEDURE 235 105 210 October 1999 Copyright 1999 Page 13 ...
Page 342: ...235 105 210 October 1999 Copyright 1999 Page 2 ...
Page 359: ...235 105 210 October 1999 Copyright 1999 Page 5 ...
Page 609: ...2 STOP YOU HAVE COMPLETED THIS PROCEDURE 235 105 210 October 1999 Copyright 1999 Page 12 ...
Page 676: ...235 105 210 October 1999 Copyright 1999 Page 9 ...
Page 792: ...3 STOP YOU HAVE COMPLETED THIS PROCEDURE 235 105 210 October 1999 Copyright 1999 Page 9 ...
Page 799: ...Figure 11 36 3 1 Cleaning Points 235 105 210 October 1999 Copyright 1999 Page 7 ...
Page 801: ...235 105 210 October 1999 Copyright 1999 Page 9 ...
Page 839: ...2 STOP YOU HAVE COMPLETED THIS PROCEDURE 235 105 210 October 1999 Copyright 1999 Page 16 ...
Page 999: ...2 STOP YOU HAVE COMPLETED THIS PROCEDURE 235 105 210 October 1999 Copyright 1999 Page 13 ...
Page 1008: ...Figure 11 55 1 CTSNS DIP Switch Settings 235 105 210 October 1999 Copyright 1999 Page 2 ...
Page 1011: ...235 105 210 October 1999 Copyright 1999 Page 5 ...
Page 1053: ...235 105 210 October 1999 Copyright 1999 Page 15 ...
Page 1289: ...Figure 15 17 2 AMATPS Data Link 235 105 210 October 1999 Copyright 1999 Page 2 ...
Page 1292: ...235 105 210 October 1999 Copyright 1999 Page 5 ...
Page 1303: ...9 STOP YOU HAVE COMPLETED THIS PROCEDURE 235 105 210 October 1999 Copyright 1999 Page 2 ...
Page 1360: ...Figure 15 47 2 Typical SCANS III Link Diagram 235 105 210 October 1999 Copyright 1999 Page 2 ...
Page 1372: ...235 105 210 October 1999 Copyright 1999 Page 2 ...
Page 1374: ...235 105 210 October 1999 Copyright 1999 Page 4 ...
Page 1421: ...Table 1 1 O M Checklist 235 105 210 October 1999 Copyright 1999 Page 3 ...


