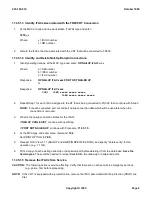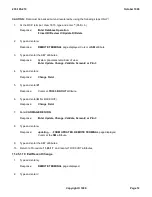
11.45.1.3 Identify IFACs Associated with the TR008 RT Conversion
1.
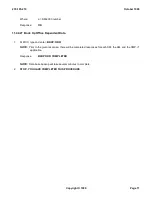
At the MCC or trunk and line work station (TLWS) type and enter:
1870
,y,x
Where:
y = IDCU number
x = SM number.
2.
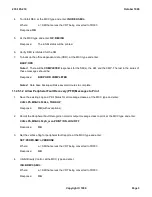
Record the IFACs that are associated with the VRT that will be converted to TR303.
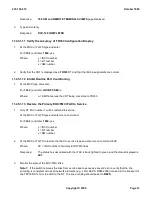
11.45.1.4 Identify and Delete Nail-Up/Hairpin Connections
1.
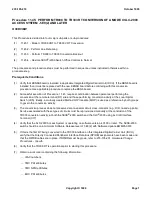
Identify existing nailups, at the MCC, type and enter:
OP:NAILUP,IFAC=
a-b-c
Where:
a = SM number
b = IDCU number
c = IFAC number.
Response:
OP NAILUP IFAC xxxx PORT NOT NAILED UP
or
Response:
OP NAILUP IFAC xxxx
CON1 ILEN xxxxx xxxxx xxxxx
ILEN xxxxx xxxxx xxxxx
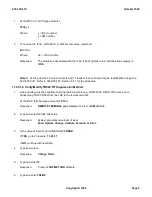
2.
Repeat Step 1 for each IFAC assigned to the RT that is being converted to TR303, then continue with Step 3.
NOTE:
For each connected port, record port nailup connection data which will be used later when the
connection is removed.
3.
What is the nailup connection status for the IFAC?
If
NAILUP CONx EXIST
, continue with next Step.
If
PORT NOT NAILED UP
, continue with Procedure
11.45.1.5
.
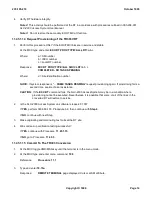
4.
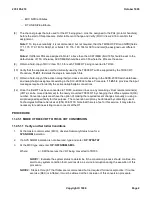
At the MCC type and enter menu command:
196
Set PRINT OPTION to
YES
5.
Request RC/V View 7.11 (NAILUP and HAIRPIN SPECIFICATION), and specify "delete verify" for the
operation (e.g., 7.11dv).
6.
Print a copy of each existing nailed-up or hairpinned port before deleting it from the data base.
Save the
hard-copies.
These will be needed to reinsert/reestablish the nailed-up or hairpinned ports.
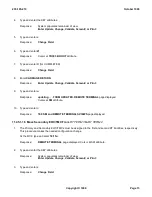
11.45.1.5 Remove the IFACs from Service.
CAUTION:
The following action is service affecting. Verify that there are no active calls to emergency services
(e.g., police, fire) before proceeding.
NOTE:
If the VRT is equipped with a protection line, remove the IFAC associated with the protection (PROT) line
first.
235-105-210
October 1999
Copyright © 1999
Page 4
Summary of Contents for 5ESS-2000
Page 96: ...235 105 210 October 1999 Copyright 1999 Page 2 ...
Page 184: ...235 105 210 October 1999 Copyright 1999 Page 3 ...
Page 300: ...13 STOP YOU HAVE COMPLETED THIS PROCEDURE 235 105 210 October 1999 Copyright 1999 Page 55 ...
Page 339: ...7 STOP YOU HAVE COMPLETED THIS PROCEDURE 235 105 210 October 1999 Copyright 1999 Page 13 ...
Page 342: ...235 105 210 October 1999 Copyright 1999 Page 2 ...
Page 359: ...235 105 210 October 1999 Copyright 1999 Page 5 ...
Page 609: ...2 STOP YOU HAVE COMPLETED THIS PROCEDURE 235 105 210 October 1999 Copyright 1999 Page 12 ...
Page 676: ...235 105 210 October 1999 Copyright 1999 Page 9 ...
Page 792: ...3 STOP YOU HAVE COMPLETED THIS PROCEDURE 235 105 210 October 1999 Copyright 1999 Page 9 ...
Page 799: ...Figure 11 36 3 1 Cleaning Points 235 105 210 October 1999 Copyright 1999 Page 7 ...
Page 801: ...235 105 210 October 1999 Copyright 1999 Page 9 ...
Page 839: ...2 STOP YOU HAVE COMPLETED THIS PROCEDURE 235 105 210 October 1999 Copyright 1999 Page 16 ...
Page 999: ...2 STOP YOU HAVE COMPLETED THIS PROCEDURE 235 105 210 October 1999 Copyright 1999 Page 13 ...
Page 1008: ...Figure 11 55 1 CTSNS DIP Switch Settings 235 105 210 October 1999 Copyright 1999 Page 2 ...
Page 1011: ...235 105 210 October 1999 Copyright 1999 Page 5 ...
Page 1053: ...235 105 210 October 1999 Copyright 1999 Page 15 ...
Page 1289: ...Figure 15 17 2 AMATPS Data Link 235 105 210 October 1999 Copyright 1999 Page 2 ...
Page 1292: ...235 105 210 October 1999 Copyright 1999 Page 5 ...
Page 1303: ...9 STOP YOU HAVE COMPLETED THIS PROCEDURE 235 105 210 October 1999 Copyright 1999 Page 2 ...
Page 1360: ...Figure 15 47 2 Typical SCANS III Link Diagram 235 105 210 October 1999 Copyright 1999 Page 2 ...
Page 1372: ...235 105 210 October 1999 Copyright 1999 Page 2 ...
Page 1374: ...235 105 210 October 1999 Copyright 1999 Page 4 ...
Page 1421: ...Table 1 1 O M Checklist 235 105 210 October 1999 Copyright 1999 Page 3 ...


