background image

REMOVING AND INSERTING LABELS

REMOVING

1

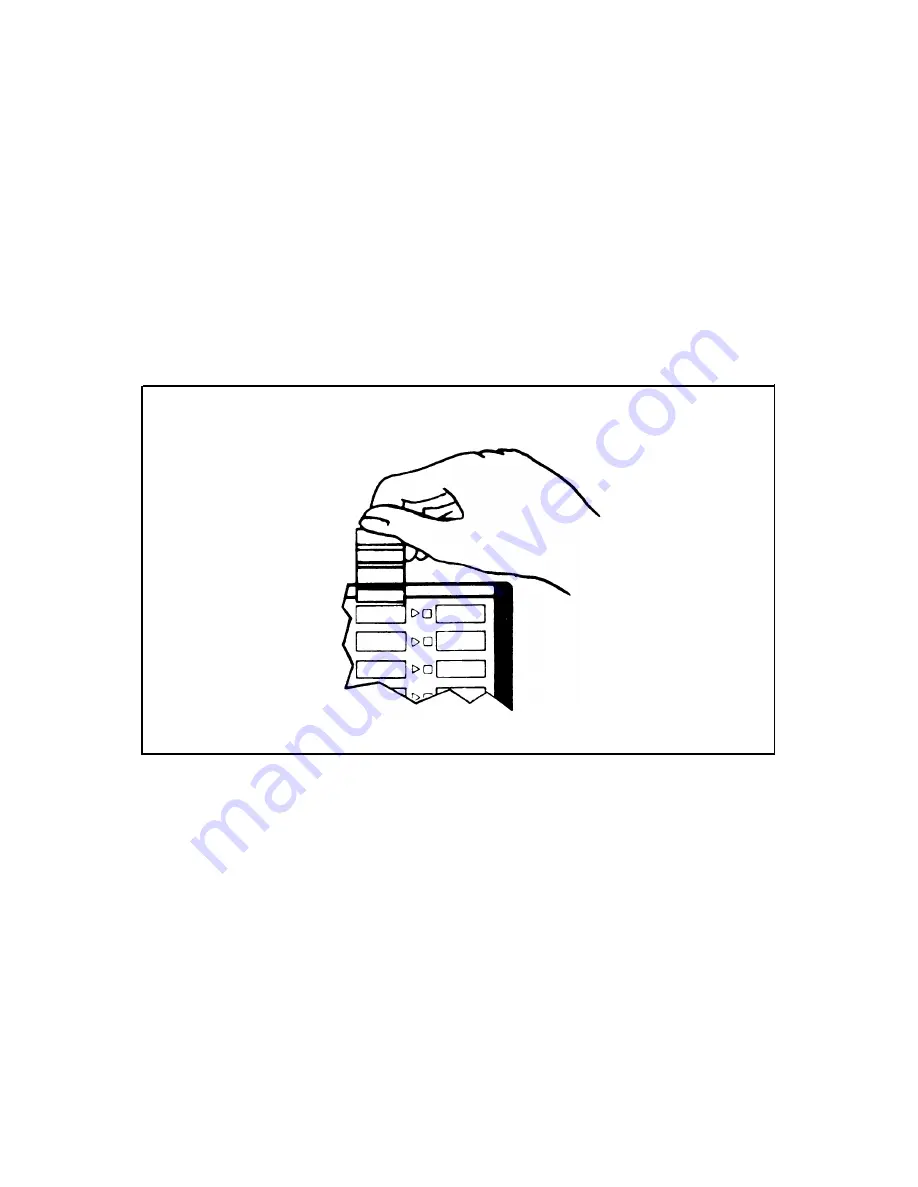
Grasp the silver tab above the touch-sensitive buttons and pull the

labels out of the label slot (Figure 8).

INSERTING

1

Insert the bottom of the label into the label slot above the column of
touch-sensitive buttons (Figure 8).

2

Slide the label all the way into the slot until the appropriate label is
over the proper button.

FIGURE 8  Removing and Inserting Button Labels

To order more label strips, call the toll-free number for the National Parts
Sales Center: 1-800-222-PART. The part number (Comcode) is
844030809. These labels come in packages of 25 and can also be used
with 34- and 10-button voice terminals.

iss 2, cib3000-7

Summary of Contents for CIB 3000

Page 1: ...CIB 3000 34 Button Deluxe Voice Terminal CIB 3000 Comcode 103 972 972 Issue 2 ...

Page 2: ...ton features that may be provided in your communications system By attaching a voice terminal power supply you can also plug in a Hands Free Unit or other adjunct to this voice terminal The lights by each programmable button make this voice terminal useful as an attendant console in a small busi ness system FIGURE 1 34 Button Deluxe Voice Terminal iss 2 cib3000 1 ...

Page 3: ...ngers be sure the adjustable portion of the desk stand is in the low position before installing the voice terminal See Step 9 1 Turn the voice terminal over 2 Position the stand on the back of the voice terminal so that the voice terminal mounting tabs fit into the A mounting slots on the stand Figure 2 A Mounting Slots B Mounting Slots 34 Button Voice Terminal Back View FIGURE 2 34 Button Deluxe ...

Page 4: ...m of the voice terminal and plug it into the jack labeled LINE on the voice terminal Check to see that one end of the handset cord is attached to the handset If it is not plug one end into the handset now Plug the other end of the handset cord into the jack on the lower right of the voice terminal Turn the voice terminal right side up and place the handset in the cra dle Figure 4 iss 2 cib3000 3 ...

Page 5: ...the modular voice terminal cord into the build ing wiring connection which may be a modular voice terminal exten sion cord or a modular voice terminal jack Figure 5 Modular Voice Terminal Extension Cord OR Modular Voice Terminal Jack FIGURE 5 Attaching the Voice Terminal Cord to Building Wiring iss 2 cib3000 4 ...

Page 6: ...lift the voice terminal to release the locking tension With the thumb of your left hand carefully press the side lever and allow the stand to lower to the desired position FIGURE 6 Adjusting the 34 Button Deluxe Voice Terminal Desk Stand REMOVAL 1 To remove the stand from the 34 button deluxe voice terminal unplug the handset cord Set the handset aside and turn the voice terminal over Unplug the m...

Page 7: ...en refer to the TROUBLESHOOTING TABLES in your system s Installation Guide If the problem is not resolved after troubleshooting your system contact your equipment supplier FIGURE 7 T P Switch and Volume Control SETTING THE VOLUME The volume control switch is also located on the left side of the voice ter minal Figure 7 and changes the volume of the alerting rings speaker and button clicks Slide th...

Page 8: ...f touch sensitive buttons Figure 8 2 Slide the label all the way into the slot until the appropriate label is over the proper button FIGURE 8 Removing and Inserting Button Labels To order more label strips call the toll free number for the National Parts Sales Center 1 800 222 PART The part number Comcode is 844030809 These labels come in packages of 25 and can also be used with 34 and 10 button v...

Page 9: ...volume in the earpiece A thumbwheel volume on the handset allows the volume to be turned up or down as needed The R8C3 push to listen handset 31754 is for use in noisy loca tions Like the impaired hearing handset the push to listen handset has an extra amplifier and a thumbwheel volume control It also has a pushbutton on the handset that increases the volume in the ear piece and mutes background n...

Reviews: