Administering IS-II Applications
N O T E :
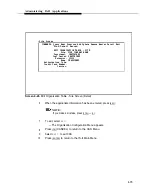
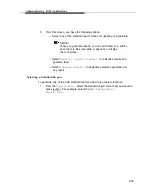
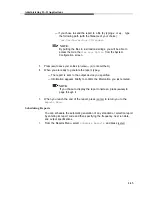
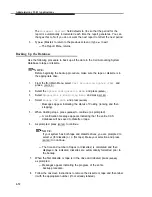
The first field,
Report Number,
is generated automatically. You
cannot change that field. As indicated in step 1, the report
number indicates the report that you are customizing. To
change the report, you must cancel out of
Update
and type
n
(for the next report) or type
p
(for the previous report).
a.
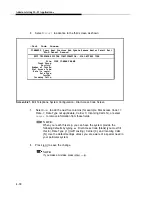
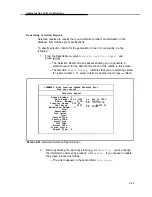
With the exception of Report Number, you can move the cursor to any
field and enter the selection criteria of your choice.
NOTE:
If you do not know the code for this or any other field, read the
prompts at the bottom of the screen or press
[CTRL]
—
[W]
for Help.
When you are finished using Help, press
[CTRL]
—
[C]
to return to
the report screen.
b.
When you are finished, press
[ESC]
to save your changes.
3.
When you are ready to generate the report, type
g.
4.
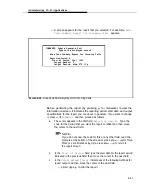
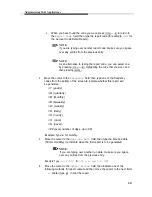
Before generating the report (by pressing
g
for
Generate),
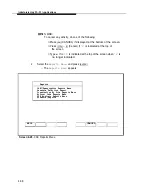
review the
information onscreen. It indicates the output specifications for the report you
are about to generate. If you want to change it, press
u
(for
Update)
and
then proceed as follows:
a.
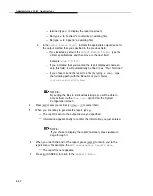
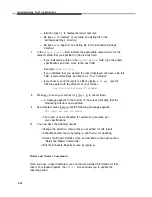
In the
Output Method field,
indicate one of the following methods for
report output and then move the cursor to the next field:
— printer (type
p
to print the report)
— terminal (type
t
to display the report onscreen)
— file (type
r
to “redirect” or overwrite an existing file)
—
file (type
a
to “append’’ an existing file)
b.
In the
Output
Device
field, indicate the appropriate output device for
the output method that you specified in the previous field.
— If you indicated a printer in the output
Method
field, type the
printer specifications and then move to the next field.
Example:
wide 570
I
lP
4-44
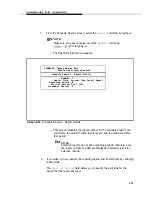
— If you indicated that you wanted the report displayed onscreen,
skip this field. It will automatically be filled in as “Your Terminal.”
Summary of Contents for Integrated Solution II
Page 7: ...Figures 2 Master Controller II Features 2 1 2 1 The Master Controller II 2 2 v ...
Page 8: ...vi ...
Page 28: ...Getting Started MERLIN LEGEND Integrated Solution II Screen 3 1 Login Screen 3 2 ...
Page 103: ...Appendix A Forms A 2 ...
Page 105: ...Appendix A Forms A 4 ...
Page 107: ...Appendix A Forms A 6 ...
Page 109: ...Appendix A Forms A 8 ...
Page 111: ...Appendix A Forms A 10 ...
Page 113: ...Appendix A Forms A 12 ...
Page 115: ...Appendix A Forms A 14 ...
Page 117: ...Appendix A Forms A 16 ...
Page 119: ...Appendix A Forms A 18 ...
Page 121: ...Appendix A Forms A 20 ...
Page 123: ...Appendix A Forms A 22 ...
Page 125: ...Appendix A Forms A 24 ...
Page 129: ...Appendix A Forms A 28 ...
Page 131: ...Appendix A Forms A 30 ...
Page 133: ...Appendix A Forms A 32 ...
Page 135: ...Appendix A Forms A 34 ...
Page 137: ...Appendix A Forms A 36 ...
Page 139: ...Appendix A Forms A 38 ...
Page 141: ...Appendix A Forms A 40 ...
Page 143: ...AppendiX A Forms A 42 ...
Page 145: ...Appendix A Forms A 44 ...
Page 147: ...Appendix A Forms A 46 ...
Page 149: ...Appendix A Forms A 48 ...
Page 153: ...Appendix A Forms A 52 ...
Page 155: ...Appendix A Forms A 54 ...
Page 157: ...Appendix A Forms A 56 ...
Page 159: ...Appendix A Forms A 58 ...
Page 161: ...Appendix A Forms A 60 ...
Page 163: ...Appendix A Forms A 62 ...
Page 165: ...Appendix A Forms A 64 ...
Page 167: ...Appendix A Forms A 66 ...
Page 169: ...Appendix A Forms A 68 ...
Page 171: ...Appendix A Forms A 70 ...

