Summary of Contents for Spirit 308

Page 1: ...Lucent Technologies Bell Labs Innovations SPIRIT Communications System Model 308 616 Customer Installation Instructions 999 500 226 105772578 Issue 4 June 1989 ...

Page 2: ...nologies Incorporated The exception is cross references to books published prior to December 31 1996 which retain their original AT T titles Lucent Technologies formed as a result of AT T s planned restructuring designs builds and delivers a wide range of public and private networks communication systems and software consumer and business telephone systems and microelectronic components The world ...

Page 3: ...f your local telephone company you are required to provide them with the following information A The lines to which you will connect the telephone equipment B The FCC registration number AS593M 72132 KF E and ringer equivalence number REN 0 3A 0 5B Both numbers are on the controller The REN is useful to determine how many devices you may connect to your telephone line and still have them ring when...

Page 4: ...g Blocks 12 Steps 5 InstalI Telephone Sets 14 Record Installation Date 14 Desk Mount 14 Wall Mount 14 Label Intercom Extension Number 14 Step 6 Connect System To Wiring Runs 15 Testing The System Testing the Incoming Telephone Company Lines Testing the Wiring Run Self Test Controller Test Telephone Test Troubleshooting Optional Accessories Replacement Parts 15 15 15 15 16 17 17 17 17 NOTICE While ...

Page 5: ...anual Reference Card If your network interface jack has two lines on a single jack you should purchase a 267D adapter from your AT T Phone Center store If you need longer line and telephone cords you should purchase them also CONTROLLER CONTROLLER SECTION Network Interface Jack WIRING RUN SECTION TELEPHONE SET SECTION a jack field installed near your controller location cable extending from the ja...

Page 6: ...cords do not cross walkways Do not run cords inside or on top of air plenums and ducts or along hot pipes Step 2 Check Outlet Grounding Your SPIRIT Communications System control unit has been protected against AC line and central office line voltage surges caused by lightning strikes or other power anomalies provided the system is properly grounded Using a circuit tester check or have checked by a...

Page 7: ... in the top leaving protruding from wall Do not install the bottom two screws until the controller is in place Install the controller placing the two keyholes on the back of the controller against the screws in the wall and pulling the controller down Install the bottom two screws through the tabs on the controller and tighten firmly Write the date on one of the date installed DATE INST labels loc...

Page 8: ...abels from the controller box and label the line cord with the green cord labels corresponding to the line jack number Remove the System Directory Label from the controller box and fill in the telephone number next to the line number Repeat the procedure for each line If your network interface is a two line jack RJ14 type plug in the 267D 2 line adapter into the TEL CO LINE jack for line 1 on the ...

Page 9: ...abeling should look like the following Sample System Directory Label Controller 10 11 12 13 Telephone Cord Labels D8W 87 Jumper Cords Jack Panel box D4BU Telephone Cord Jack Panel Wiring Run Label Modular Connecting Block 25 Max Modjack Modjack Adapters Up to 1000 length of cable 8 conductor Wiring Run Labels If you choose to wire your system with customer convenience wiring use the wiring run lab...

Page 10: ...TALLATION KIT Wiring run labels Jack panel box Number required depends on number of telephones You will need one jack panel box per six telephones Cable Installation tool TELEPHONE LOCATION CABLE EXTENSION KIT Telephone location stickers one per telephone more than 10 feet from the control unit WIRING TERMINATION KIT one per telephone 100 or 200 foot length of cable Length depends on distance betw...

Page 11: ...cture such as studs or cross members attach the boxes directly to the walls If the walls are hollow mount the jack panel boxes on a board that is about two inches larger all around than the complete jack field all the boxes mounted together Then mount the board on the wall Mount the jack panel box with the screws provided or fasteners appropriate for your walls Mesh the tongue and groove of anothe...

Page 12: ...00 feet If there is no plastic cable loop in place slide a cable tie under the two spiders in each box Attach a cabel clip 6 to 12 inches Fill out a pair of wiring run labels wih the telephone location of the first wiring run for example W1 shop W2 sales W3 RM 105 Attach one label inside a jack panel door Save the second label for use on a modular connecting block below the lowest box to support e...

Page 13: ...and set aside Use cable stripping part of cable installation tool to remove 2 inches of cable cover 2 inches Mount connecting block with screws or adhesive backing provided Thread cable through center of connecting block until 1 4 inch of cable cover shows Mounting holes Align cable in one of the notches Adhesive backing Remove and save plastic caps Cut off loose wire ends near plastic caps Make s...

Page 14: ...e locations and installing modular connecting blocks for each one Be sure to label both ends of each cable run identically Route your other cables and terminate each one in a modular connecting block Be sure to label both ends of each cable run identically Cable clip Dress the cables neatly through the lower openings and secure them with cable clips or ties Customer Installation Instructions 11 ...

Page 15: ...ock 630B one for every telephone set to be mounted on the wall telephone wire stripper 953A telephone wire clips Install Plugs Install a 700A4 plug to the end of the telephone wire that is plugged into the controller Follow the instructions that are packed with the plug Install Wire Junctions If the distance between the controller and a telephone set location exceeds 50 feet install a Wire Junctio...

Page 16: ...Modular Cord D4BU 25 Max Wire Run Less Than 50 Telephone Set Cord included with telephone 625A 742B Wire Junction Box o r 725A Modular Connecting Block Note to installers The SPIRIT system requires a reversal in the station set wiring This reversal is in the telephone tinsel cord that is packed with the telephone so all other station set wiring should be straight Customer Installation Instructions...

Page 17: ...pulling the base away from the telephone Install the base on a 630B Wall Telephone Modular Connecting Block Plug one end of the telephone cord into the wall connecting block Wrap surplus cord around the tabs on the base see picture on left Plug the other end of the telephone cord into the jack on the back of the telephone set Insert the top tab of the base into the slot at the top of the set With ...

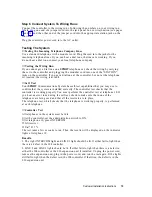
Page 18: ... to confirm that the system is installed correctly The controller test checks that the controller is working properly You must perform the controller test at telephone 10 If you hear an error tone during the self test check to make sure that none of the telephones are being used and that all the receivers are in place The telephone test which checks that the telephone is working properly is perfor...

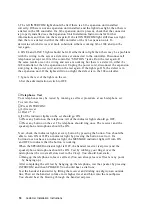
Page 19: ...on the set 6 Set the administration switch to OFF Telephone Test Your telephones may be tested by running a self test procedure at each telephone set To start the test Press INTERCOM Lift receiver Dial All of the indicator lights on the set should go ON Press any button on the telephone All of the indicator lights should go OFF Press any button on the set The telephone should ring once The receive...

Page 20: ...ller and the telephone set is at fault To check the station jack plug the inoperative telephone into a station jack that you know is working Check the network interface jacks where the telephone company lines come into your company by plugging a working standard telephone NOT a SPIRIT telephone set directly into the jack If the telephone does not work call your local telephone company Optional Acc...

Reviews: