LJR106 AssembLy InstRuctIons
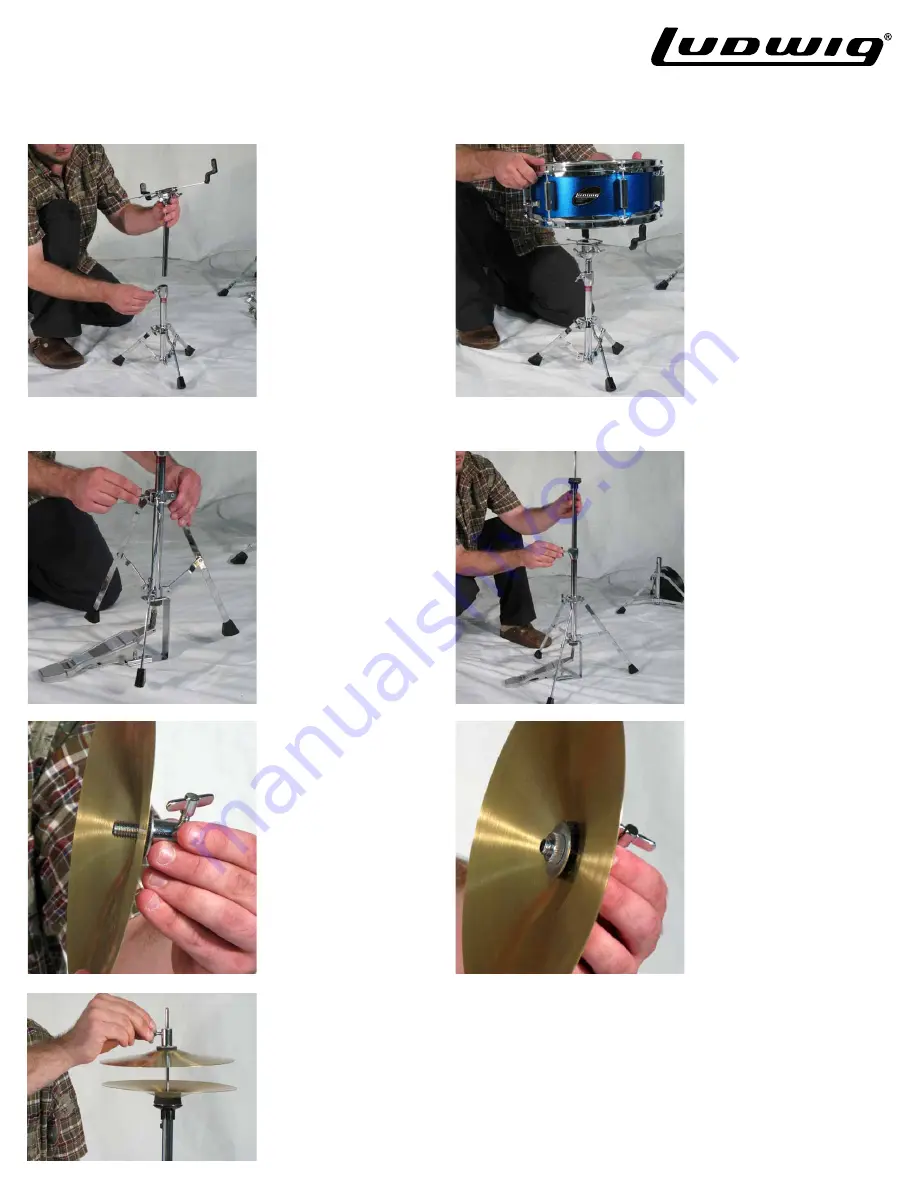
snARe stAnD AssembLy InstRuctIons
HI-HAt AssembLy InstRuctIons
11) Take the top basket
section (17) of the snare
stand and insert it into the
bottom half base of the
stand (18). Adjust the height
by tightening the T-handle
located at the top portion of
the base of the snare stand.
13) For putting together
the Hi Hat stand, begin by
folding out the three legs
located on the bottom half of
the stand (19). Once the legs
are touching the floor use
the T-handle to tighten them
down for stability.
15) Now you’re ready to
place the Hi Hat cymbals
(21) onto the Hi Hat stand.
Remove the bottom stop nut,
metal washer and felt washer
from the Hi Hat clutch and
insert the clutch thru the top
Hi Hat cymbal.
17) Place the bottom Hi Hat
cymbal onto the stand/upper
pull rod. Then place the top
cymbal on top of that and
you are finished with the Hi
Hat stand.
12) Place the snare (16)
evenly on top of the snare
basket.
14) There is a thin metal
upper pull rod that you
tighten into the base of the Hi
Hat stand (20). After you’ve
done this, place the upper
tube over the top of this pull
rod and down into the base
of the stand. Simply tighten
down the T-rod located at the
top of the base of the stand to
hold the upper tube in place.
16) Place the other felt thru the
bottom of the clutch and make it so
it is in contact with the bottom of the
cymbal. Following that, place the
metal washer provided onto the felt
and tighten the stop nut onto the
clutch and against washer.
3.
Summary of Contents for LJR106
Page 1: ......


