background image

User’s Guide ... 

9

8

... LUKAS BLACKBOX

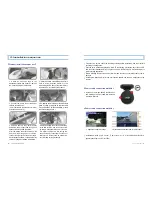
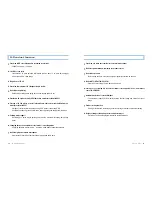
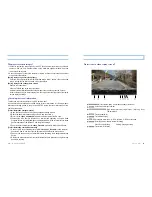
4. Installation sequence

For safety, be sure to check the following contents before installation, and then install it
according to its sequence.
Park the car in a flat and bright place, turn OFF the starting, pull out the key of the vehicle,
and then start installation. Wipe the glass on which the black box is mounted cleanly to
remove foreign substances.
Before installing the black box power terminal and the video out terminal, check them in
advance.
Installing the black box with its lens part oriented upward can cause a malfunction to the
product.

Insertion of an image behind the black box,
and marking of a power cable terminal and a
vide cable terminal

1. Attach an adhesion tape to the
transparent cradle, and mount a cradle on
the mounting holder of a black box.

2. Select a position not shielding the driver’s
field of vision, and then attach it to the
windshield glass(in front of the room mirror).
Insert the memory card into the product.

Product installation sequence

6. Adjust the angle of a black box according
to the field of vision, and then fix the screw
by using a hexagonal wrench. At this time,
it is better to adjust it while seeing the
current image by connecting the video out
terminal to a display such as navigation,
etc. (AV cable option purchased)

3. Connect the power jack of the power
cable to the main body.
(If it is inserted into the Video Out terminal,
power doesn’t come in.)

4. Embed the cable in the top of the windshield
glass by using a fixing clip so that the cable
may not fall down. (When embedding it, insert
the cable by using a card.)

5. Embed a cable in the pillar A(a pillar
beside the driver’s seat) and then pass it
between rubbers beside the pillar A.
After completing the attachment of main
body and the arrangement of cables,
connect the cigar jack of the power cable.
After starting the vehicle, check whether the
version of a segment window is displayed.

Power cable connection method

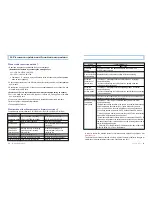
Installation method by a G sensor : Z axis value: -0.1~-0.3 / recommended value for a
general passenger car: -0.2(for 3700)

< A recommended screen ratio for a black box >

< Appearance after mounting >

Power cable connection method

Summary of Contents for LK-2700

Page 1: ......

Page 2: ...cope of warranty and responsibility This product is an image and voice recorder aiming at video recording of a traffic accident but it doesn t guarantee the recording of all accident images Our compan...

Page 3: ...etc but use a soft dry cloth 4 Never give an excessive shock to or inject a foreign substance into this product Giving an excessive force to or shock or injecting a foreign substance into this produc...

Page 4: ......

Page 5: ...uct installation sequence 6 Adjust the angle of a black box according to the field of vision and then fix the screw by using a hexagonal wrench At this time it is better to adjust it while seeing the...

Page 6: ...me than the maximum recording time during travel Changing between an automatic travel mode a parking mode Changing between a travel mode a parking mode without separate operation Built in high perform...

Page 7: ...ing it into a travel mode Automatic Checking of automatic conversion of parking modes in terminal conversion of environment setting parking modes A function of detecting the vehicle travel in a travel...

Page 8: ...s After a firmware update is completed it flashes 4 times and then is rebooted A word dAY appears along with a buzzer sound when a weekly alarm function is activated 2 times Par appears when moving to...

Page 9: ...ut cable during travel after adjusting the angle A malfunction may happen due to the connected external device Recording during travel Normal recording Recording starts while the buzzer sound goes off...

Page 10: ...nated storage period 3 Clicking the data selected from the travel information data interlocks the right storage position to the map Insertion of a video replay screen Travel date display month day yea...

Page 11: ...hen you buy a black box or you can download it from the Lukas homepage as well 2 Execute the Lukas viewer installed on the Windows wallpaper There may be a difference in contents depending on models F...

Page 12: ...are recorded when an firmware impact above a certain value is detected 2 G sensor The sensitivity of a G sensor can be set up to sensitivity 1 5 sensitivity setup The sensitivities of a travel mode a...

Page 13: ...rn OFF the power and segment Separating or inserting a SD card with power turned ON can break the SD card or make the product work abnormally 24 LUKAS BLACKBOX 10 Memory card usage 4GB SDHC 5 min 3 mi...

Page 14: ...dow and then pressing Help Internet Explorer Information Thanks Q How should I handle the folder in a SD card in order to format it Formatting the SD card inserting the empty SD card into the black bo...

Page 15: ...or A S Service technology support If you want A S for your product contact our customer support center or the A S inquiry column in the Lukas homepage to get fast and exact A S During A S we may have...

Page 16: ......

Page 17: ......

Reviews: