background image

12 


www.LumaComfort.com 

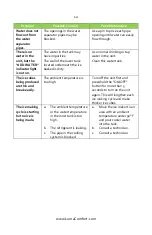
Problem 

Possible Cause(s) 

Possible Solution 

Water does not 
flow out from 
the water 
separator 
pipes. 

The openings in the water 
separator pipes may be 
blocked. 

Use a pin to price each pipe 
opening until water can easily 
flow through. 

There is no 
water in the 
unit, but the 

“ADD WATER” 

indicator light 
is not on.  

The water in the tank may 
have impurities. 
The wall of the lower tank 
located underneath the ice 
basked is dirty. 

Use normal drinking or tap 
water in the unit. 
Clean this water tank. 

The ice cubes 
being produced 
are thin and 
break easily. 

The ambient temperature is 
too high.  

Turn off the unit first and 

press/hold the “ON/OFF” 

button for more than 5 
seconds to turn on the unit 
again. This will lengthen each 
ice making cycle and make 
thicker ice cubes. 


The ice making 
cycle is starting 
but no ice is 
being made. 

a.


The ambient temperature 
or the water temperature 
in the inner tank is too 
high. 
 

b.


The refrigerant is leaking. 

c.


The pipe in the cooling 
system is blocked. 

a.


Move the ice maker to an 
area with an ambient 
temperature under 90°F 
and pour cooler water 
into the tank. 

b.


Consult a technician. 

c.


Consult a technician.  


Summary of Contents for IM200SS

Page 1: ...Manual v1 0 Because you re not like everyone else PORTABLE CLEAR ICE MAKER IM200SS OWNER S MANUAL...

Page 2: ...mfortable living or work space Our goal is to ensure that every Luma Comfort customer is 100 satisfied with their product If you have any questions or concerns regarding your product or if you would s...

Page 3: ...nstructions 7 Control Panel 7 Making Ice 8 Additional Operating Tips 9 Maintenance 10 Technical Support 11 Product Specifications 11 Troubleshooting 11 Warranty 13 SAVE THESE INSTRUCTIONS Please caref...

Page 4: ...and offers Registering your product information online is safe secure and takes less than 2 minutes to complete Alternatively we recommend you attach a copy of your sales receipt below and record the...

Page 5: ...eceptacle Under no circumstances should the plug be altered in any way An improper connection can result in electric shock 8 If possible avoid using extension cords with this ice maker If an extension...

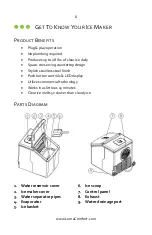
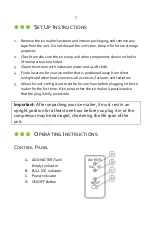
Page 6: ...rving countertop design Stylish stainless steel finish Push button controls LED display Utilizes commercial technology Works in as little as 15 minutes Clear ice melts 5x slower than cloudy ice PARTS...

Page 7: ...d away from direct sunlight and other heat sources such as stoves furnaces and radiators 5 Allow the unit s refrigerant to settle for one hour before plugging in the ice maker for the first time Also...

Page 8: ...3 seconds It will then be on continuously 3 The ice making cycle lasts anywhere from 15 to 30 minutes depending on the ambient temperature The ice making cycle will also take slightly longer when usin...

Page 9: ...unit allow the refrigerant inside the compressor to settle for at least 3 minutes before restarting the ice maker ADDITIONAL OPERATING TIPS 1 Clean the ice maker s interior water reservoir etc with l...

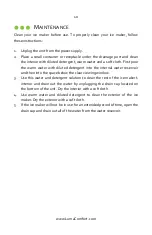
Page 10: ...into the internal water reservoir and then into the space below the clear viewing window 3 Use this water and detergent solution to clean the rest of the ice maker s interior and drain out the water b...

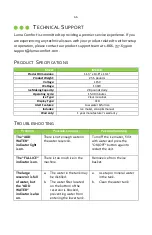
Page 11: ...s Low water full ice Includes Ice maker scoop manual Warranty 1 year manufacturer s warranty TROUBLESHOOTING Problem Possible Cause s Possible Solution The ADD WATER indicator light is on There is not...

Page 12: ...er in the unit Clean this water tank The ice cubes being produced are thin and break easily The ambient temperature is too high Turn off the unit first and press hold the ON OFF button for more than 5...

Page 13: ...that are designed to be replaced such as filters or batteries Power failure and improper power supply such as low voltage defective wiring or inadequate fuses Use of force or damage caused by external...

Reviews: