adventure
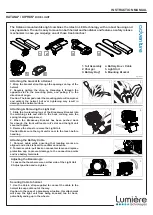
Attaching the bracket to a Helmet
1. Wrap the bracket strap through the openings on top of the
helmet.
2. Securely tighten the strap by threading it through the
opposite slot in the mounting plate, and pulling it in the
direction of origin.
Caution: The foam pad under the mounting plate will compress
and protect the helmet, but over tightening may result in
damage to the helmet surface
Attaching & Removing the Light Unit
1. Slide the two locating legs of the Breakaway Bracket into
the matching slots and slide to the back, making sure the
spring is being compressed.
2. When the Breakaway Bracket has been pushed back
far enough, the front will locate in it’s slot and the light unit
secured in place.
3. Reverse the steps to remove the Light Unit.
Caution: Make sure the Light unit is cool to the touch before
handling
Attaching the Battery Cable
1. Connect cable while ensuring that locating marks are
aligned and a click is heard to confirm connection.
2. To remove cable: pull back on connector sleeve and replace
protection cap to prevent damage to the connection points
and live battery terminals.
Securing Cable to helmet
1. Use the Velcro strap supplied to connect the cable to the
helmet to keep cable out of the way.
Caution: In the case of a breakaway situation, this attachment
will keep the light unit from being knocked too far back,
potentially ending up in the wheels.
1
5
2
3
4
6
4. Battery Box + Cable
5. Light Unit
6. Mounting Bracket
The Katana4 mountain bike light combines the latest in LED technology with a robust housing and
easy operation. The unit is easy to mount on both helmet and handlebar and features a safety release
mechanism in case you misjudge one of those tree branches!
INSTRUCTION MANUAL
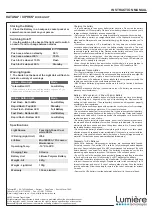
Adjusting the Beam Angle
1. Loosen the thumb screws on either side of the Light Unit
2. Adjust position and re-tighten
KATANA
4
/ XIPHOS
4
BIKE LIGHT
1. Full Assembly
2. Charger
3. Battery Bag*
2
1
1
2
*optional
1
2


