
Luminell Norway AS
• Borgundfjordvegen 16, 6017 Ålesund • Org.nr. 915 014 348 • info@luminell.com L0142 V1.5
Note on coated print circuit board:
In order to withstand extreme conditions even without the glass on, the print circuit boards in the RLX series are coated
with a premium quality tough-gel. During the hardening process, this gel may generate some dew, which could be visible
on the inside of the glass on brand new products. This is not a product failure, and the dew will disappear over time.
DANGER!
Electric shock risk, 100 – 305 VAC. Ensure that power is disconnected before carrying out any connections!
•
Shall only be installed by a qualified electrician.
•
Do not connect the RLX C floodlight on the same power circuit as floodlights using ballast units (such as high
pressure sodium, metal halide or other high intensity discharge lamps).
•
Make sure to replace unused cable glans with blind caps M20x1.5. Warranty will be voided if replaced cable
glans / blind caps are not UV and weather resistant, –40°C to 80°C. In addition, it is the installer’s responsibility
to ensure that cable and cable glands are appropriate for each other.
Unscrew the back plate using an Umbraco 4mm. The leak
proofing seal have a grease (OKS1110) applied to it – if this is wiped
off, please make sure to replace it in order to make the housing leak
proof. Each floodlight is delivered with one cable gland. Make sure to
tighten all four M5 bolts.
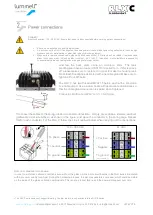
The RLX C has two threaded M20x1.5 holes, each with a blind cap
or a cable gland. Use a power cable with appropriate dimensions so
that the cable gland connection is sealed when tightened.
Conductor: Multi core, AWG 16–14 / 1.5-2,5 mm
2
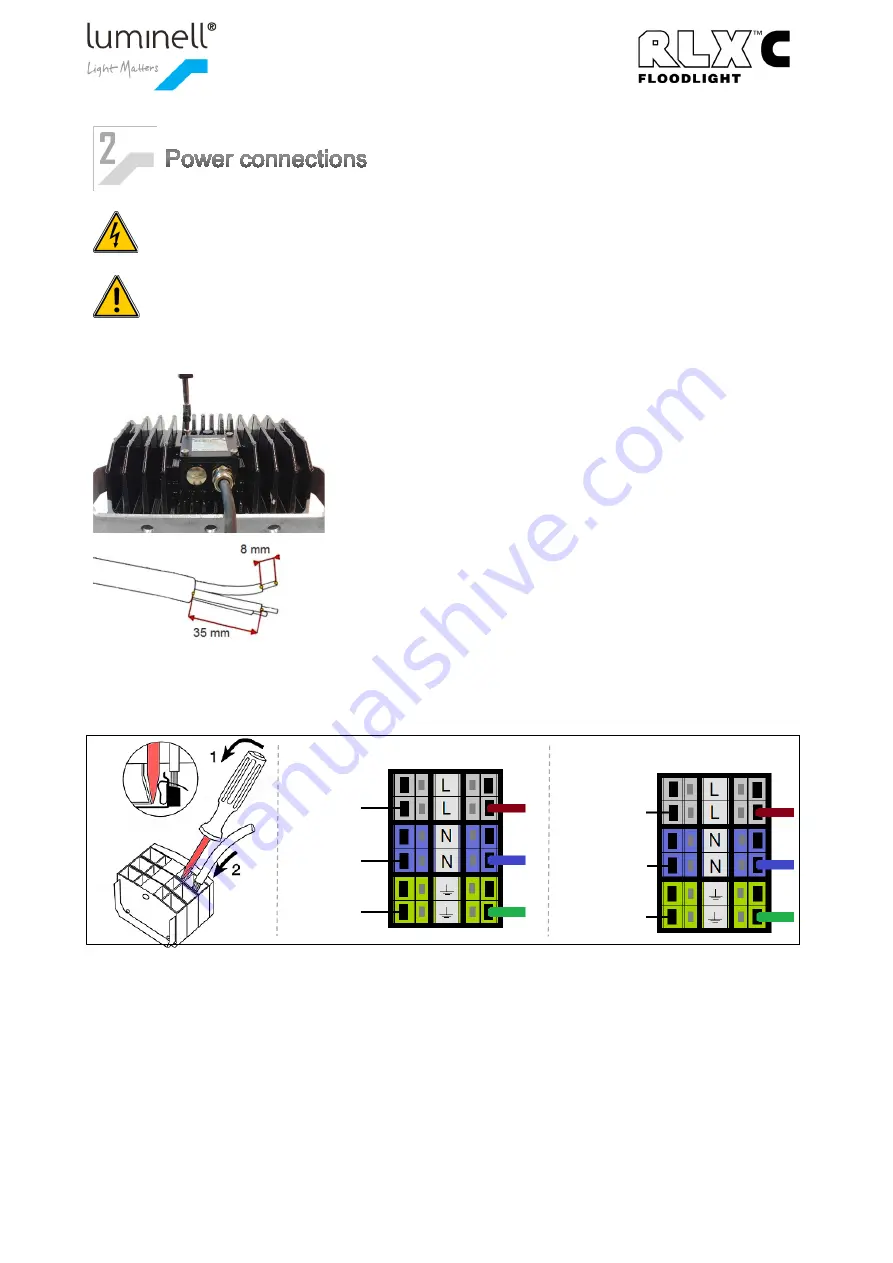
To connect the cables to the spring–loaded conductor connection
simply
press down a small screwdriver
(preferably a slot screwdriver) as shown in the figure, and place the conductor in the spring cage. Repeat
this for each conductor. For the RLX C, follow the circuit outlined below when carrying out the connections.
To phase
To neutral
To ground
100 – 305 VAC
+ Positive
- Negative
To ground
Connected to (-)
24 VDC
2
The RLX C series does not support dimming. The dim feature is only available in the RLX E series.


