Luminell Norway AS
• Borgundfjordvegen 16, 6017 Ålesund • Org.nr. 915 014 348 • info@luminell.com L0142 V1.5
This brief guide will take you through the installation of your new RLX C floodlight. For
additional in–depth product information, operation and maintenance issues, please contact
your local Luminell distributor or go online for further information. By scanning the QR code,
you will be taken you directly to our download page:
https://www.luminell.com/downloads
•
Fully assembled RLX C floodlight
(VAC or 24 VDC version)
•
Quick installation guide
•
Recyclable cardboard
•
Umbraco 4mm
•
Electricia
n’s screwdriver (slot)
•
2x 17mm combination spanners
•
24mm combination spanner
•
Wire stripper
•
Additional cable glands (optional)
The RLX C should be opened or dismantled by Luminell only
. The customer can, however, perform all
power connections described in the Quick Installation Guide or in the RLX User Manual without the latter
requirement being exceeded. If the terminal box has been moulded, do not open it!
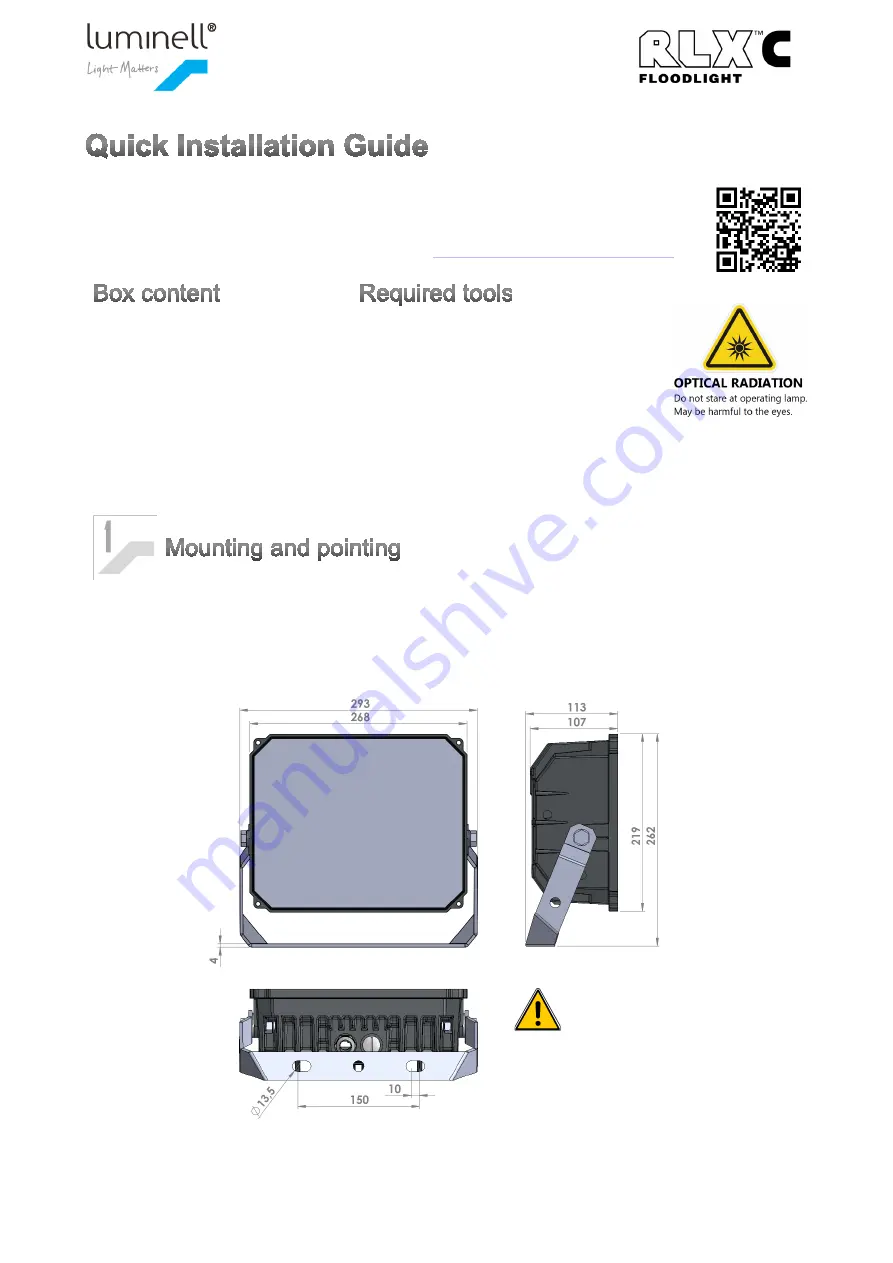
To attain the long lifetime, please make sure that the heat sink on the back of the chassis has an adequate
passage to allow air to flow freely – this for the highest possible cooling performance. For outdoor applications
it is important that the external cables and cable glands point downward. If the RLX C is desired recessed,
please make sure to have at least 200 mm of free space around the unit for cooling purposes. Shall only be
installed by a qualified electrician.
CAUTION!
Crush hazard! Be aware of
moving parts when lifting and
mounting the floodlight. Shall
only be installed by a qualified
electrician.
1
Or personnel authorized by Luminell.


