www.Lumishore.com
Lumishore UK Unit 3, Technium 1, Kings Road, Swansea, SA1 8PH, UK | +44(0)208 144 1694 | Info@Lumishore.com
Lumishore USA 7137 24TH Court East Sarasota, Florida 34234 | (941) 405-3302 | Sales@LumishoreUSA.com
Light Installation
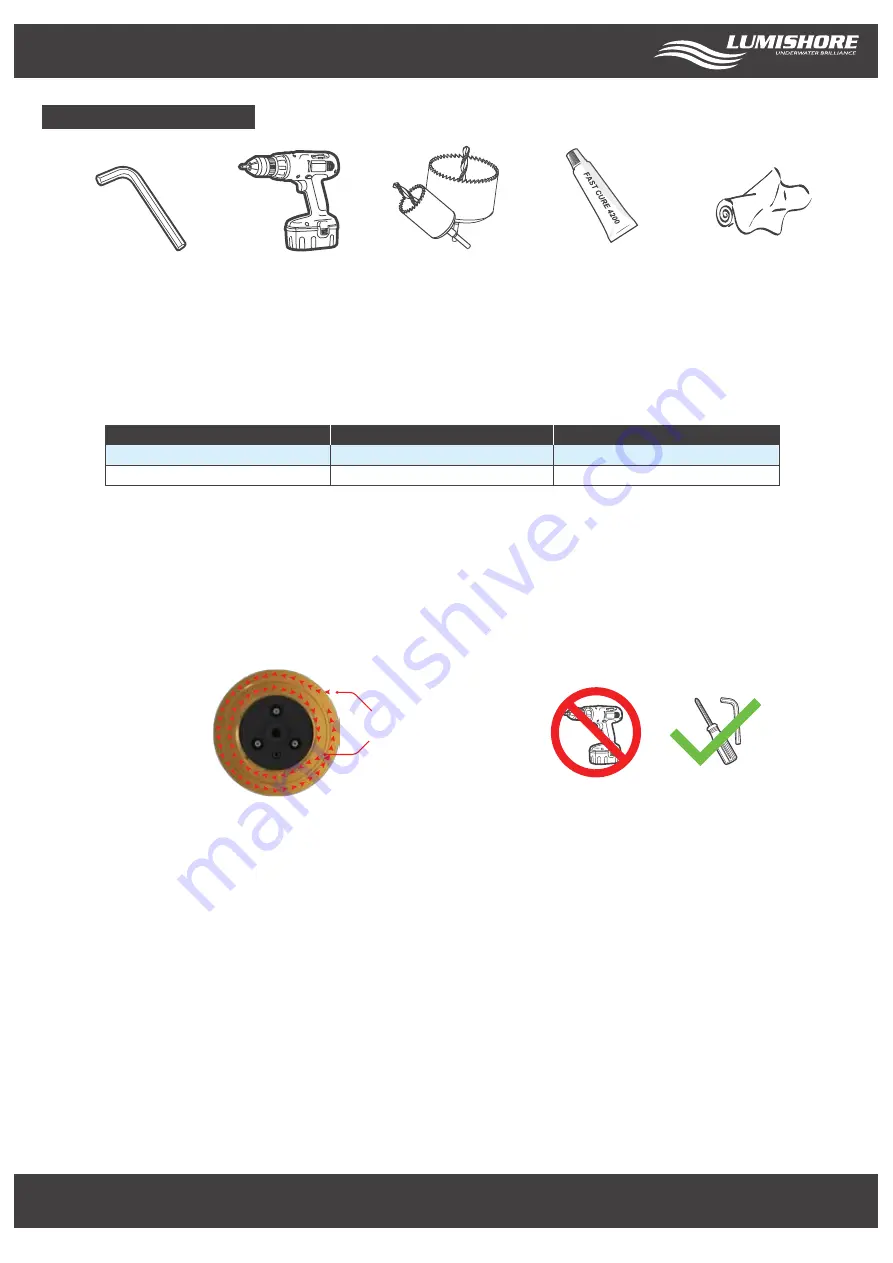
Tools Required
Drill/Driver
5mm Allen Wrench
Holesaw
Marine Sealant
(Use only 3M 4200)
Rags for clean-up
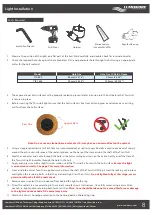
1. Measure the position of the lights on a flat part of the hull. Mark carefully, and double-check for internal obstacles.
2. Check the required hole size against the table below. Drill a perpendicular hole through the hull using an appropriate
cutter for the hull material.
3. The exposed inner hull surface must be properly sealed to prevent water intrusion into the hull before the Thru-Hull
is secured in place.
4. Before inserting the Thru-Hull light ensure that the hull surface is free from dirt and grease and remove any existing
anti-foul from the hull surface.
5. Using an approved adhesive (3M 4200 Marine (recommended) or similar), apply liberally a continuous bead of sealant
around the entire circumference of the sealant groove, on the base of the stem and on the shaft of the Thru-Hull.
6. Feed the connector and cable through the hole in the hull avoiding any strain on the cable. Gently insert the stem of
the Thru-Hull light assembly through the hole in the hull.
7. Apply even pressure with a slight circular motion until the Thru-Hull is flush with the hull surface.
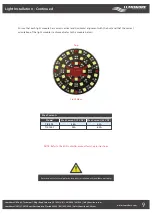
Ensure the light
is orientated correctly. See page 9 for more information.
8. From inside the vessel, feed the supplied washer down the shaft of the Thru-Hull fitting. Screw the locking nut in place
and tighten the retaining bolts so that they are hand tight (less than 1Nm) -
Do not tighten fully at this stage, excess
pressure will push all of the sealant out.
9. Remove excess sealant that is squeezed from behind the light with a rag.
10. Allow the sealant to cure according to the sealant manufacturer’s instructions. Once fully cured, using a 5mm Allen
wrench, re-tighten each retaining bolt (force less than
3Nm
).
Care should be taken not to exceed this force as damage
to the light module or hull of the vessel may occur.
11. Attach the vessel’s bonding protection to the bonding bolt on the locking ring.
Model
TIX 802
TIX 1602
Hole Size
86mm (3.375”)
92mm (3.625”)
Hole Size W/Delrin Sleeve
92mm (3.625”)
100mm (3.9375”)
Note: Do not use an alcohol-based solvent as this may have an adverse effect on the sealant
Rear Side
Apply sealant
8

