background image

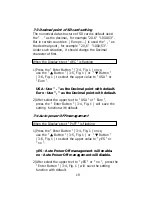
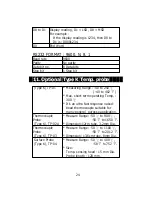
D8 to D1 Display reading, D1 = LSD, D8 = MSD

For example : 

If the display reading is 1234, then D8 to
D1 is : 00001234

D0

End Word

RS232 FORMAT : 9600, N, 8, 1

Baud rate

9600

Parity

No parity

Data bit no.

8 Data bits

Stop bit

1 Stop bit

11. Optional Type K Temp. probe

 (Type K) TP-01

*  Measuring Range : -40 to 250 

                          ( -40 to 482   )

*  Max. short-term operating Temp. : 

300 

*  It's an ultra fast response naked-

bead thermocouple suitable for
many general  purpose application.

Thermocouple 

* Measure Range: -50   to 900  ,

Probe

     -58   to 1650  .

 (Type K), TP-02A

* Dimension:12cm tube, 3.2mm Dia.

Thermocouple 

* Measure Range: -50   to 1100  ,

Probe

     -58   to 2012  .

 (Type K), TP-03

* Dimension: 13.6cm tube, 8mm Dia.

 Surface Probe

* Measure Range: -50   to 400  ,

 (Type K), TP-04

      -58   to 752  .

* Size :

Temp. sensing head - 15 mm Dia.
Probe length - 120 mm.

24

Summary of Contents for BTM-4208SD

Page 1: ...OGGER marks a step forward for you into the field of precision measurement Although this METER is a complex and delicate instrument its durable structure will allow many years of use if p r o p e r o p e r a t i n g t e c h n i q u e s a r e developed Please read t h e f o l l o w i n g instructions carefully and always keep this manual within easy reach OPERATION MANUAL ...

Page 2: ...ax Min reading 8 4 5 LCD Backlight ON OFF 9 5 DATALOGGER 9 5 1 Preparation before execute datalogger function 9 5 2 Auto Datalogger Set sampling time 1 second 10 5 3 Manual Datalogger Set sampling time 0 second 11 5 4 Loop Datalogger 12 5 5 Check time information 12 5 6 Check sampling time information 13 5 7 SD Card Data structure 13 6 Saving data from the SD card to the computer 14 7 ADVANCED SET...

Page 3: ...ogger or manual datalogger Data logger sampling time range 1 to 3600 seconds Type K thermometer 100 to 1300 Type J thermometer 100 to 1200 Page select show CH1 to CH8 or CH9 to CH12 in the same LCD Display resolution 1 degree 0 1 degree Offset adjustment SD card capacity 1 GB to 16 GB RS232 USB computer interface Microcomputer circuit provides intelligent function and high accuracy Jumbo LCD with ...

Page 4: ...t memory data may loss Manual Push the data logger button once will save data one time Set the sampling time to 0 second Data error no 0 1 of total saved data max Loop The record time can set for the duration Datalogger every day For example the user intend set the record time from the 2 00 to 8 15 every day or record time 8 15 to 14 15 Memory Card SD memory card 1 GB to 16 GB Advanced Set clock t...

Page 5: ...ecall Maximum Minimum value Sampling Time Approx 1 second of Display Data Output RS 232 USB PC computer interface Connect the optional RS232 cable UPCB 02 will get the RS232 plug Connect the optional USB cable USB 01 will get the USB plug Power off Auto shut off saves battery life or manual off by push button it can select in the inner function Operating 0 to 50 Temperature Operating Less than 85 ...

Page 6: ...pprox 11 mA Weight Meter 827 g 1 84 LB Dimension 225 X 125 X 64 mm 8 86 X 4 92 X 2 52 inch Accessories Instruction manual 1 PC Included Type K Temp probe TP 01 2 PC Hard carrying case CA 08 1 PC SD memory card 2 GB 1 PC Optional Type K thermocouple probe Accessories TP 01 TP 02A TP 03 TP 04 USB cable USB 01 RS232 cable UPCB 02 Data Acquisition software SW U811 WIN EXCEL data Acquisition software S...

Page 7: ...0 0 4 0 5 0 1 58 1 to 148 0 0 4 1 8 58 0 to 752 0 0 4 1 Type E 0 1 50 1 to 100 0 0 4 1 50 0 to 900 0 0 4 0 5 0 1 58 1 to 148 0 0 4 1 8 58 0 to 999 9 0 4 1 1 1000 to 1652 0 4 2 Type R 1 0 to 1700 0 5 3 1 32 to 3092 0 5 5 Type S 1 0 to 1500 0 5 3 1 32 to 2732 0 5 5 Remark a Accuracy value is specified for the meter only b Accuracy is tested under the meter s environment temperature within 23 5 c Lin...

Page 8: ...tton Enter Button 3 5 Type Button Button 3 6 Page Button Button 3 7 Logger Button OFFSET Button Sampling time check Button 3 8 SET Button Time check Button 3 9 T1 to T12 input socket 3 10 SD card socket 3 11 RS232 socket 3 12 Reset button 3 13 DC 9V power adapter socket 3 14 Battery Cover Battery compartment 3 15 Stand 6 ...

Page 9: ...t socket 3 9 Fig 1 The LCD will show the 8 channels CH1 CH2 CH3 CH4 CH6 CH7 CH8 temperature value at the same time Page selection If intend to show the other 4 channels CH9 CH10 CH11 CH12 temperature value just press the Page Button 3 6 Fig 1 once the Display will show those channels Temp value following press the Page Button 3 6 Fig 1 once again the Display will revert to the 8 channels CH1 CH2 C...

Page 10: ...old the measured value the LCD will display a HOLD symbol Press the Hold Button once again will release the data hold function 4 4 Data Record Max Min reading 1 The data record function records the maximum and minimum readings Press the REC Button 3 4 Fig 1 once to start the Data Record function and there will be a REC symbol on the Display 2 With the REC symbol on the Display a Press the REC Butt...

Page 11: ...g 1 once will turn OFF the LCD Backlight Press the Backlight Button once again will turn ON the LCD Backlight again 5 DATALOGGER 5 1 Preparation before execute datalogger function a Insert the SD card Prepare a SD memory card 1 GB to 16 GB optional It recommend use memory card 4 GB insert the SD card into the SD card socket 3 10 Fig 1 Please plug the SD card in the right direction the front name p...

Page 12: ...should change the Decimal character at first details of setting the Decimal point refer to Chapter 7 3 page 19 5 2 Auto Datalogger Set sampling time 1 second a Start the datalogger Press the REC Button 3 4 Fig 1 once the LCD will show the text REC then press the Logger Button 3 7 Fig 1 the REC will flashing and beeper will sound at the same time the measuring data along the time information will b...

Page 13: ...ill flashing c Finish the Datalogger During pause the Datalogger press the REC Button 3 4 Fig 1 continuously at least two seconds the REC indicator will be disappeared and finish the Datalogger 5 3 Manual Datalogger Set sampling time 0 second a Set sampling time is to 0 second Press the REC Button 3 4 Fig 1 once the LCD will show the text REC then press the Logger Button 3 7 Fig 1 once the REC wil...

Page 14: ... Location no automatically b Finish the Datalogger Press the REC Button 3 4 Fig 1 continuously at least two seconds the REC indication will be disappeared and finish the Datalogger 5 4 Loop Datalogger every day to record the data with certain duration The record time can set for the certain period every day For example the user can set the record time from the 2 00 to 8 15 ever day or record time ...

Page 15: ...B01 2 If the first time to execute the Datalogger under the route TMB01 will generate a new file name TMB01001 XLS After exist the Datalogger then execute again the data will save to the TMB01001 XLS until Data column reach to 30 000 columns then will generate a new file for example TMB01002 XLS 3 Under the folder TMB01 if the total files more than 99 files will generate anew route such as TMB02 4...

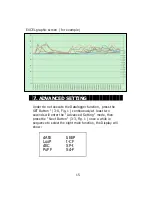
Page 16: ... SD card into the SD card adapter then connect the SD card adapter into the computer 3 Power ON the computer and run the EXCEL software Down load the saving data file for example the file name TMB01001 XLS TMB01002 XLS from the SD card to the computer The saving data will present into the EXCEL software screen for example as following EXCEL data screens then user can use those EXCEL data to make t...

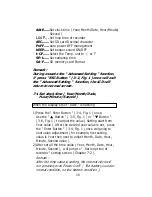
Page 17: ...atalogger function press the SET Button 3 8 Fig 1 continuously at least two seconds will enter the Advanced Setting mode then press the Next Button 3 3 Fig 1 once a while in sequence to select the eight main function the Display will show dAtE bEEP LooP t CF dEC SP t PoFF Sd F 15 ...

Page 18: ...ond When the Display s text dAtE is flashing 1 Press the Enter Button 3 4 Fig 1 once Use the Button 3 5 Fig 1 or Button 3 6 Fig 1 to adjust the value Setting start from Year value After the desired year value is set press the Enter Button 3 4 Fig 1 once will going to next value adjustment for example first setting value is Year then next to adjust Month Date Hour Minute Second value 2 After set al...

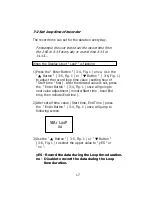
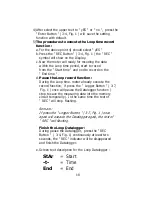
Page 19: ...d loop time value setting hour of Start time first After the desired value is set press the Enter Button 3 4 Fig 1 once will going to next value adjustment minute Start time hour End time then minute End time 2 After set all time value Start time End Time press the Enter Button 3 4 Fig 1 once will jump to following screen StAr LooP no 3 Use the Button 3 5 Fig 1 or Button 3 6 Fig 1 to select the up...

Page 20: ... record function During the Loop time meter already execute the record function if press the Logger Button 3 7 Fig 1 once will pause the Datalogger function stop to save the measuring data into the memory circuit temporally In the same time the text of REC will stop flashing Remark If press the Logger Button 3 7 Fig 1 once again will execute the Datalogger again the text of REC will flashing Finis...

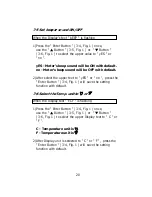
Page 21: ... upper value to USA or Euro USA Use as the Decimal point with default Euro Use as the Decimal point with default 2 After select the upper text to USA or Euro press the Enter Button 3 4 Fig 1 will save the setting function with default 7 4 Auto power OFF management When the Display s text PoFF is flashing 1 Press the Enter Button 3 4 Fig 1 once use the Button 3 5 Fig 1 or Button 3 6 Fig 1 to select...

Page 22: ...t 2 After select the upper text to yES or no press the Enter Button 3 4 Fig 1 will save the setting function with default 7 6 Select the Temp unit to or When the Display text t CF is flashing 1 Press the Enter Button 3 4 Fig 1 once use the Button 3 5 Fig 1 or Button 3 6 Fig 1 to select the upper Display text to C or F C Temperature unit is F Temperature unit is 2 After Display unit is selected to ...

Page 23: ...etting function with default 7 8 SD memory card Format When the Display s text Sd F is flashing 1 Press the Enter Button 3 4 Fig 1 once use the Button 3 5 Fig 1 or Button 3 6 Fig 1 to select the upper value to yES or no yES Intend to format the SD memory card no Not execute the SD memory card format 2 If select the upper to yES press the Enter Button 3 4 Fig 1 once again the Display will show text...

Page 24: ...ever in spec measurement may still be made for several hours after low battery indicator appears before the instrument become inaccurate 2 Loose the Battery Cover Screws take away the Battery Cover 3 14 Fig 1 from the instrument and remove the battery 3 Replace with DC 1 5 V battery UM3 AA Alkaline heavy duty x 8 PCs and reinstate the cover 4 Make sure the battery cover is secured after changing t...

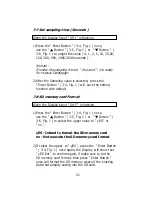
Page 25: ... format D15 D14 D13 D12 D11 D10 D9 D8 D7 D6 D5 D4 D3 D2 D1 D0 Each digit indicates the following status D15 Start Word D14 4 D13 When send the CH1 Temp data 1 When send the CH2 Temp data 2 When send the CHx Temp data x When send the CH10 Temp data A When send the CH11 Temp data B When send the CH12 Temp data C D12 D11 Annunciator for Display 01 02 D10 Polarity 0 Positive 1 Negative D9 Decimal Poin...

Page 26: ...g Range 40 to 250 40 to 482 Max short term operating Temp 300 It s an ultra fast response naked bead thermocouple suitable for many general purpose application Thermocouple Measure Range 50 to 900 Probe 58 to 1650 Type K TP 02A Dimension 12cm tube 3 2mm Dia Thermocouple Measure Range 50 to 1100 Probe 58 to 2012 Type K TP 03 Dimension 13 6cm tube 8mm Dia Surface Probe Measure Range 50 to 400 Type K...

Page 27: ...rd structure already get patent or patent pending in following countries Germany Nr 20 2008 016 337 4 JAPAN 3151214 TAIWAN M 358970 M 359043 CHINA ZL 2008 2 0189918 5 ZL 2008 2 0189917 0 USA Patent pending 25 1203 BTM4208SD NEW ...

Reviews: