background image

Before using the Luvele Pure Plus Yogurt Maker remove all packaging 
material. Then remove the outer yogurt maker lid and the glass container 
with lids. Wash it in warm, soapy water, then rinse under water and 
dry thoroughly. Wipe the yogurt maker housing with a damp cloth and 
dry thoroughly. Ensure that all parts are completely dry before use.

Before assembling the yogurt maker, make sure the power is 
switched off at the power outlet and the power plug is removed from the 
power outlet.

Prepare the yogurt mixture following the desired recipe 
instructions. Refer to recipe on page 10 or visit our recipe blog at 

www.luvele.com

 for lots of gut loving, yogurt recipe ideas.

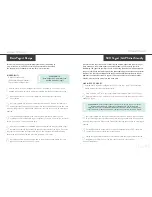
Pour the yogurt mixture into the yogurt container. Place the container lid 
onto the container and secure into place.

Insert the glass yogurt container into the base of the yogurt 
(before adding water).

Once the container has been placed into the base, water can 
now be added. Pour water into the base of the yogurt maker slowly 
until it reaches the ‘tall maximum fill line indicator’ as shown on page 5. 

Do not overfill. 

INSTRUCTION | P9

INSTRUCTION | P8

Operating

S T E P 

1

S T E P 

2

S T E P 

3

S T E P 

4

S T E P 

5

!

PLEASE NOTE:


Do not operate your Luvele Pure Yogurt Maker 

without the supplied jars or without water.

S T E P 

6

S T E P 

7

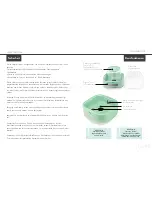
Switch the yogurt maker on by plugging the power plug into 
a power outlet. This will light up the digital display. 

Press the ‘TEM’ button to select one of the three temperature settings. 
Then press the ‘+’ or ‘-’ (TIME) button to select your incubation time 
between 1 & 24 hours. Once you have selected the temperature and 
time press the ‘CONFIRM/CANCEL’ button. The incubation period 
will start.  If you want to cancel the incubation time and temperature, 
tap the ‘CONFIRM/CANCEL’ button twice to re-set. 

What temperature should I use?

 Read more on this on page 12

Avoid moving the yogurt maker during the incubation period. Do not 
stir the yogurt mix during or at the end of the incubation period to 
avoid the yogurt curdling.

At the end of the selected incubation time, remove the lid and 
check that the yogurt has thickened and set. If the yogurt requires 
more thickening, replace the lid and set the digital timer to required 

additional incubation time. When the yogurt has thickened sufficiently, 
switch the power off at the outlet and unplug the power cord. Remove 
the yogurt container and lid from the base. Place the yogurt into the 
refrigerator overnight to achieve firmly set yogurt.

PLEASE NOTE:


During the incubation period, condensation may appear on the inside of the 

outer lid/cover of the yogurt maker. 

This is normal due to the waterbath feature. If this occurs, be careful when 

lifting the outer lid/cover off the base that water does not spill or drip. 

Some separation of the liquid whey may occur. This is normal.

Summary of Contents for LPPYM300W

Page 1: ...LUVELE PURE PLUS YOGURT MAKER I Instruction Booklet LPPYM300W...

Page 2: ...ody of the appliance in water or other liquids Never operate damaged appliance incl Mains cable Operate appliance only through a professionally installed socket supplying the correct voltage and do no...

Page 3: ...person responsible for their safety Children 8 years and above can use this appliance however they should be supervised to ensure that they do not play with the appliance Children should not play wit...

Page 4: ...luded The BPA free lid features a date recorder Use this to record the day of the month the yogurt was made 1 5 litre glass contianer is available for separate purchase at www luvele com The Waterbath...

Page 5: ...itch the yogurt maker on by plugging the power plug into a power outlet This will light up the digital display Press the TEM button to select one of the three temperature settings Then press the or TI...

Page 6: ...D yogurt can assist is correcting the balance of bacteria types in the gut There has been much written about the benefits of adding SCD yogurt to your diet Introducing SCD yogurt to your diet can aid...

Page 7: ...gurt We recommend to start with the 38 C setting when making your first batch of yogurt Once you are comfortable with the process you can then start to experiment with different temperatures Ensure th...

Page 8: ...we will suggest some troubleshooting ideas to establish whether or not the issue can be fixed without a return Photos of the fault may be requested if and where appropriate and if it will ensure a fas...

Page 9: ...gkeiten Betreiben Sie nie besch digte Ger te was auch f r das Stromkabel gilt Betreiben Sie das Ger t nur ber eine professionell installierte Steckdose mit der richtigen Stromspannung und verwenden Si...

Page 10: ...Wartung sollten nicht von Kindern durchgef hrt werden au er sie sind ber 8 Jahre alt und werden dabei beaufsichtigt Bewahren Sie das Ger t und sein Kabel au er Reichweite von Kindern unter 8 Jahren a...

Page 11: ...e Keramikbeh lter mit der Joghurtmischung und stellen Sie diese dann in die Basis des Joghurtbereiters bevor Sie Wasser einf llen Der Wasserstand darf den hier gezeigten langen Balken nicht berschreit...

Page 12: ...ieferten Beh lter oder ohne Wasser 6 7 Schalten Sie den Joghurtbereiter ein indem Sie das Stromkabel in die Steckdose einstecken Jetzt leuchtet das digitale Display auf Dr cken Sie die TEM Taste um ei...

Page 13: ...ftes Starterpulver verwendet werden Im Rahmen der Speziellen Kohlenhydratdi t SCD soll Joghurt das Gleichgewicht der Bakterienst mme im Darm wiederherstellen Es gibt viele Informationen ber die Vortei...

Page 14: ...f vertraut sich k nnen Sie mit verschiedenen Temperaturen experimentieren Stellen Sie sicher dass der Joghurtbeh lter der Deckel und andere Utensilien die Sie zur Joghurtherstellung ben tigen vor der...

Page 15: ...estzustellen ob der Fehler ohne R cksendung behoben werden kann Fotos des Fehlers k nnten nach Bedarf angefordert werden falls der Antrag dadurch schneller bearbeitet werden kann Falls eine R cksendun...

Reviews: