SECTION SEVEN | P24
SECTION EIGHT | P25
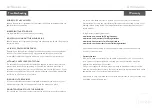
Tips
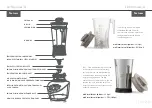
BLENDER JUG CLEANING:
TAMPER, LID AND FILLER CAP:
Separate each of these parts, and then wash them in warm soapy water. Rinse
under running water, and dry.
MOTOR BASE:
Before cleaning the base be sure to unplug the blender. Wash the outside surface with a
damp soft cloth or sponge, which has been rinsed in a mild solution of liquid detergent and
warm water. Do not place the motor base in water.
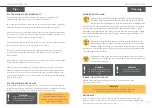
Cleaning
!
WARNING:
Be careful while cleaning around
the blades, as the blades are very
sharp.
IMPORTANT:
To ensure continued and effective performance, do not put the
blender jug, lid, filler cap or tamper in the dishwasher.
!
WARNING:
Never wash the blender by
putting hands into the jug.
Fill the blender jug half full with warm water and add a couple drops of
liquid dish washing detergent to the jug. Then place the lid and filler cap
into position. Turn the blender on using the pulse button for approximately
30 seconds. Turn off the blender and rinse the jug under running water. The cleaning
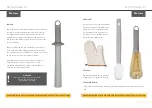
brush accessory provided can be used before or after the above steps to clean
thoroughly under and around the blade set. Simply insert the bottom of the cleaning
brush under the blade and rotate around the jug. Always dry jug upside down for
best cleanning results.
Minerals from fruits and leafy greens can cause a film to build up on the
blender jug overtime. To assist in removal of film, pour one cup of white
distilled vinegar into the jug, then fill half-full with warm water. Let soak for
several hours, or overnight, then pour the contents out and use the cleaning brush to
clean the inside of the container.
For a deeper clean, place four cups of water and four cups of white dis-
tilled vinegar into the jug and let it soak for about four hours. Pour contents
out and rinse thoroughly.
S T E P
1
S T E P
2
S T E P
3
TIPS FOR BLENDING DRY INGREDIENTS:
We recommend using the stainless steel jug when grinding dry ingredients. The
preprogrammed nut button is useful when grinding dry ingredients.
Do not operate the blender for more than 120 seconds when processing dry ingredients.
Grinding dry ingredients for more than two minutes could damage your blender.
The pulse function can come in handy when processing dry ingredients. Nuts and seeds
can contain a lot of oil and will turn into nut and seed butter if blended enough. Use the
pulse button for more accurate control and consistency.
When blending dry items always be sure to add enough to cover the blades completely.
Conversely, adding too much to the blender jug can overload it.
The tamper is an important accessory when blending dry ingredients. Use the tamper
to move and push ingredients into the blade. See page 10 for more information on
using the tamper.
Regular blending of dry ingredients may result in cosmetic marring of the 2L plastic blender
jug and cause the blades to become dull over time.
Grinding some herbs may release oils, causing the plastic jug to discolour permanently.
Others have strong odours that may linger in the plastic container, affecting the flavour of
other foods. To overcome this issue we recommend using the stainless steel jug when
processing these ingredients. The grinding of some herbs and spices may also cause the
blade to dull over time.
TIPS FOR BLENDING HOT LIQUIDS:
Escaping steam, splashes or contents may scald. To secure the hot contents, place the
lid and filler cap securely in place prior to operating the blender. Always allow hot liquids
to stand for a few moments to permit steam to escape before processing.
!
WARNING:
Never remove the lid or filler cap
or add ingredients while the hot
contents are being processed.
When the processing of the hot
ingredients has been completed,
removed the filler cap carefully to allow
excess steam to escape.


