LUXCANADA.CA
12
TM
INSTALLATION
1.
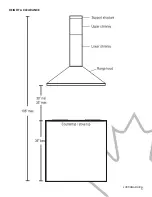
Measure the distance between the stove top and the bottom of the range hood and mark it on the wall. A
distance of 30” to 33” is recommended.*
2.
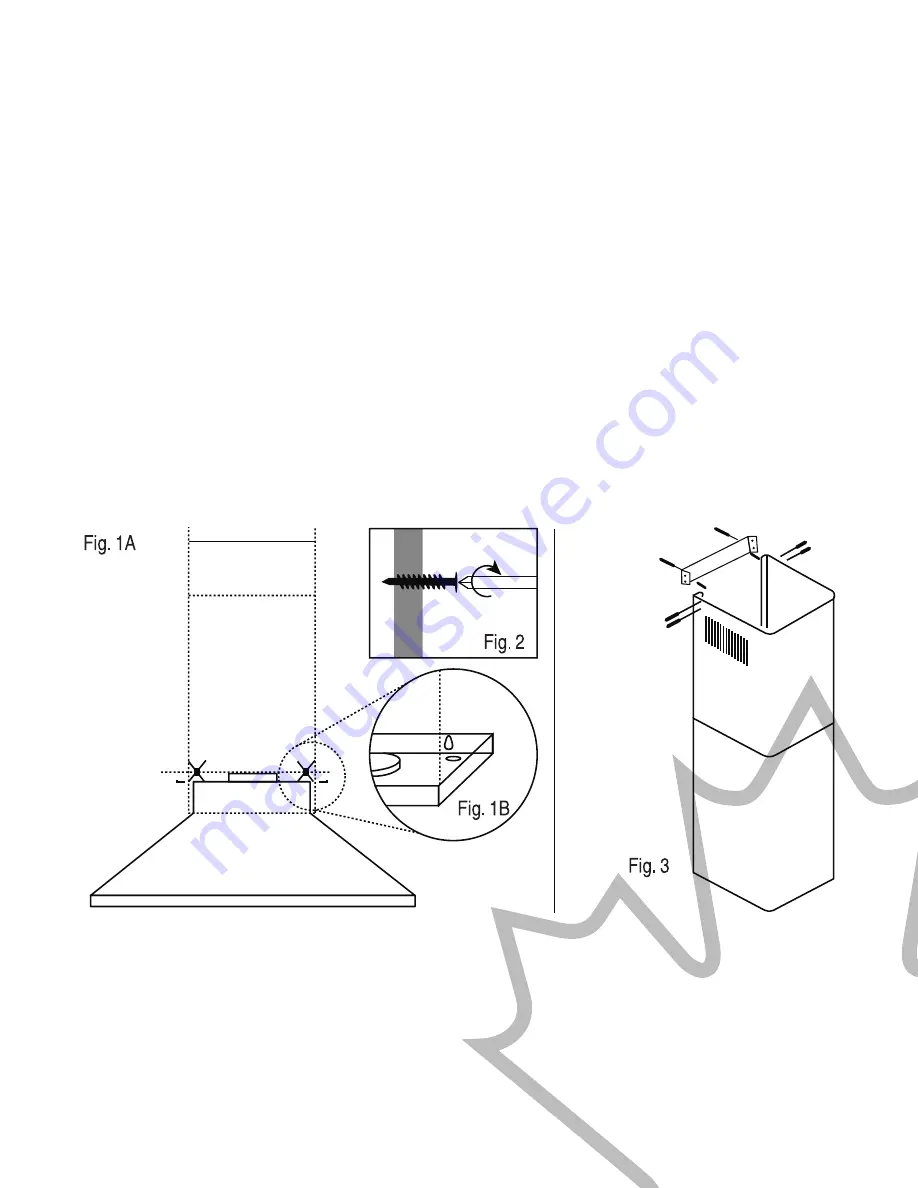
Make sure the range hood is level and not tilted. Mark the location of the mounting-bracket holes for the range
hood on the wall as shown.
3.
Place the chimney mounting bracket directly above the range hood and hold it against the ceiling. Level itand
mark the location of the mounting-bracket holes for the chimney on the wall as shownL
4. Locate the hole markings and drill the holes for all the mounting brackets. Use appropriate anchors for your
type of wall.
•
Sheet rock: Attach range hood to stud blockings if possible. If stud blockings are not accessible, build
a support structure behind the sheet-rock for optimal suppor
•
Concrete: Use designated screws (not provided).
•
Wood: Use at least 4” long wood screws (not provided).
5.
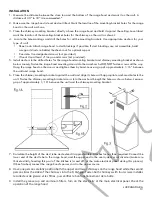
Install anchors in the drilled holes for the range hood mounting bracket and chimney mounting bracket as shown
below. Loosely fasten the range hood mounting screws into their anchors but DO NOT fasten screws all the way.
Hang the range hood on the screws and tighten them by hand. Leave a gap of approximately 1/16” between
the wall and range hood.
6. Place the chimney mounting bracket against the wall and align its holes with appropriate anchored holes in the
wall. Fasten the chimney mounting bracket screws into the anchors through the holes as shown below. Leave a
gap of approximately 1/16” between the wall and the chimney mounting bracket.
7.
Calculate the height of the duct tube and extend it approximately 6 inches longer than required. Connect the
lower end of the duct tube to the range hood, and the upper end to the vent system or air diverter (make sure
that electricity feeding this part of the kitchen is turned off at the main electrical panel during this process).
When finished, connect the range hood’s power cord to the power source
8.
Have one person carefully position both the upper and lower chimneys on the range hood while the second
person slides the sides of the chimneys into the 1/16” gap. Fasten both chimneys with four screws.Installez
le collecteur de graisse et les filtres, puis vérifiez le bon fonctionnement de la hotte.
9.
Install the grease cup and aluminum filters. Turn on the electricity at the main electrical panel. Check the
operation of the range hood.
Summary of Contents for KW30LCD
Page 5: ...LUXCANADA CA 5 HAUTEUR ET D GAGEMENT...
Page 7: ...LUXCANADA CA 7 OPTION 1 VACUATION HORIZONTALE PAR UN MUR...
Page 8: ...LUXCANADA CA 8 OPTION 2 VACUATION VERTICALE PAR LE TOIT...
Page 24: ...LUXCANADA CA 5 HEIGHT CLEARANCE...
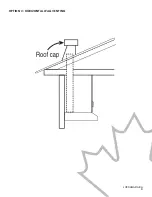
Page 26: ...LUXCANADA CA 7 OPTION 1 VERTICAL ROOF VENTING...
Page 27: ...LUXCANADA CA 8 OPTION 2 HORIZONTAL WALL VENTING...


