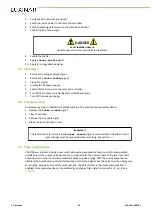
DANGER
Risk of electric shock or severe damage to the equipment
Ensure that the equipment is disconnected from the mains supply before making this
connection.
Respect the polarity of the terminals on the power supply and the laser.
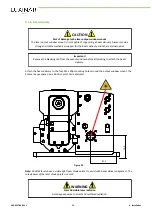
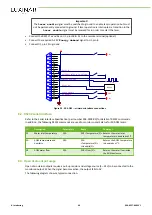
To connect the cables to the laser:
1.
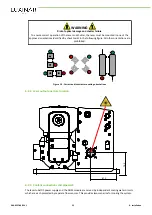
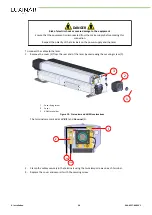
Remove the cover (2) from the rear end of the laser by unscrewing the securing screw (1).
3
1
2
1
Cover fixing screw
2
Cover
3
AOM fuse holder
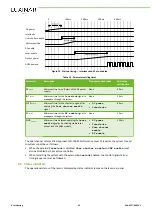
Figure 19 - Pre-ioniser and AOM fuse locations
The terminals are marked as
+VE
(2) and
Ground
(1).
1
2
0V
+50V
2.
Clamp the cables securely in the terminals using the two clamp screws on each terminal.
3.
Replace the cover and secure it with the securing screw.
6. Installation
30
906-0227-00 REV 1
Summary of Contents for SR 10 AOM
Page 1: ...USER MANUAL SR AOM series Sealed CO2 laser sources with integrated AOM...
Page 8: ...Preface iv 906 0227 00 REV 1...
Page 40: ...6 Installation 32 906 0227 00 REV 1...
Page 42: ...7 Transport and recommissioning 34 906 0227 00 REV 1...
Page 52: ...8 Interfacing 44 906 0227 00 REV 1...

