13
Unpacking and Assembly
1. Remove press from packaging, ensure all parts are present;
• Press body (1)
• Ram, toggle, linkage assembly (1)
• Shoulder bolts (4)
• Handle (1)
• Spent Primer Cup (1)
• 5/16ths Hex Wrench (1)
• Instruction manual (1)
• Packet of Thread Lock (1)
2. Place press body on reloading bench or other flat surface to
make assembly easier.
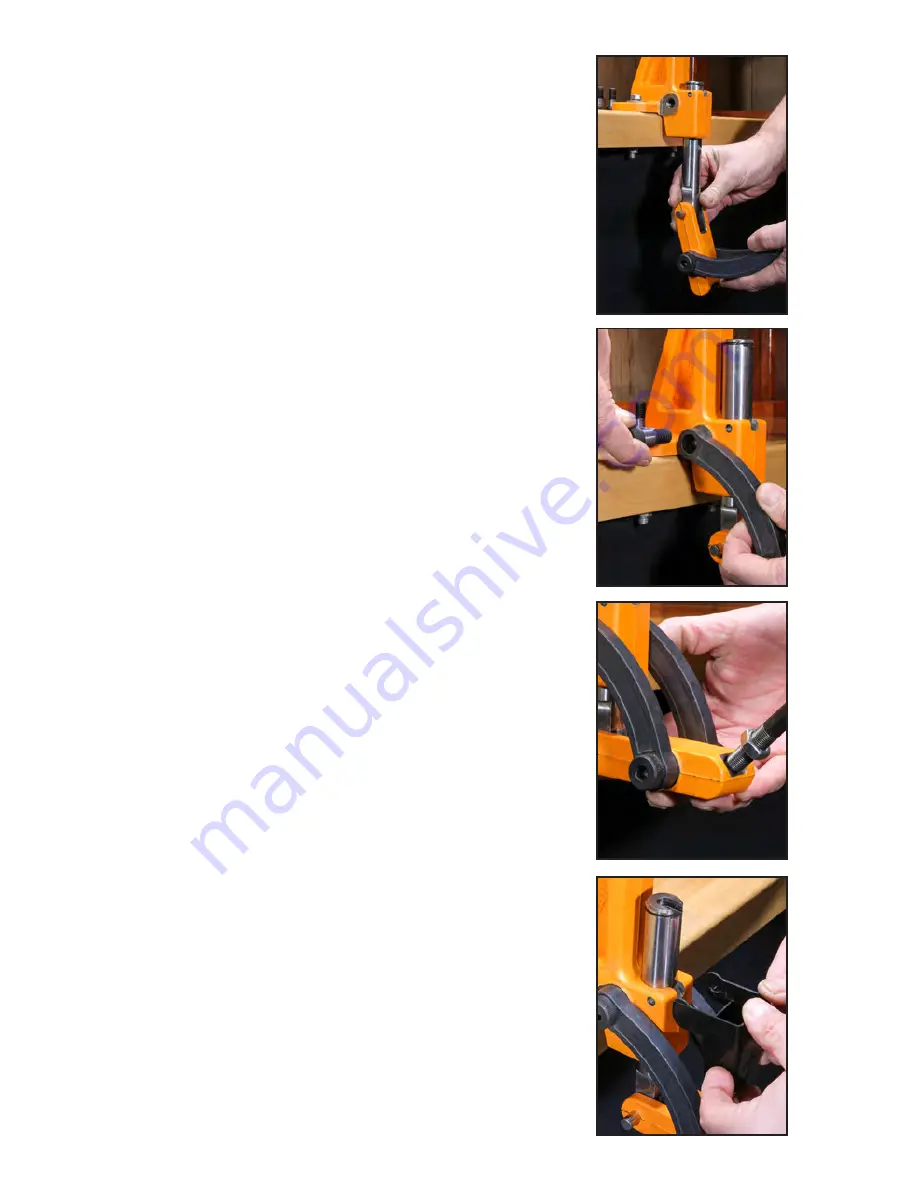
3. Insert ram through bottom of press body. (photo 1)
4. Place a small drop of the supplied thread lock onto the two
shoulder bolt threads. Insert top two shoulder bolts through links
and thread into mounting holes on the press body. NOTE: You
will need to hold the ram in place until at least one shoulder bolt
is fully installed. Tighten shoulder bolts until snug. (photo 2)
5. Thread handle into toggle and tighten jam nut. (photo 3)
6. Place primer catcher onto press. (photo 4)
Set Up and Use
1. Bolt press firmly to bench. The press body can be used as a tem-
plate for the bolt pattern and spacing.
2. Insert shell holder into ram
3. Die set up; Follow your die manufactures set up instructions for
your particular die or die set.
Your Lyman Ideal Reloading Press is now ready for use.
Maintenance and Trouble Shooting
Before using your press, apply a light film of powdered graphite to
the bearing surfaces of all moving parts. Pay particular attention to
the sides of the ram. Thin oil can also be used for this purpose but
powdered graphite is recommended.
To clean your press, use a lightly dampened cloth and wipe the
press free of dirt, and contamination from the press after every use.
1
2
3
4
Summary of Contents for All-American 8
Page 2: ...2 All American 8TM Turret Press ...
Page 6: ...6 VictoryTM Single Stage Press ...
Page 11: ...IdealTM C Frame Press 11 ...


