background image

CARE & USE/INSTALLATION


|

28

29


|


CARE & USE/INSTALLATION

Professional restaurant chefs rely on a different type of heat 
... infrared heat ... to create a higher searing temperature 
than what standard burners can achieve. So Lynx provides 
the Trident ™ infrared burner.  

Infrared burners work by focusing the gas flame through a 
ceramic element filled with tiny holes. 

These holes focus the flame on the surface of the element, 
creating an intense heat much higher than that of a 
standard ceramic burner. It allows you to sear your food 
more quickly while leaving the inside rare, if desired.

The Trident ™ burner, with its advanced components, 
requires particular attention to lighting, usage and cleaning 
guidelines. 

Pre-Heating the Trident ™ Burner

Always preheat the entire grill before cooking to achieve 
consistent, successful results. (See INDEX: “Preheating” for 
further details.) 

If the grill is already hot from cooking you should still      
pre-heat the Trident ™ burner for 2-3 minutes, or  
until it glows red. 

Never place food over a Trident ™ burner before it is fully
pre-heated because food particles and grease dripping 
onto a cold Trident ™ burner can clog the tiny ports and 
damage the burner. 

For the same reason you should minimize water spills on 
the Trident ™ burner and should not use water to control 
flare-ups. Take special care to minimize dropping any 
liquids on the Trident ™ burner while cleaning the cooking 
grids. 

HOW TO SEAR

Searing locks in flavor and juices while allowing the food’s 
outer surface to absorb smoke and food-born aromas 
produced when drippings are vaporized by the burner. 

The result is a restaurant-style finish … crisp, flavorful 
outside with a tender, juicy inside. 

While the ceramic burners in your grill are capable of 
producing searing heat, the Trident ™ infrared burner is 
specifically designed for this purpose.

USING THE TRIDENT ™ BURNER

Lynx grill cooking grids are heavy duty. 
Dropping them on the Trident ™ Burner will 
damage the burner. Such damage is not 
covered by the product warranty and will cause 
a fire, burns or other personal injury.

TRIDENT™ BURNER CLEANING 

It’s easy to keep your Trident ™ Burner 
operating at peak performance. Just run it on 
“HI” with the hood open for 5 minutes after 
each use to burn away any food particles or 
drippings. 
Any ash accumulation on the burner screen 
can be removed with a light brush (like a paint 
brush) or vacuum … BUT WAIT UNTIL THE 
BURNER IS COOL! Never use water.

SAFETY PRECAUTIONS

Rotisserie 
cooking provides 
an even delivery of 
heat to your foods. 
It has no equal. 
The constant rotation not only cooks foods evenly, it also 
self bastes. As juices rise to the surface of the food, they      
naturally flow around it as it rotates. And, by moving the 
burner out from beneath the food, you avoid scorching 

flare-ups. 

Your foods will be more evenly 
cooked, more tender and juicier 
when slow-roasted on a Lynx’s 
rotisserie.

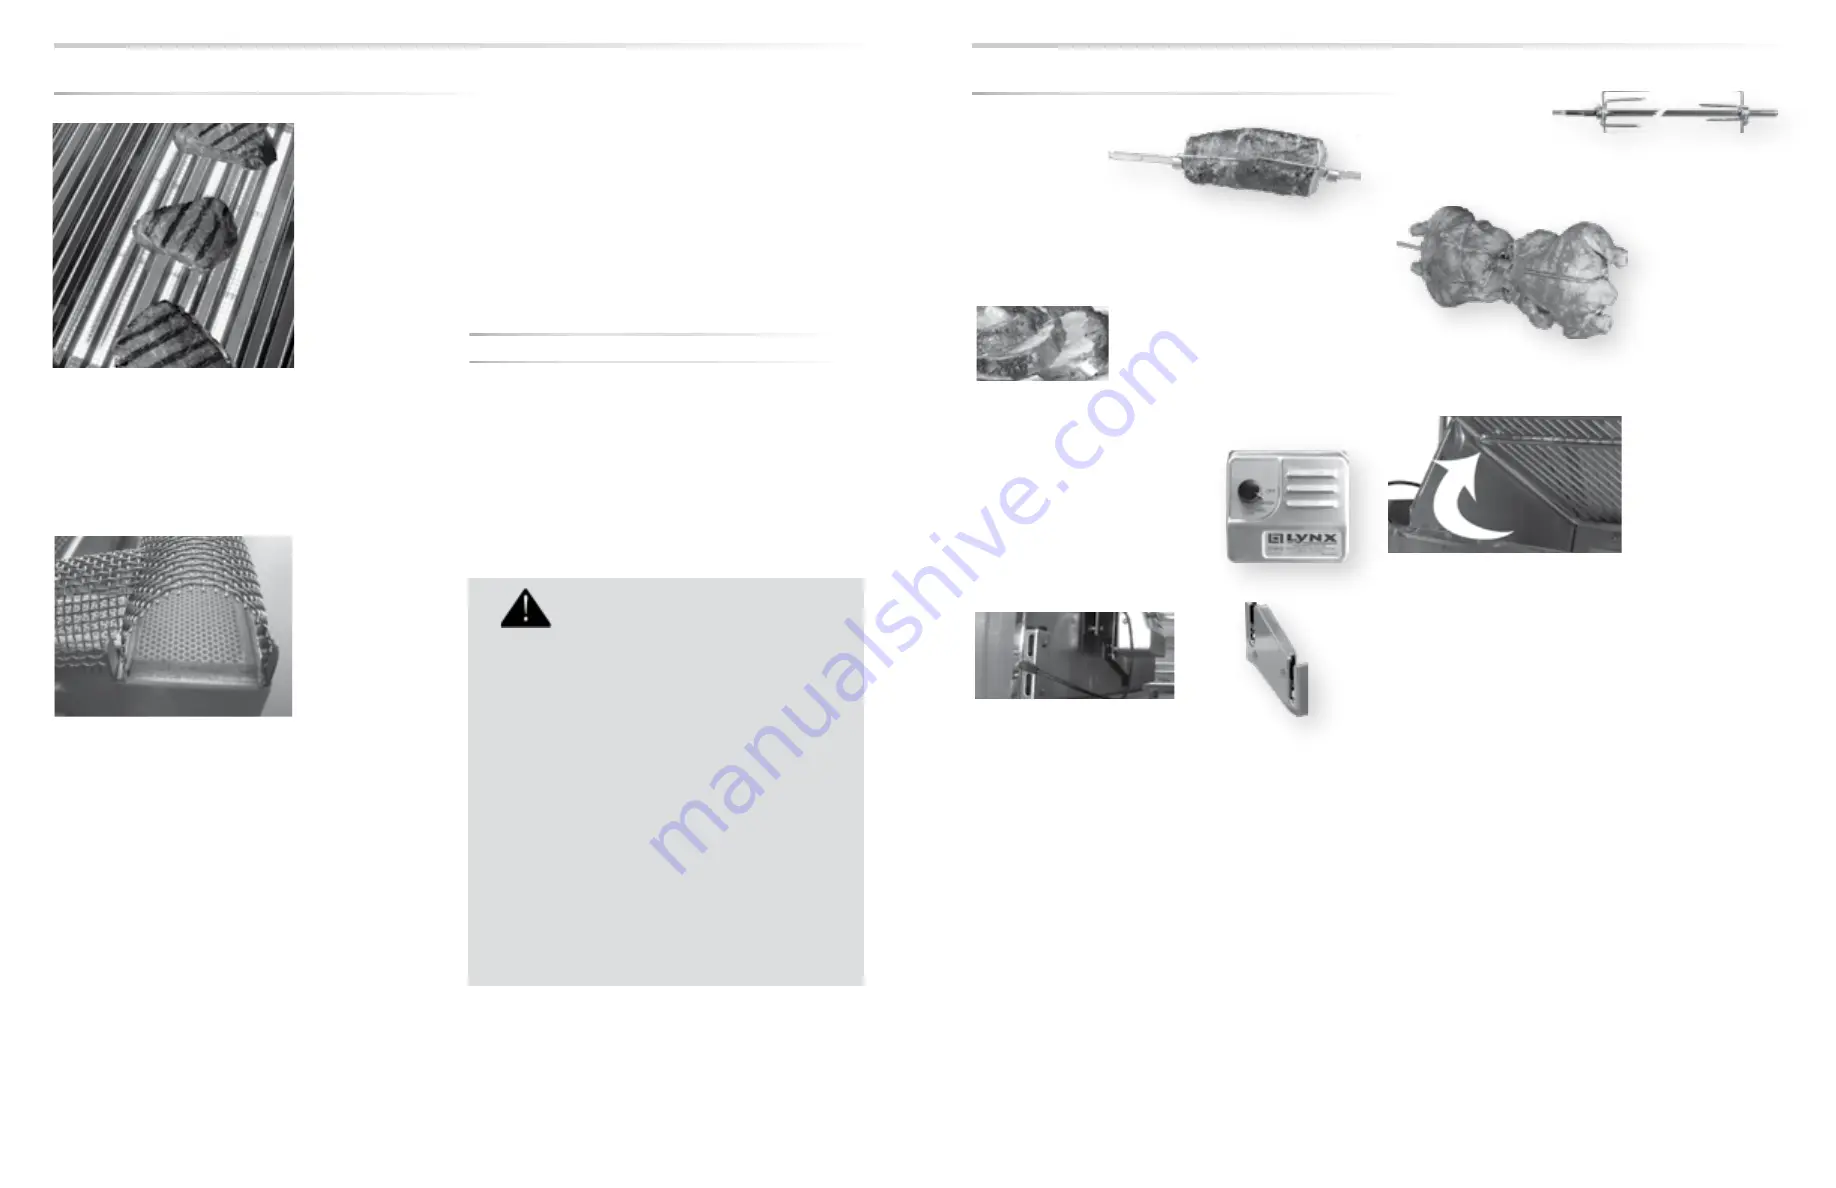
The Lynx rotisserie system consists of four main parts, the 
motor, the skewer, the forks and 
the infrared burner.

The Motor

Install the motor by sliding it into 
one of the slots shown here. Use 
the top slot for small foods or 
fast cooking and the lower slot for large foods and slower  
cooking.                                                                                           


Plug the motor power cord into the 
motor and into the built-in power 
outlet on the rear left panel. Your 
grill must be plugged into an AC power supply for the  
rotisserie to work. 

Place a basting pan in the grill to prevent food                  
accumulations on the briquettes and burners. But BE SURE 
YOU REMOVE IT before using any of the other burners. 

The location of the rotisserie burner makes it more            
susceptible to strong wind conditions (more so than the 
main grill burners). 

For this reason it features a safety valve that automatically 
closes any time the rotisserie burner is not properly lit … 
like if it were to extinguish in windy conditions. During 
windy conditions, it’s best to keep the lid closed and to 
periodically check the burner.

When the rotisserie is not in use the rotisserie motor should 
be stored in a cool dry location.

The Spit Rod & Forks

The rotisserie can handle large food items up to 50 lbs. You 
should prepare any item and first mount it on the skewer. 

Swing the warming rack up and out of the way. It will rest in 
place.

Then mount the skewer on the grill before lighting the rotis-
serie infrared burner. Lighting the burner first could result 
in burning your hands while trying to mount the skewer on 
the grill. 

It’s okay to remove the grill racks and even the briquette 
trays to make room for large foods on the skewer. 

To load the skewer, slide one of the forks onto the skewer. 
Push the skewer through the center of the food, then slide 
the second fork onto the skewer. Center the food to be 
cooked on the skewer then push the forks firmly together. 
Tighten the thumb screws (use pliers if necessary). You 
should wrap any loose, dangling pieces of food (like wings) 
with butcher’s string (never use nylon or plastic string). 

With the food secured to the skewer slowly roll the skewer 
in the palms of your hands to check for balance. It should 
rotate smoothly. If you find it has a heavy side, adjust where 
the skewer pierces the meat. An unbalanced skewer will 
cause uneven rotation and uneven cooking. It’s normal for 
the skewer to flex with large foods.

USING THE ROTISSERIE BURNER

Rotisserie  
Motor Mount

Summary of Contents for ALL-TRIDENT LF36ATRF

Page 1: ...CARE USE INSTALLATION MAKE THE MOST OF YOUR...

Page 2: ...trailers boats or any other moving installation Always have an ABC Fire Extinguisher accessible never attempt to extinguish a grease fire with water or other liquids Storing your grill Store your gri...

Page 3: ...ilisation ne doit pas tre entrepos e dans le voisinage de cet appareil ou de tout autre appareil WARNING DANGER WARNING DANGER AVERTISSMENT WARNING CALIFORNIA PROPOSITION 65 WARNINGS WARNING STATE OF...

Page 4: ...IEW 43 LYNX PROFESSIONAL GRILLS PARTS LIST 44 MODEL SPECIFIC BTU OUTPUTS MAX RUNS FOR APPLIANCES 45 INSULATED JACKET INSTALLATION 46 INDEX 47 TABLE OF CONTENTS This use care manual covers the Lynx gri...

Page 5: ...s not required to support it from the bottom When using the insulated jacket in a combustible enclosure the jacket must be supported from the bottom by a ledge on each side or a full deck beneath the...

Page 6: ...0 LDR24L R 4 19 25 19 00 LDR30T 4 25 13 19 00 LDR36T 4 31 50 19 00 LDR42T 4 37 50 19 00 SIDE BURNERS MODEL A B C LSB1 3 12 13 10 63 12 50 LSB2 2 12 13 10 63 24 50 LSB2PC 1 24 25 10 63 24 50 LPB 19 00...

Page 7: ...n the surface or wood slatted decks be cautious and move slowly or use a carpet dolly Failure to do so may damage the structure of the cart which will not be covered under warranty INTERIOR PACKING Ly...

Page 8: ...ny flexible pipe used be kept as short as possible See INDEX Gas Connections for typical permanent hook up GAS CONNECTIONS Keep last two threads clean For freestanding units using natural gas Lynx rec...

Page 9: ...ynx Grills to allow the grill to operate on either Natural gas or LPG These kits should be installed by a qualified technician or certified plumber The kits come with complete installation instruction...

Page 10: ...ance malfunc tions or has been damaged in any manner Contact the manufacturer for repair WARNING ELECTRICAL GROUNDING FINAL CHECKS LEAK TESTING Leak Test Procedure Create a soapy solution of 1 part so...

Page 11: ...e Do all control knobs turn freely If not call for service if yes please continue If you are using a portable propane cylinder is it connected and leak tested If not check the connection before contin...

Page 12: ...ace a load weighing more than 25 pounds on a side shelf 17 If any burner does not light or goes out during operation turn off all gas control knobs open the hood and wait five 5 minutes before attempt...

Page 13: ...low rotisserie cooking BEFORE EACH USE Before any use always make sure that you do not smell gas before you light the grill If you do smell gas shut everything off and have a qualified plumber check f...

Page 14: ...he grill to heat for 10 to 15 minutes the hood thermometer should reach approximately 450 Once you ve reached your de sired pre heat temperature turn off the burners that you won t be using to cook yo...

Page 15: ...tation not only cooks foods evenly it also self bastes As juices rise to the surface of the food they naturally flow around it as it rotates And by moving the burner out from beneath the food you avoi...

Page 16: ...remove grease and splatters Be sure to follow the cleaning instructions for keeping the grates and burners clean and ready for use Use a commercially available Stainless Steel cleaner to clean and po...

Page 17: ...SE OR LIQUIDS TO ACCUMULATE IN THE DRIP TRAY AS THIS MAY CREATE A FIRE HAZARD NEVER USE GRILL WITHOUT DRIP TRAY PROP ERLY INSTALLED WARNING PROPER PLACEMENT OF EACH BURNER IS CRITICAL AFTER CLEANING T...

Page 18: ...heating A carpenter s spirit level should be used to level the grill both front to back and side to side If the low heat problem persists Check the gas supply line sizing requirements Check the gas su...

Page 19: ...ave to loosen the screw to remove the lens Avoid touching the glass of a new bulb Halogen bulbs are very sensitive to the oils found in human skin Touching the bulbs may shorten their life Pull the bu...

Page 20: ...arrantable any missing components will be replaced at consumers expense major handling damage to manifold valve and ignition system will be serviced at consumer s expense all other warranties will rem...

Page 21: ...CARE USE INSTALLATION 40 41 CARE USE INSTALLATION L27 L30 ROTISSERIE GRILL WIRING SCHEMATICS L36 L42 ROTISSERIE GRILL WIRING SCHEMATICS...

Page 22: ...OODCHIP TRAY 14 ROLLER BEARING HOOD STOP HOOD SPACER REAR HOOD ASSY 6 IR ELECTRODE IR ELBOW IR HOOD LIGHT ASS Y 12 22B 7 8 13 11 22 21 LIGHT PANEL 9 10 WARMING SHELF 4 5 GRATE EXTENSION SPRING 56 2 PO...

Page 23: ...80514 80515 80517 80516 31772 80518 37 L42 L27 38 L36 L30 39 ALL L54 L42 L54 36 34 32 ALL L27 35 L36 L30 ALL 33 30 ALL 31 ALL LIGHT SWITCH HARNESS BLUE LIGHTED IR BURNER VALVE W MICROSWITCH BULLNOSE A...

Page 24: ...Place the grill into the liner and engage it over the liner lip across the back and sides The liner is designed to support the grill without additional fasteners FINISHING If desired any gap remainng...

Page 25: ...The best outdoor kitchen products come from Lynx Grills Inc 7300 Flores Street Downey CA 90242 Service 888 289 5969 Fax 562 299 6978 www lynxgrills com PN 35283...

Reviews: