background image

CXA Series   

User Manual

Lynx Pro Audio S.L

4

www.lynxproaudio.com

Before starting to use this device, please read this instruction manual carefully.
Keep these instructions in the place where the equipment will be used and with easy access to them.

• 

Electrical appliance

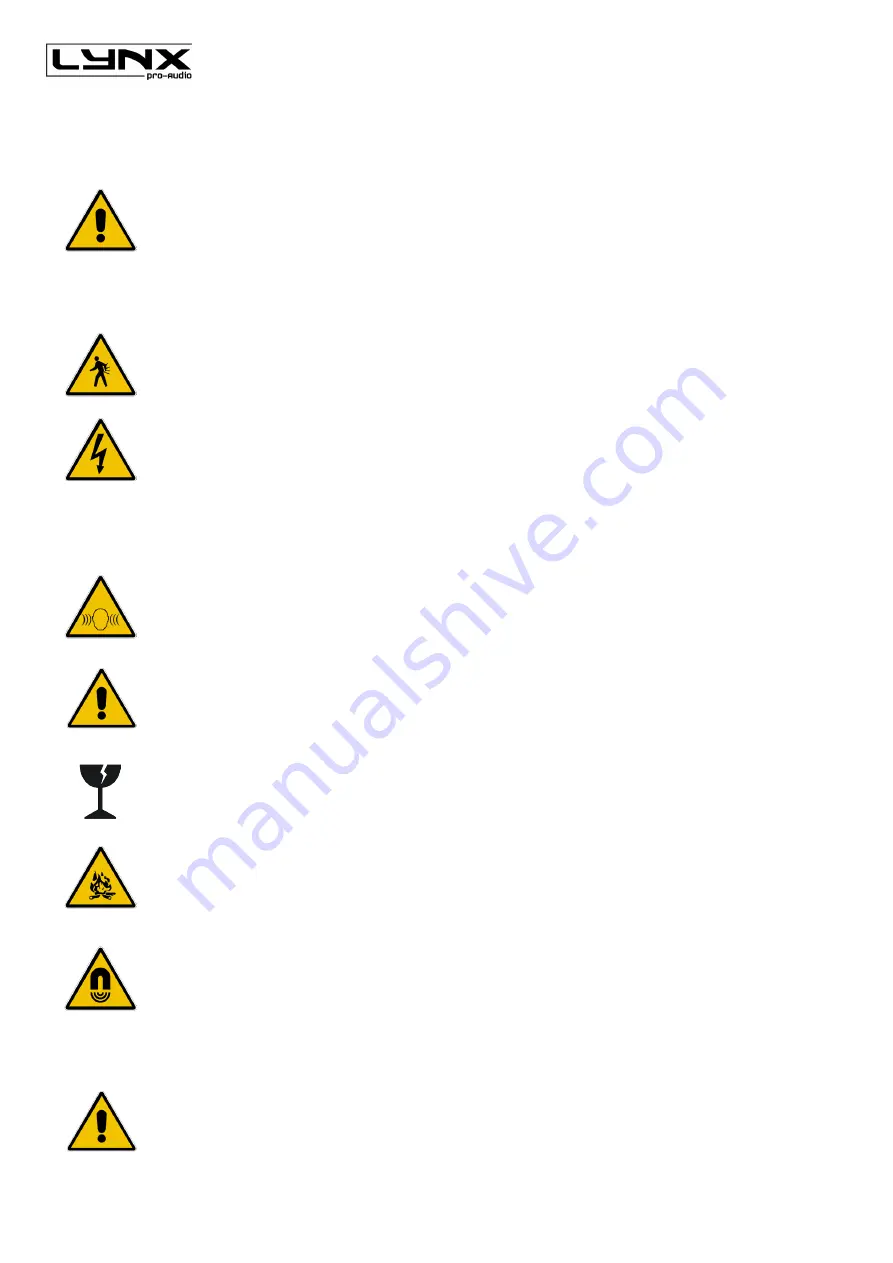
The exclamation mark within a triangle identifies the presence of electricity. Use the system carefully without 
wet hands or feet. Avoid installing the speaker in wet or excesivelly humid places. Do not place material that 
contains liquid on or near the unit. Avoid dripping or splashing water or any liquid over the unit. Regularly check 
the condition of the cables and make sure these are not being walked on or pinched. Connect the speaker to 
bipolar, earthed mains. The mains plug must be connected to the appropriate protection (fuse or breaker). 
Connection to any other type of mains could result in an electrical shock and violate local electrical codes. 
CAUTION: DO NOT CONNECT OR DISCONNECT THE AC POWER CONNECTORS UNDER LOAD. 

• 

Heavy equipment

Apply back protection when using the system. Avoid loading and unloading at heights.

 Electrical shock risk

The diagonal mark within a triangle identifies the presence of dangerous voltage.
Do not open or handle the interior of the box. These parts are not to be adjusted by the user. For maintenance 
and/or repair please go to an authorized service centre.In order to reduce the risk of electric shock, disconnect 
from AC before plug in or unplugging Audio signal cables. Reconnect to AC only if all signal connections are 
made and secured. Never manipulate the ground type plug provided.
The AC mains plugs should always remain accessible for operation.
Unplug the loudspeaker during storms or when it’s being used for a long time.

• 

Hearing damage risk

These systems can reproduce large quantities of sound pressure which can damage hearing. Take precautions 
if you are going to be near them for extended amounts of time and do not get too close.

• 

Hanging / Flying

Do not hang the cabinets from the handles or from any other part other than the designated hanging point. 
When flying this system please observe the technical and “Rainbow” software data carefully. Never exceed 
the maximum safe working loads or ignore the instructions included within this manual. Use Only flying 
accessories provided by Lynx Pro Audio S.L. Rigging must be always carried out by professionals.

 Delicate Material

Please ensure no foreign object or water enters the speaker. Only clean the unit with dry cloths. Do not use solvents.

 Overheating / Fire risk

To reduce the risk of the speaker over heating, avoid direct contact with sunlight. Avoid placing the unit close 
to heat inducing objects such as radiators. Do not cover the equipment in use and do not block any ventilation 
openings.  Do not put naked flame, such as lighted candles, close or on top of the unit.

• 

Electromagnetic and interferente emissions

Avoid placing objects which through electromagnetic waves can damage the unit, such as mobile phones, lap 
tops, magnetic strip cards etc.
This system complies with normatives 


EN 55103-1 (1)


EN 55103-2 (2)

(1) This device may not cause harmful interferences.
(2) This device may receive interference including interferences that may cause undesired working.

IMPORTANT NOTE

This Equipment must be used in accordance with these instructions and by trained professional personnel 
only. This equipment should not be used in places with extreme tropical climates. Don’t expose this apparatus 
to extreme humidity and or temperature values.

Summary of Contents for CXA Series

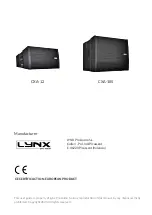
Page 1: ...USER MANUAL Lynx Pro Audio S L Valencia Spain www lynxproaudio com info lynxproaudio com CXA series CXA 12 CXA 18S V 21 04...

Page 2: ...UCT CXA 12 LYNX Pro Audio S L Calle 1 Pol Ind Picassent E 46220 Picassent Valencia This user guide is property of Lynx Pro Audio S L Any reproduction of this manual by any means is strictly prohibited...

Page 3: ...nstalled for symmetrical HF dispersion The CXA Array models are self powered Class D with switching power supply and 1400W of amplification each They are also controlled by the latest generation of Di...

Page 4: ...peration Unplug the loudspeaker during storms or when it s being used for a long time Hearing damage risk Thesesystemscanreproducelargequantitiesofsoundpressurewhichcandamagehearing Takeprecautions if...

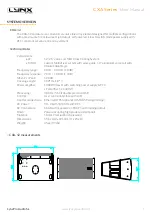
Page 5: ...6 bit double precision DSP Control User control interface with LCD Control connections Ethernet OCS optional USB DSP programming AC Power 90 264V 50 60 Hz with PFC AC Connectors 16A Neutrik powerCon T...

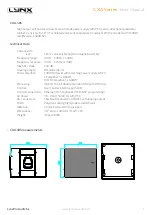
Page 6: ...Hz 3dB Max SPL Peak 132 dB Coverage angle Omnidirectional Power amplifier 1400W Class D with switching power supply PFC LF amplifier 1 x 800W MF HF amplifier 1 x 600W Processing 48 KHz 56 bit double p...

Page 7: ...the same rear pannel including the connectors and digital control display USB connection signal INPUT signal OUTPUT Main Link Main input Available when the user has requested the cabinets to be suppli...

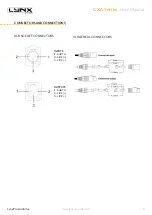
Page 8: ...CXA Series User Manual Lynx Pro Audio S L 8 www lynxproaudio com CONNECTORS AND CONNECTIONS XLR AEREAL CONNECTORS OUTPUTS 1 EARTH 2 LIVE 3 LIVE INPUTS 1 EARTH 2 LIVE 3 LIVE XLR SOCKET CONNECTORS...

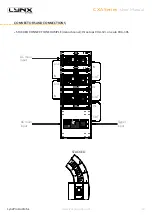
Page 9: ...E mono channel four tops CXA 12 two sub CXA 18S This is the maximal CXA configuration delivering a 72 coverage in the vertical plane Total coverage 100 H x 72 V AC main input AC main input Link IN OUT...

Page 10: ...x Pro Audio S L 10 www lynxproaudio com STACKED CONNECTION EXAMPLE mono channel three tops CXA 12 one sub CXA 18S AC main input AC main input Link IN CONNECTORS AND CONNECTIONS STACKED Signal input Li...

Page 11: ...ynx Pro Audio S L 11 www lynxproaudio com FLOWN CONNECTION EXAMPLE mono channel three tops CXA 12 one sub CXA 18S AC main input Link IN CONNECTORS AND CONNECTIONS Signal input OUT IN FLOWN AC main inp...

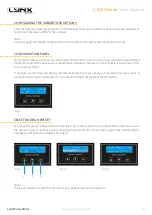
Page 12: ...nd information such as amplification module temperature input signal level and name of the current preset Fig1 If changes are not made the display will automatically dim to save energy and avoid unnec...

Page 13: ...ute polarity and phase You can also activate the air absorption compensation and select the SOLO mode How does it work Via Ethernet cable or wireless Once installed the O C S software automatically de...

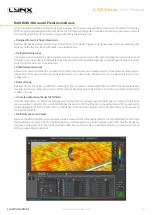
Page 14: ...ofers line arrays columns and individual boxes as you desire Also the line arrays can be placed in stack or flown configuration Beam steering Rainbow 3D has the ability to add DSP processing to the si...

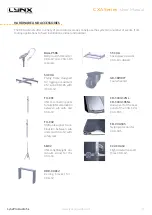
Page 15: ...esigned for rigging a maximum of 2 sub CXA 18S with 4 CXA 12 TU C01 35mm connecting pole forsatellitecombination between sub units and CXA 12 TU C02 M20 pole support com bination between sub units and...

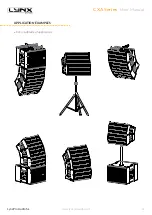
Page 16: ...CXA Series User Manual Lynx Pro Audio S L 16 www lynxproaudio com APPLICATION EXAMPLES For a multitude of applications...

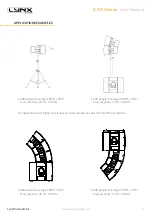
Page 17: ...100 H x 18 V Freq response 70 Hz 18 KHz For applications with higher low frequency demand add one sub unit CXA 18S per channel 500 people Coverage 100 H x 36 V Freq response 35 Hz 18 KHz 800 people C...

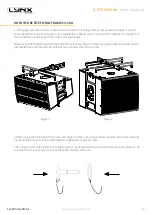
Page 18: ...ingly When using the flying frame with the CXA 12 enclosures Figure 1 they are supported via 2 points with 1 lateral plate incorporated in each cabinet and a special steel pin per side When using the...

Page 19: ...XA Series User Manual Lynx Pro Audio S L 19 www lynxproaudio com HOW TO USE THE FLYING FRAME SV CXA When using the flying frame with the CXA 18S sub units NOTE Only use the four STRAIGHT parts provide...

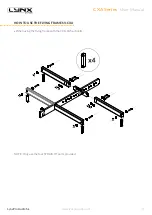
Page 20: ...ser Manual Lynx Pro Audio S L 20 www lynxproaudio com ASSEMBLY OF THE FLYING FRAME SV CXA When using the flying frame with the CXA 12 line array units Part ANGULATED NOTE Only use the two ANGULATED pa...

Page 21: ...ese shackles and orientate the system to your requeriments Fix the shackles to the elevation system e g motors lifts and elevate enough so as to fix the SV CXA on to the first cabinet CXA 12 or sub CX...

Page 22: ...d with the flying frame SV CXA In case of failure the link system used should be capable of supporting the total weight of the complete system If the system is installed outdoors check that the suppor...

Page 23: ...TTING THE CXA 18S CABINETS TO THE FLYING FRAME To fly the CXA 18S cabinets is very easy with the flying frame SVA CXA For a typical CXA array configuration you can fly a combination of a maximum 2 sub...

Page 24: ...com FITTING CXA 12 WITH CXA 18S CABINETS To fly the CXA 18S cabinets is very easy with the flying frame SVA CXA For a typical CXA array configuration you can fly a combination of a maximum 2 sub enclo...

Page 25: ...ype support in your ceiling Then you have to mount a lateral plate in each side of the cabinet where you will find 3 screws aligned Lateral plate Justunscrewtheupperandlowerscrews don t touch the cent...

Page 26: ...tive 2011 65 UE RAEE WEEE 2012 19 UE In accordance with Harmonized European Norms EN 60065 2014 Audio video and similar electronic apparatus Safety requirements EN 55032 2012 Electromagneticcompatibil...

Page 27: ...e life of this guarantee All our products undergo rigorous tests and quality controls We guarantee the characteristics described here within and their quality against any fabrication defect The user l...

Reviews: