Read the instructions
Do not use
Damaged Equipment
Only ascend or descend the LLWP
using the access provided
Never stand on the side protection
or use boxes, stepladders or other
objects to gain extra height
Inspect before use
Do not
overreach
Face the access when
ascending and descending
Never more than
one person
Never stand on the
access ladder to work
Working platform must be level
Do not use on loose
or slippery surfaces
Ensure all breaks are locked, where the LLWP
incorporates breaks e.g. Caster Wheels
Never move when a
person is standing
on a work platform
Never work near
power lines or other
electrical Equipment
Do not use on sloping or uneven surfaces,
where the LLWP is not fi tted with
a means of levelling the LLWP, such
as adjustable legs. Contact the
manufacturer for further information
Ensure side protection gate is
closed and secure before use
Never use as a means
of access to another place
Beware of fi nger traps
Ensure all
components
are present and
correctly fi tted
before use
7
DON’TS...
DO’S AND DON’TS WHEN USING
A HIPOD WORK PLATFORM...
3
DO’S...
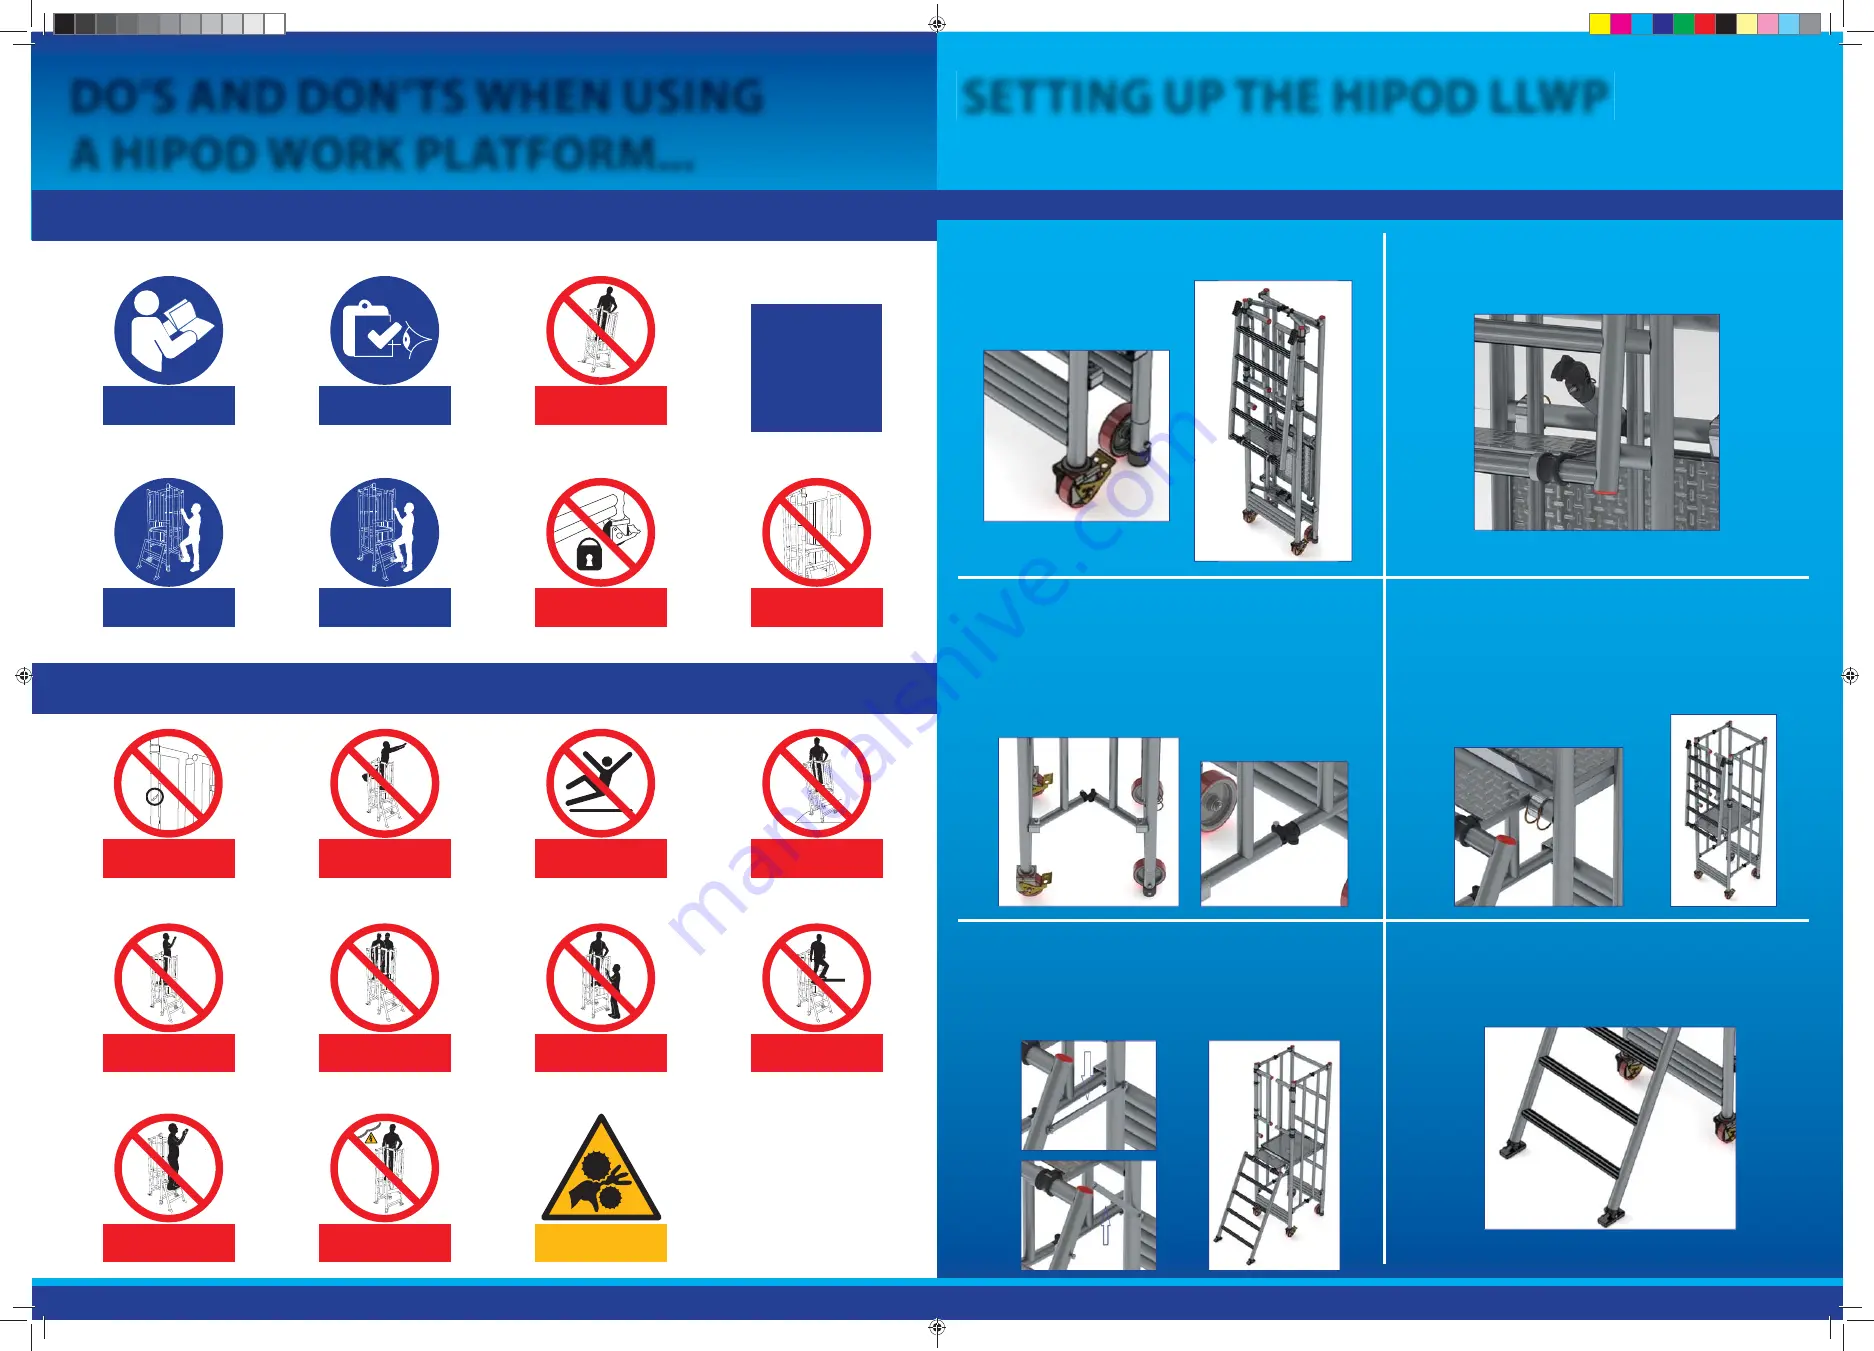
When moving and positioning the HIPOD LLWP ensure caster wheel brakes are unlocked.
Open front and rear frames which will allow both side frames
with elbow joints to unfold.
Depress self return pin on the elbow joint then open fully.
Release self return pin locking frames in the open
position. Always check elbow joints are locked and
secure before proceeding.
Lower and pivot the access and egress ladder to the ground
by releasing the locking strap situated to the side of the
front frame.
Ensure ladder locking arm is engaged and secure in the
sprung catch before climbing the ladder.
Place the closed unit in the upright position,
unlock all casters.
Opening the HIPOD LLWP
Release locking brace that locks the front and
rear frames together.
When the HIPOD LLWP is square and in position, ensure that
the platform is fi xed to the chosen height.
Locate the platform claws on the front and rear frames,
ensure the claws are sitting on the horizontal tube.
Lock and secure the 4 platform clips to the front and rear
tubes when in the correct position.
Ensure the articulated feet are positioned on the
fl oor correctly.
1.
3.
5.
2.
4.
6.
1.
5.
5.
9.
1.
2.
6.
6.
10.
2.
3.
7.
7.
11.
3.
4.
8.
8.
4.
SETTING UP THE HIPOD LLWP
Lyte_HiPod_Instruction_Leaflet.indd 2-3
Lyte_HiPod_Instruction_Leaflet.indd 2-3
16/12/2013 11:11:12
16/12/2013 11:11:12


