© 2016 Lytx, Inc. – Confidential & Proprietary
20
one-time use and may need to be replaced after removal. Please refer to the vehicle service
manual for information.
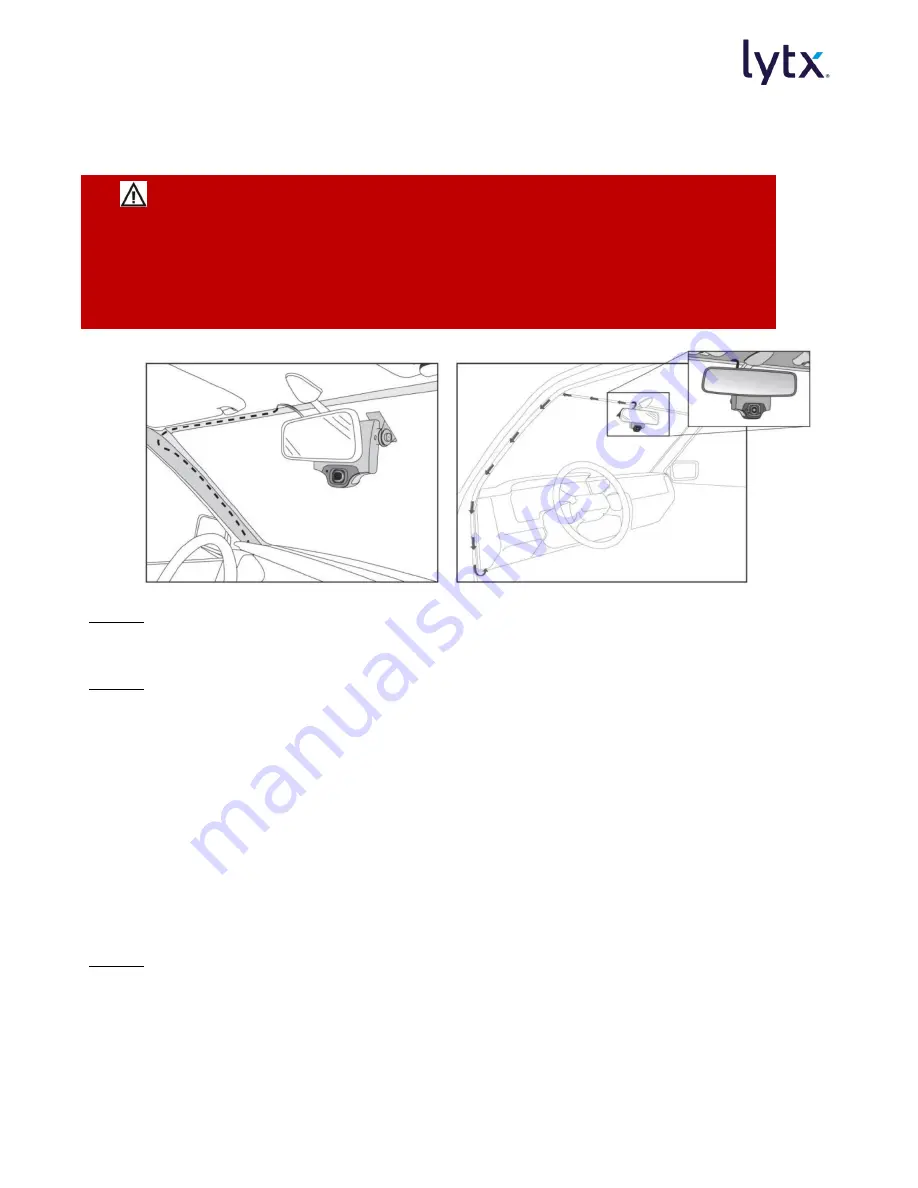
Step 1:
Starting from below the dash near the kick panel, route the RJ45 end of the cable
up the door pillar underneath the vertical door/window trim to the top of the door
pillar.
Step 2:
Route the cable across the top of the windshield under the window trim or
headliner to the DC3P. Connect the RJ45 connector to the event recorder. Use the
oversized washer to lock and secure the connector in place.
a.
Make sure the cable is clear of any sharp edges, moving parts, and cannot get
pinched in the door jam.
b.
Make sure the cable is tucked away and secured so that it cannot come loose.
We recommend using cable-ties every few inches along the route of the cable
to secure it in place.
Step 3:
Connect the RJ45 connector to the event recorder. Use the oversized washer to
lock and secure the connector in place. The DC3P is now ready for testing and
connectivity verification.
WARNING: When installing the cable in a vehicle with SIDE OR CURTAIN
AIRBAGS, be certain that neither the cable nor your installation activities interferes
with any airbag related mechanisms or otherwise risks affecting airbag
deployment. Lytx disclaims all responsibility for any damages arising from
improper installation and maintenance of the DC3P.


