11
Once the installer has finished, you can shut down your computer. Plug the FireWire SOLO into your computer’s FireWire Port. When the FireWire
SOLO is connected, turn the computer back on. Once the operating system has loaded, go to “System Preferences” in the Apple Menu. Select the
“Sound” preference panel, and click the “Output” tab. Select “M-Audio FireWire SOLO” to choose the FireWire SOLO as your default output device.
Your FireWire Solo is now installed ready to use.
Hardware Connections
Audio
<
Connect the FireWire Solo’s Line Outputs 1 & 2 to your amplifier, powered monitors, or mixer.
<
Connect your headphones to the FireWire Solo’s headphone outputs.
<
Connect your microphone to the FireWire Solo’s front panel Mic Input.
<
Connect your guitar or bass to the FireWire Solo’s front panel Guitar input.
<
Alternatively, you can connect your line-level sources to the FireWire Solo’s rear panel line inputs. Remember to select the REAR position on
the front panel’s FRONT/REAR selector.
<
Connect your S/PDIF digital devices to the FireWire Solo’s coaxial digital I/O.
Software Control Panel
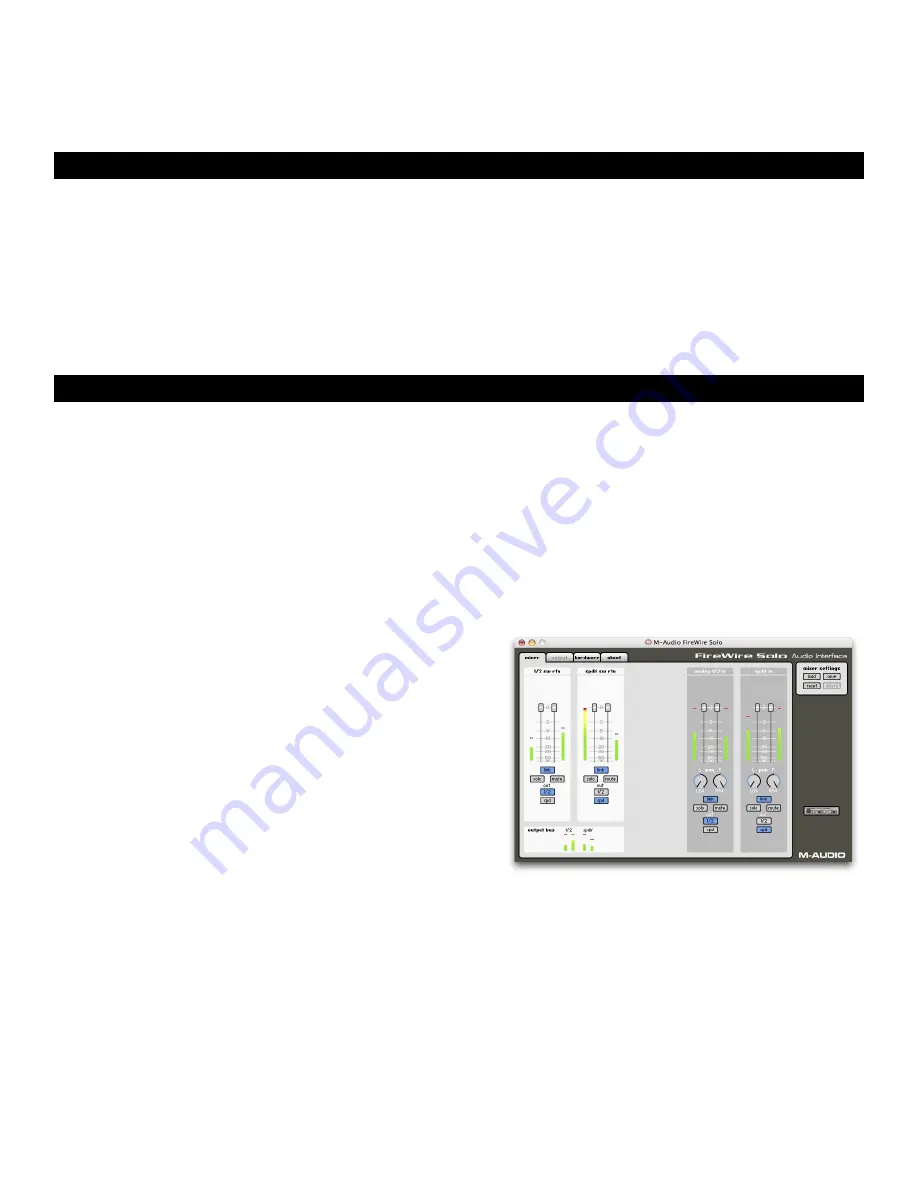
The FireWire Solo’s driver software provides a simple yet powerful interface with your computer and Digital Audio Workstation software. The control
panel gives you a four-channel software mixer, allowing you to route any of the FireWire Solo’s four inputs (two analog and two S/PDIF) to any of
the four outputs (two analog and two S/PDIF).
The FireWire Solo control panel is installed in your system when you complete the driver installation procedure. To open the control panel:
In Windows – A tiny red logo will be placed in the system tray, generally located at the bottom of your Windows desktop. Double-click this icon to
open the control panel.
On the Mac – The FireWire Solo control panel can be found in the system preferences.
NOTE:
The FireWire Solo control panel can also be opened from an ASIO-compliant music program’s audio setup page.
Mixer Page
The
Mixer
page provides output routing and control of the FireWire Solo’s
analog and digital inputs, as well as the four virtual channels returning from
your Digital Audio Workstation software. It also provides input and output level
meters, level controls, stereo linking, solo and mute functions.
Mixer Settings
These four buttons allow you to save and recall mixer settings as needed.
Reset Button
This button returns the control panel settings to their default values. These
default values can be found in the section on product specifications.
Load, Save, Delete Buttons
These buttons will open a Windows or Mac file dialog box within your audio
application, with the corresponding load, save or delete function selected.
Channel Returns
The Mixer page provides you with control over the FireWire Solo’s audio routing. On this page you will find metering and faders for four stereo
pairs:
Software Returns (1/2 SW RTN, S/PDIF SW RTN)
The Mixer
page provides access to four virtual audio “returns” from your audio application. These returns are available in two stereo pairs, and
are labeled
1/2 sw rtn
and
spdif sw rtn
. These returns will appear in your DAW program’s output mixer settings as available audio outputs.
Most likely, you will control the output monitor levels from your audio program’s mixer, and will want to keep its faders at their maximum level.
However, you may find it convenient to adjust them here in the mixer page, if you are, for example, setting up a balance between input levels
and
sw rtn
levels.


