background image

Oxygen Series


User Guide


7

6.

Function Buttons:

Oxygen 88 features 5 function buttons for programming various settings and advanced features as outlined 
below. 

Advanced
The Advanced button allows access to the extended parameters listed along the top edge of the keyboard. 
When the Advanced button is pressed, the LED screen will display three dots, indicating the keyboard is in 
Advanced mode. For more information on Advanced Mode, see "Chapter 7: Advanced Keyboard Functions" on 
page 12.

Mute 
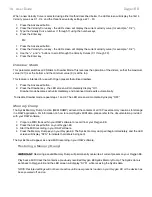
Pressing the Mute button prevents the Knobs and Sliders from transmitting MIDI data, and the LED screen will 
display 

"

OFF

"

, signifying their disabled state. This allows changes to Slider and Knob positions without 

affecting the settings of connected MIDI devices or applications. 

As shown in the following example, the Mute function can be used to prevent 

"

jumps

"

 caused by differences 

between the physical positions of sliders and knobs on Oxygen 88, and the expected values of the 
corresponding software parameters:

When loading a new sound patch for a virtual instrument, it is likely that the current positions of the Knobs on 
Oxygen 88 will be 

"

out-of-sync

"

 with what the virtual instrument is expecting. For example, an Oxygen 88 Knob 

may be set to 64 (center position) while the sound patch expects this value to be zero (all the way to the left). 
This may cause this synthesizer setting to jump or 

"

snap

"

 from zero to 64 when the Oxygen 88 Knob is 

adjusted. The rapid change can be a jarring experience if the knob is controlling a parameter like Master 
Volume or Filter.

To prevent these value jumps, press the Mute button, and


set the Knobs and Sliders to their expected positions 

before using them with a new sound patch. Pressing the Mute button a second time will exit Mute mode. 

NOTE: The Mute function does not affect the buttons, keys or the sustain pedal. Pressing any of them      
automatically cancels Mute mode. 

Snapshot (Advanced & Mute)
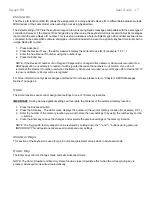
Simultaneously pressing the Advanced and Mute buttons will activate the Snapshot function. The LED screen 
momentarily shows 

"

S-S

"

, and Oxygen 88 will immediately


send the current values of all knobs and sliders. 

This feature can be used to simultaneously change multiple parameters within the software you are controlling, 
to match the settings on your Oxygen 88.

Summary of Contents for Oxygen 88

Page 1: ...Oxygen 88 User Guide ...

Page 2: ...e power switch to the On position Please refer to Section 5 of this Guide for more information on keyboard setup including optional driver installation and configuration of your recording application 2 Oxygen 88 Features 88 velocity sensitive fully weighted hammer action keys 4 programmable Keyboard Zones Automatic mapping of top panel controls to qualified DAWs Advanced programming functions via ...

Page 3: ...ing drivers from the Oxygen Series disk the computer will automatically display the interactive install screen when the CD ROM is inserted If your computer fails to launch this application you can manually start it by clicking on Start My Computer Oxygen Series Windows XP or Start Computer Oxygen Series Windows Vista and Windows 7 2 Select Oxygen 88 from the menu and click Install 3 Follow the on ...

Page 4: ...ry or available when using Oxygen 88 on Mac OS X Simply connect the controller keyboard to the computer using the supplied USB cable configure your recording software and start making music Host Software Configuration When using Oxygen 88 with your computer you may need to configure your music software to receive MIDI data This process varies from one application to another but is usually done thr...

Page 5: ... from www avid com 1 Launch Pro Tools 2 Select Peripherals from the Setup menu 3 Select the MIDI Controllers tab from the window that appears 4 Click the first Type pop up menu and select Keyboard 5 Click the first Receive From pop up menu and select the Oxygen 88 In port In Windows XP the Oxygen 88 MIDI ports are listed as USB Audio Device Install the Oxygen 88 drivers available from www avid com...

Page 6: ...s expressive changes in performances by raising and lowering pitch Rolling the Pitch Bend wheel upward will raise the pitch of an instrument Rolling it downward will lower the pitch The upper and lower pitch bend limit is determined by settings on your hardware or software synthesizer not by the Pitch Bend wheel on Oxygen 88 itself Typically this can be either a half note or an octave up down This...

Page 7: ... track 8 is currently selected and the track button is pressed track 9 will be selected The track sliders and their corresponding buttons will now control Tracks 9 16 Default Operation The left Track button sends MIDI CC 110 while the right Track button sends MIDI CC 111 These buttons are not re assignable to other MIDI parameters On your DAW use the MIDI Learn function if available to assign thes...

Page 8: ...virtual instrument it is likely that the current positions of the Knobs on Oxygen 88 will be out of sync with what the virtual instrument is expecting For example an Oxygen 88 Knob may be set to 64 center position while the sound patch expects this value to be zero all the way to the left This may cause this synthesizer setting to jump or snap from zero to 64 when the Oxygen 88 Knob is adjusted Th...

Page 9: ...Each slider can be mapped to various parameters in your DAW by using its MIDI Learn function if available check the user documentation for your DAW or by manual assignment as described in Chapter 9 Advanced Programming Functions on page 23 8 Slider Buttons Oxygen 88 features nine Slider Buttons DirectLink Operation The first eight buttons map to the currently active bank of eight tracks within qua...

Page 10: ...pplications to control playback record start stop fast forward and rewind as well as enabling or disabling of the loop function Pro Tools 8 users can access additional functions via the Loop button Holding the Loop button while pressing one of the other Transport Control buttons gives access to additional Pro Tools transport functions See Appendix D for more details Quickly pressing the Loop butto...

Page 11: ...e user documentation for your DAW or by manual assignment as described on page 23 12 Velocity sensitive Keyboard The velocity sensitive keyboard is not only the primary method of sending Note On Off and Velocity data when performing it is also used to access extended programing functions listed along its upper edge For more information on the extended programming functions refer to Chapter 7 Advan...

Page 12: ...pressive changes during performances 17 MIDI Out Port This standard 5 pin MIDI connector transmits MIDI data to any compatible device such as a synthesizer sound module or drum machine 18 USB Port The USB 2 0 port backward compatible with USB 1 1 delivers power to the keyboard and transmits MIDI data when connected to a computer ...

Page 13: ...rol Select The Control Select function CTRL SEL is used to select a MIDI control a Knob Button Slider or the Sustain or Expression Pedal jack for editing NOTE Every control is labeled with a unique number such as C1 C2 etc It is not necessary or possible to enter the letter C when following the editing examples below 1 Press the Advanced button 2 Press the Control Select key 3 Enter the control s ...

Page 14: ...l as described earlier 2 Press the Advanced button 3 Press the Channel Assign key The LED screen will display the current MIDI channel for example c 0 2 4 Enter the new MIDI channel number using the number keys 5 Press the Enter key When assigned to channel 0 the control Knob Slider Button or Sustain Pedal jack will transmit on the Global MIDI Channel For more information refer to the next section...

Page 15: ...ogram key the LED screen will display the last sent program number for example 0 1 3 Enter the Program number 4 Press the Enter key to send the program change message Program change messages can also be sent using the following method 1 Press the Select button until the a red dot appears above PGM on the lower edge of the LED screen 2 Scroll through the Program numbers using the or buttons Bank LS...

Page 16: ...t a key affects the volume at which a note plays Oxygen 88 provides 7 different sensitivity options 1 C1 is a sensitivity setting that generates lower velocity values for the same force This setting is useful for playing more quietly even if you tend to strike the keys harder 2 C2 is the default setting and is designed to be useful for most players with an average touch people who play with an ave...

Page 17: ...iately and Advanced mode exits automatically To disable Drawbar mode repeat steps 1 and 2 The LED screen will momentarily display OFF Memory Dump The SysEx Memory Dump function MEM DUMP will send the contents of all 10 Preset memory locations for storage in a DAW application For information on how to record SysEx MIDI data please refer to the documentation provided with your DAW software 1 Prepare...

Page 18: ...member the Device ID number used when the Memory Dump was recorded set your Oxygen 88 to Device ID 127 to ensure all Memory Dumps will be recognized For more information on SysEx messages and Device ID numbers please refer to Chapter 10 MIDI Messages Defined on page 34 Store The Store function saves control assignment settings to one of 10 memory locations IMPORTANT Storing new assignment settings...

Page 19: ...e Voice ZONE VOICE function is a global parameter that is applied to all zones of the same number for example Zone one across all memory locations of Oxygen 88 regardless of the currently active Preset Patch Zone Voice can be enabled or disabled for each of the four zones When the Zone Voice function is set to On default recalling an Oxygen 88 Preset Patch will cause the Zone to transmit Bank and ...

Page 20: ...that Zone 1 Select a Zone by pressing its Zone button 2 Press the Advanced button 3 Press the ZONE LSB key the LED screen will display the currently assigned Bank LSB value 4 Enter the new Bank LSB value using the number keys 5 Press the Enter key The assigned Bank LSB value will be transmitted immediately 6 Repeat steps 1 5 to assign new Bank LSB value for the remaining Zones After setting the Ba...

Page 21: ...o set the range of notes for all remaining Zones Or 1 Press and hold one or multiple Zone Buttons After approximately two seconds the LED screen will read Z n 2 Press the lowest note to be included in the zone the LED screen will display the note value 3 Press the highest note to be included in the zone the LED screen will display the note value 4 Repeat steps 1 3 to set the range of notes for the...

Page 22: ... the corresponding Zone Zone Octave The Zone Octave ZONE OCT function allows the pitch of a Zone to be shifted up or down in one octave increments to a maximum of 10 Octaves 1 Select a Zone by pressing its Zone button 2 Press the Advanced button 3 Press the Zone OCT key the LED screen will display the current Octave shift value 4 Repeatedly press the or button to lower or raise the Octave shift va...

Page 23: ... value for the remaining Zones After setting the Transpose value and exiting Advanced mode activate all desired Zones by simultaneously pressing their respective Zone buttons Note Zone Transpose shift settings work in combination with the Global Transpose shift setting This can be useful when working with different Transpose or Octave shift settings across multiple Zones The Global Transpose funct...

Page 24: ...ese additional messages can be assigned to Oxygen controls just as if they were standard MIDI CCs but using numbers in the range from 128 to 255 as listed in the tables in Assignable MIDI CCs on page 41 Generally this is achieved by selecting the control for editing and assigning a 3 digit number This chapter provides examples of the typical control assignment procedure for knobs sliders buttons a...

Page 25: ...ssigns MIDI CC number 10 Pan to the button 5 Press the Enter key 6 Press the Advanced button 7 Press the Data 2 key 8 Type 0 using the number keys to assign the second button press minimum value 9 Press the Enter key 10 Press the Advanced button 11 Press the Data 3 key 12 Type 127 using the number keys to assign the first button press maximum value 13 Press the Enter key NOTE If you want the butto...

Page 26: ... the Advanced button 3 Press the Control Assign key 4 Type 146 using the number keys This configures the button to operate as a trigger press release See Appendix B 5 Press the Enter key 6 Press the Advanced button 7 Press the Data 1 key 8 Type 10 using the number keys This specifies which parameter the button will trigger and release In this example MIDI CC 10 Pan See Standard MIDI Control Number...

Page 27: ...I Machine Control 5 Press the Enter key 6 Press the Advanced button 7 Press the Channel Assign key 8 Enter 127 Poly On using the number keys This ensures all receiving devices will respond to the MMC messages 9 Press the Enter key 10 Press the Advanced button 11 Press the Data 2 key 12 Enter a number from the chart below to select the MMC command for the button This determines which transport func...

Page 28: ...lay MIDI note 64 E4 see Appendix C 9 Press the Enter key 10 Press the Advanced button 11 Press the Data 2 key Velocity Off 12 Enter 0 using the number keys This sets the button to transmit a Note Off message with a release velocity value of zero 13 Press the Enter key 14 Press the Advanced button 15 Press the Data 3 key Velocity On 16 Enter 100 using the number keys This sets the button to transmi...

Page 29: ...Pedal 2 Press the Advanced button 3 Press the Control Assign key 4 Enter 145 using the number keys This sets the button or the pedal to send a combined Bank Select Program Change message 5 Press the Enter key 6 Press the Advanced button 7 Press the Data 1 key 8 Enter the Program Change number for example 42 9 Press the Enter key 10 Press the Advanced button 11 Press the Data 2 key 12 Enter the Ban...

Page 30: ...d button 7 Press the Data 1 key 8 Enter 72 using the number keys This specifies the MIDI CC for which values will be incremented 9 Press the Enter key 10 Press the Advanced button 11 Press the Data 2 key 12 Enter 0 using the number keys This specifies the minimum value 13 Press the Enter key 14 Press the Advanced button 15 Press the Data 3 key 16 Enter 127 using the number keys This specifies the ...

Page 31: ...ress the Data 2 key 8 Enter 0 using the number keys This specifies the lowest Program number 9 Press the Enter key 10 Press the Advanced button 11 Press the Data 3 key 12 Enter 127 using the number keys This specifies the highest Program number 13 Press the Enter key To configure a button to decrement a Program Change between a maximum and minimum value assign the button to number 155 see Assignab...

Page 32: ...a knob needs to be configured in reverse when controlling a particular parameter This requires two values to be specified values given are examples The following example configures a button or slider to reverse its operation 1 Select a Knob or Slider as detailed earlier in this guide 2 Press the Advanced button 3 Press the Data 2 key 4 Enter 127 using the number keys This configures the control to...

Page 33: ...mum volume setting for a track The following example configures a knob or slider to operate within a limited range 38 to 93 1 Select a a Knob or Slider as described earlier in this guide 2 Press the Advanced button 3 Press the Control Assign key 4 Type 7 using the number keys This assigns MIDI CC number 7 Volume to the knob or slider See Appendix A 5 Press the Enter key 6 Press the Advanced button...

Page 34: ... software device requires four values to be specified The following example assigns a manufacturer specific NRPN coarse 134 message to a control on Oxygen 88 1 Select a Knob or Slider as described earlier in this guide 2 Press the Advanced button 3 Press the Control Assign key 4 Enter 134 NRPN Coarse using the number keys see Appendices B and F 5 Press the Enter key 6 Press the Advanced button 7 P...

Page 35: ...annot be changed using the Device ID key This key is used for varying the global Device ID of Oxygen 88 Non Volatile Memory All Oxygen keyboards feature non volatile memory which allows for automatic saving of preset patches when the device is powering down The current controller and channel assignments are stored even if the Save function has not been used The Program Bank LSB and Bank MSB data G...

Page 36: ...b banks The combination of Bank MSB and LSB messages gives a 14 bit message that can select any of a possible 16 384 banks Each bank can in turn contain 128 possible sounds selected via a separate program change MIDI message This enables a user to theoretically recall over two million programs directly using only MIDI commands However most devices only use a few different banks and you can often i...

Page 37: ...troller number 6 data entry for coarse adjustments or number 38 for fine adjustments A list of NRPNs is usually given in the user manual of any device that receives NRPN messages It is always necessary that the NRPN MSB and LSB be sent together Both will be specified in the device manual but typically only in Hexadecimal format If this is the case you may refer to Appendix C for help translating t...

Page 38: ... the value of the selected RPN or NRPN For most devices MIDI CC 6 is used when working with NRPN or RPN coarse messages while MIDI CC 38 is used when working with fine messages In other words the combined MIDI CC numbers NRPN 98 99 RPN 100 101 only specify the parameter to be edited They have to be followed with yet another specific MIDI CC number value CC 6 or CC 38 in order to alter the associat...

Page 39: ...ll 14 bit RPN NRPN resolution are very uncommon To illustrate the concept and make the purpose of RPN NRPN Coarse and Fine messages easier to understand we included a graphic describing how such a 14 bit RPN NRPN control would operate not supported by Oxygen Series keyboards The RPN NRPN coarse message divides the range of 16384 steps into 128 segments and activates them by sending each segment s ...

Page 40: ...vice can read and translate the message This allows devices to send audio sample memory data memory dumps controller settings and much more It also allows the controllers of one device to be controlled by another It is not possible to program your own specific SysEx message into the Oxygen controller However several useful SysEx messages are pre programmed into the keyboard They can be accessed by...

Page 41: ...fer to the documentation for your DAW software to learn how to route MIDI data properly When playing a virtual instrument loaded in my music software there is a noticeable delay before I hear any sound This delay is known as latency and it may be possible to reduce it through the Control Panel of your audio interface Please refer to the User Guide your audio interface to see if this is possible I ...

Page 42: ...ntroller 111 20 Controller 20 66 Sostenuto 112 Controller 112 21 Controller 21 67 Soft Pedal 113 Controller 113 22 Controller 22 68 Legato Pedal 114 Controller 114 23 Controller 23 69 Hold 2 115 Controller 115 24 Controller 24 70 Sound Variation 116 Controller 116 25 Controller 25 71 Resonance 117 Controller 117 26 Controller 26 72 Release Time 118 Controller 118 27 Controller 27 73 Attack Time 11...

Page 43: ...in Max 129 Channel Fine Tune Min Max 130 Channel Coarse Tune Min Max 131 Channel Pressure Min Max 132 RPN coarse RPN LSB RPN LSB 133 RPN Fine RPN LSB RPN LSB 134 NRPN Coarse NRPN LSB NRPN LSB 135 NRPN Fine NRPN LSB NRPN LSB 136 Master Volume GM Min Max 137 Master Pan GM Min Max 138 Master Coarse Tune GM Min Max 139 Master Fine Tune GM Min Max 140 Chorus Mod rate GM2 Min Max 141 Chorus Mod Depth GM...

Page 44: ...lume GM Volume LSB Volume MSB 137 Master Pan GM Pan LSB Pan MSB 138 Master Coarse Tune GM Tuning LSB Tuning MSB 139 Master Fine Tune GM Tuning LSB Tuning MSB 140 Chorus Mod rate GM2 Mod Rate 141 Chorus Mod Depth GM2 Mod Depth 142 Feedback GM2 Feedback Level 143 Send to Reverb GM2 Reverb Send Level 144 Pitch Bend Pitch Shift LSB Pitch Shift MSB 145 Program Bank Preset Program Bank LSB Bank MSB 146 ...

Page 45: ...ccolo 73 Flute 74 Recorder 75 Pan Flute 76 Bottle Blow 77 Shakuhachi 78 Whistle 79 Ocarina 104 Sitar 105 Banjo 106 Shamisen 107 Koto 108 Kalimba 109 Bag Pipe 110 Fiddle 111 Shanai Organ Ensemble Synth Lead Percussive 16 Drawbar Organ 17 Percussive Organ 18 Rock Organ 19 Church Organ 20 Reed Organ 21 Accordion 22 Harmonica 23 Tango Accordion 48 String Ensemble 1 49 String Ensemble 2 50 Syn Strings ...

Page 46: ... mode parameter mapping can be customized by clicking the learn button in the upper right corner of the Plug In Please check the Pro Tools 8 documentation for more details Octave n Note Numbers Cn C Dn D En Fn F Gn G A A Bn 1 0 1 2 3 4 5 6 7 8 9 10 11 0 12 13 14 15 16 17 18 19 20 21 22 23 1 24 25 26 27 28 29 30 31 32 33 34 35 2 36 37 38 39 40 41 42 43 44 45 46 47 3 48 49 50 51 52 53 54 55 56 57 58...

Page 47: ...8 0D 13 38 56 63 99 0E 14 39 57 64 100 0F 15 3A 58 65 101 10 16 3B 59 66 102 11 17 3C 60 67 103 12 18 3D 61 68 104 13 19 3E 62 69 105 14 20 3F 63 6A 106 15 21 40 64 6B 107 16 22 41 65 6C 108 17 23 42 66 6D 109 18 24 43 67 6E 110 19 25 44 68 6F 111 1A 26 45 69 70 112 1B 27 46 70 71 113 1C 28 47 71 72 114 1D 29 48 72 73 115 1E 30 49 73 74 116 1F 31 4A 74 75 117 20 32 4B 75 76 118 21 33 4C 76 77 119 ...

Page 48: ...tive change 01 64 00 7F n a 64 0 63 EG TVF TVA Decay Time relative change 01 66 00 7F n a 64 0 63 EG TVF TVA Release Time relative change 14 00 7F 00 7F n a 64 0 63 Drum Filter Cutoff Freq relative change 15 00 7F 00 7F n a 64 0 63 Drum Filter Resonance relative change 16 00 7F 00 7F n a 64 0 63 Drum EG Attack Rate relative change 17 00 7F 00 7F n a 64 0 63 Drum EG Decay Rate relative change 18 00...

Page 49: ...ement This model Oxygen 88 complies with the following standards regulating interference and EMC FCC Part 15 Class B EN 55103 1 E3 EN 55103 2 E3 AS NZS 3548 Class B CISPR 22 Class B Radio and Television Interference This equipment has been tested and found to comply with the limits for a Class B digital device pursuant to Part 15 of the FCC Rules DECLARATION OF CONFORMITY We Avid 2001 Junipero Ser...

Page 50: ... occur Handle With Care Never use the system during abnormal conditions Do not operate if no picture appears on the monitor if smoke is emitted sound is frequently deformed or if there are any conditions of malfunction Do not place any liquids on or near the system Ensure that nothing rests on the system s cables that they do not come in to contact with water or excessive heat Damage to a cable ca...

Page 51: ...ero Serra Boulevard Daly City CA 94014 3886 USA Technical Support USA Visit the Online Support Center at www avid com support Product Information For company and product information visit us on the web at www avid com ...

Reviews: