8
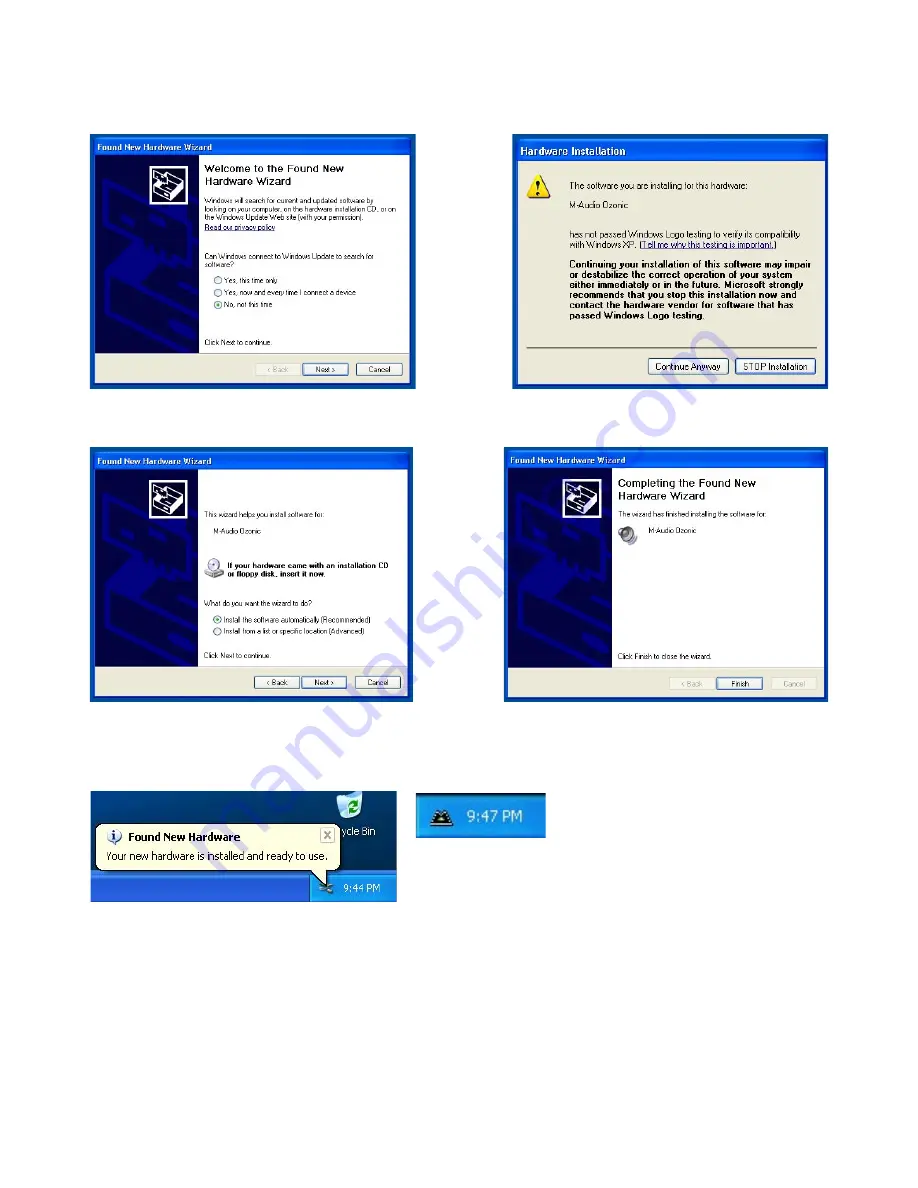
10. After the computer has powered off, connect the Ozonic to your computer’s FireWire port and power it on. Once the Ozonic is
connected, turn on your computer. Once Windows has loaded, the New Hardware Wizard will open. Choose the default selection,
“Install the software automatically.” Click “Next.” Windows will locate and install the Ozonic Bootloader files.
11. During the installation, you will be prompted with a message warning that the driver software has not passed Windows Logo testing.
Select “Continue Anyway” and proceed with the installation.
12. The Found New Hardware Wizard will run a second time to install the Ozonic driver software. Choose the default selection, “Install
the software automatically.” Click “Next.”
13. You will again be prompted by the Windows Logo Testing notice. Again, click “Continue Anyway” and proceed with the installation.
14. Click “Finish” to complete the installation. Your Ozonic is now ready to use.
15. You will see the M-Audio Ozonic control panel icon in your system tray (lower right corner of your desktop). Click on the icon to open
the control panel.
Summary of Contents for Ozonic
Page 1: ...OZONIC 37 Key Audio MIDI Interface and Controller...
Page 37: ...38...
Page 38: ...041025_OZONIC_UG_02...


