


4.0 Installing 3D Ink (Filament)
Filament Installation is accessed by selecting the
3D Ink
button in the top left
corner of the M3D Software. You will be guided to install filament
Externally
or
Internally
. DO NOT attempt to load both ports at the same time during printing.
*NOTE Factory Filament *
There may be factory filament installed externally, let the
printer extrude this first and then insert your filament of
choice.
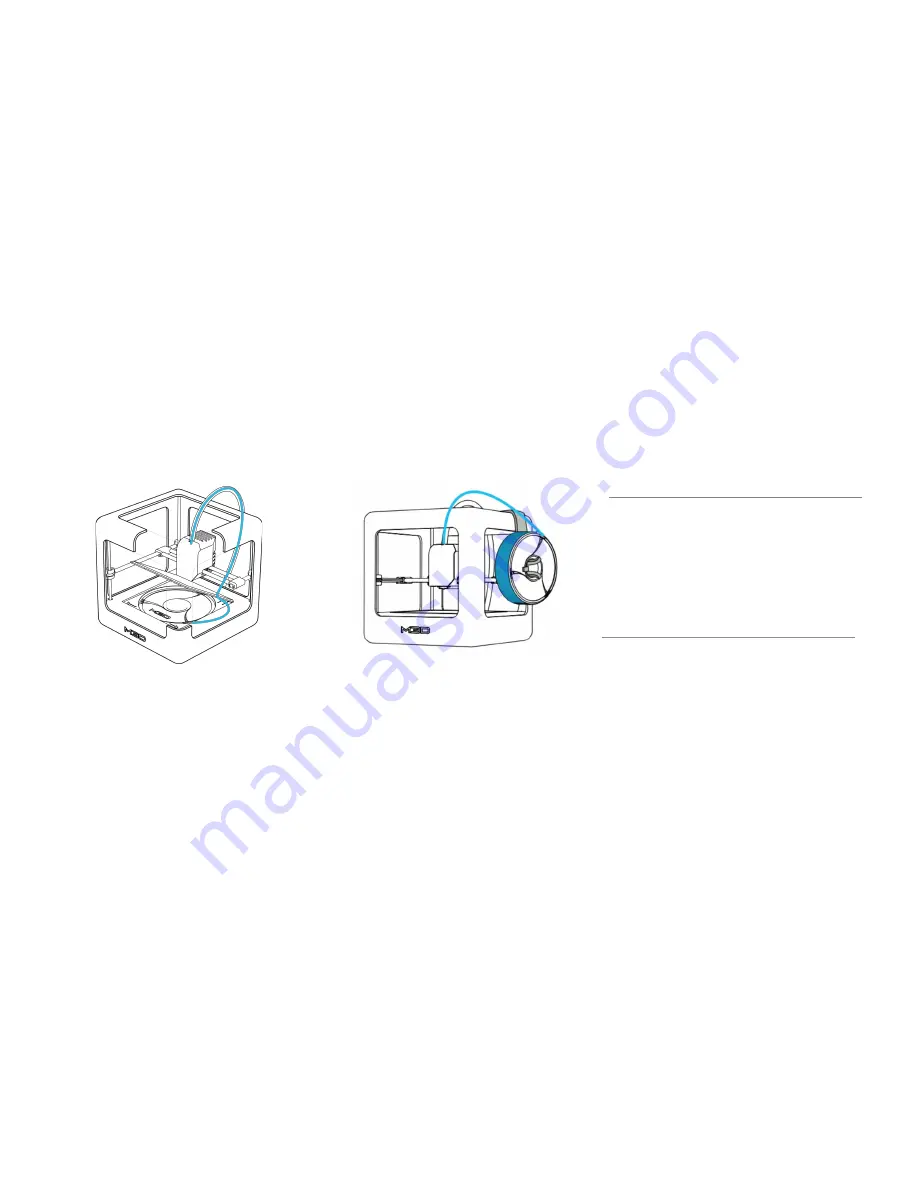
Internal Filament
Figure. Showing the filament path taken
when installing internal filament. The path
begins underneath the print bed through the
black filament tube.
External Filament
Figure. An example of an ideal external
filament path. External filament is installed
via the external feed port located at the top
of the extruder head. Always keep a clear
path between your filament spool and the
print head.
Notes for Loading Filament
In both scenarios, you need to feel the filament
“catch” the extruder gear. When you are loading
filament, apply constantforce on the filament to
push it forward into the extruder gear. A good way
to test if the filament is “caught” is to lightly pull
back and forth on the filament. If the filament does
not pull out, then you have engaged with the gear.
3D Ink Cheat Code
Your 3D Ink™ Cheat Code is written on the
front of your Micro+ Spool. If it is not, you
can type in either ABS or PLA depending on
which filament type you are using.


