background image

5.0 The First Print! 

1. Quick Calibrate

Often a successful first print layer leads to a 
successful print! To be sure your printer is 
ready for its first print, select the

 Gear 

I

con to 

open the printer settings. Then go to the 

Calibration 

section where you can select


Advanced Calibration. 

Now select the 

Recalibrate Bed Location button. This will begin 
the Quick Calibration process, which should 
take no more than 5 minutes.  

*DO NOT TOUCH

 The Micro+ During 

Calibration*
Keep the printer on a level/stable surface during any 
calibration sequence. There is the option in the M3D 
Software to manually adjust the calibration height of 
your Micro. Please visit www.PrintM3D.com/
support for detailed videos and documents regarding 
calibrating The Micro+. 

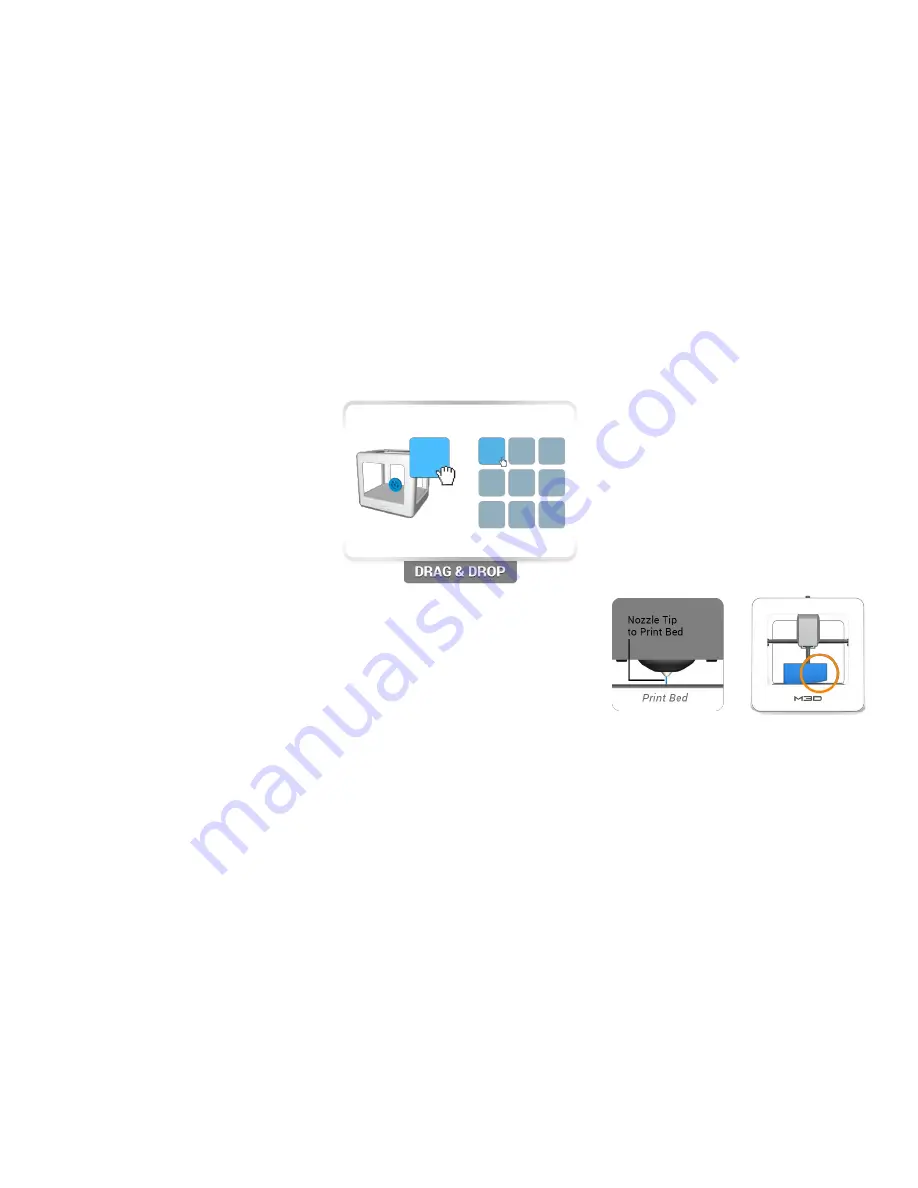
2. Load the First Model

Loading a model into the printer is 
simple; just drag the model from the 
Recent Models library to the printer. Your 
first model is already loaded in the M3D 
Software. We recommend printing this 
model first as a test calibration. 

Select the 

Open Model

 button in the top left 

corner of the M3D Software to browse for 

other 3D Models on your computer. 

Other models can be downloaded from sites 

like Thingiverse.com and Yeggi.com. These 

files must be .STL or .OBJ file types. 

3. Watch Your First MicroPrint! 

Click the 

Green Button

  to open the print 

settings menu and begin your first print. For 
your first model, we have already 
pre-loaded the best settings, so all you have 
to do is press print! 

*Look Out!* 
We encourage you to get into the habit of
watching the first few layers of your print and 
paying attention to two things:

Nozzle Height 
Only a piece of paper 
should fit between 
the print bed and 
nozzle tip. If not, 
Recalibrate! 

Peeling/Warp 
You should typically 
stop your print and 
adjust the User 
Offset Values in that 
corner. 

Summary of Contents for Micro+

Page 1: ...The Micro 3D Printer User Manual...

Page 2: ...meter 1 75 mm Nozzle Diameter 0 35 mm Layer Thickness 0 05 mm Speed Up to 55 mm s Position Precision XY 15 microns Z 3 Microns Software M3D Supported File Types STL and OBJ System Compatibility Window...

Page 3: ...untry specific power supply Be sure to remove the Gantry Clips located on the front left and front right corners of the printer Safety Considerations Caution Hot Keep your fingers away from the Nozzle...

Page 4: ...trol Panel this will prevent Windows Automatic Updates from restarting your computer resulting in a print failure while The Micro is in operation 3 0 Connect and Power The Micro 1 Insert the provided...

Page 5: ...nal Filament Figure An example of an ideal external filament path External filament is installed via the external feed port located at the top of the extruder head Always keep a clear path between you...

Page 6: ...rinter is simple just drag the model from the Recent Models library to the printer Your first model is already loaded in the M3D Software Werecommend printing this model first as a test calibration Se...

Page 7: ...ed by adjusting the options on the left Models can be scaled by all three dimensions simultaneously by using the right mouse button individually adjusted using the scale bar or manually entered into t...

Page 8: ...ion drug delivery or ingestion PRECAUTION If any allergy develops as a result of direct or indirect contact using M3D s products or from the 3D printed objects discontinue use immediately MAINTENANCE...

Page 9: ...that the user manual for M3D s products this end user agreement and the limited warranty may have been provided as a physical copy where required by law with the initial customer purchase A digital c...

Page 10: ...www printM3D com M3D 3D Ink and Print Anything are registered trademarks of M3D LLC in Fulton MD...

Reviews: