25
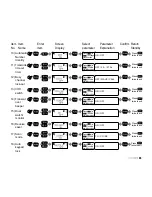
Item
No.
Item
Name
Enter
item
Screen
Display
Parameter
Explanation
Confirm Return
Standby
Select
parameter
+
Automatic
Number
Identity
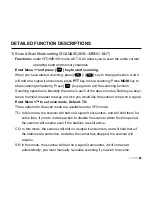
10)
+
Transmitter
time-out
timer
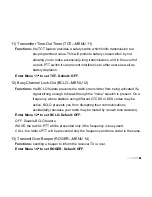
11)
+
Busy
channel
lock-out
12)
+
VOX
switch
13)
+
Transmit
over
beeper
14)
+
Dual
watch/
monitor
15)
+
Receive
saver
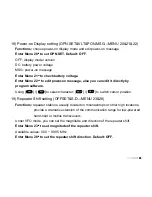
16)
+
Scan
mode
17)
Press [ ] or
[ ] to change
scan direction
Press [ ] or
[ ] to select
available values
Press [ ] or
[ ] to select
available values
Press [ ] or
[ ] to select
available values
Press [ ] or
[ ] to select
available values
Press [ ] or
[ ] to select
available values
Press [ ] or
[ ] to select
available values
Press [ ] or
[ ] to select
available values
+
Auto
keypad
lock
18)
Press [ ] or
[ ] to select
available values
ON / OFF
OFF / 30... / 270s
OFF / WAVE / CALL
ON / OFF
ON / OFF
ON / OFF
ON / OFF
TO / CO / SE
ON / OFF
Press [ ]
twice to exit
Press [ ]
twice to exit
Press [ ]
twice to exit
Press [ ]
twice to exit
Press [ ]
twice to exit
Press [ ]
twice to exit
Press [ ]
twice to exit
Press [ ]
twice to exit
Press [ ]
twice to exit
24
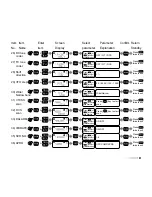
SHORTCUT MENU OPERATION
TX power
setting
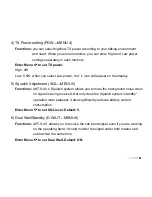
4)
+
Frequency
/Channel
scan
SQL level
setting
5)
+
Dual wait/
standby
6)
+
+
Priority
Transmit
2)
+
VOX level
setting
3)
+
Keypad
beeper
9)
Background
light color
8)
+
LED
display
mode
7)
+
Press [ ] or
[ ] to select
available values
Press [ ] or
[ ] to select
available values
Press [ ] or
[ ] to select
available values
Press [ ] or
[ ] to select
available values
Press [ ] or
[ ] to select
available values
Press [ ] or
[ ] to select
available values
Press [ ] or
[ ] to select
available values
Press [ ] or
[ ] to select
available values
1)
+
Item
No.
Item
Name
Enter
item
Screen
Display
Parameter
Explanation
Confirm Return
Standby
Select
parameter
Press [ ] or
[ ] to change
scan direction
Press [ ]
twice to exit
Press [ ]
twice to exit
VOX level: 1~8
High / Low
SQL level: 0~9
ON / OFF
ON / AUTO / OFF
COLOR1 / COLOR2 /
COLOR3
ON / OFF
EDIT / BUSY
Press [ ]
twice to exit
Press [ ]
twice to exit
Press [ ]
twice to exit
Press [ ]
twice to exit
Press [ ]
twice to exit
Press [ ]
twice to exit
Press [ ]
twice to exit
Press [ ] key to
start scanning
Summary of Contents for AHT-9-UV
Page 2: ......
Page 4: ......
Page 6: ......
Page 7: ...Professional FM Transceiver User s Manual USING TIPS UNPACKING AND CHECKING EQUIPMENT...
Page 8: ......
Page 10: ......
Page 11: ...05 05 AHT 9 UV 1500 7 4V CHARGING BATTERY PACK Charging Precaution...
Page 12: ......
Page 14: ......
Page 15: ...09 Picture 5 Picture 6 Installing Belt Clip PUSH PUSH...
Page 16: ......
Page 17: ...Professional FM Transceiver User s Manual GETTING FAMILIAR...
Page 18: ......
Page 20: ......
Page 22: ......
Page 24: ......
Page 26: ......
Page 28: ......
Page 30: ......
Page 32: ......
Page 34: ......
Page 36: ......
Page 38: ......
Page 40: ......
Page 42: ......
Page 44: ......
Page 46: ......
Page 48: ......
Page 50: ......
Page 52: ......
Page 54: ......
Page 56: ......
Page 58: ......
Page 60: ......
Page 62: ......
Page 64: ......
Page 66: ......
Page 68: ......
Page 70: ......
Page 72: ......


