26
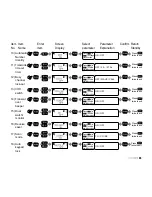
Item
No.
Item
Name
Enter
item
Screen
Display
Parameter
Explanation
Confirm Return
Standby
Select
parameter
+
Voice
prompt
19)
+
Power-on
display
20)
+
Battery
power
voltage
21)
+
Power-on
message
22)
+
A.
Repeater
shift
23)
+
B.
Display
channel
name
+
Channel
name
editing
24)
+
TX/RX
tone
coder
25)
Press [ ] or
[ ] to select
available values
Press [ ] or
[ ] to select
available values
Press [ ] or
[ ] to select
available values
Press [ ] or
[ ] to select
available values
Press [ ] or
[ ] to select
available values
Press [ ] or
[ ] to select
available values
Press [ ] or
[ ] to select
available values
Press [ ] or
[ ] to select
available values
ON / OFF
OFF / DC / MSG
Show current voltage
Edit power-on message
0.000-99.995MHz
ON / OFF
Input channel name
OFF / QT / DCS
Press [ ]
twice to exit
Press [ ]
twice to exit
Press [ ]
twice to exit
Press [ ]
twice to exit
Press [ ]
twice to exit
Press [ ]
twice to exit
Press [ ]
twice to exit
Press [ ]
twice to exit
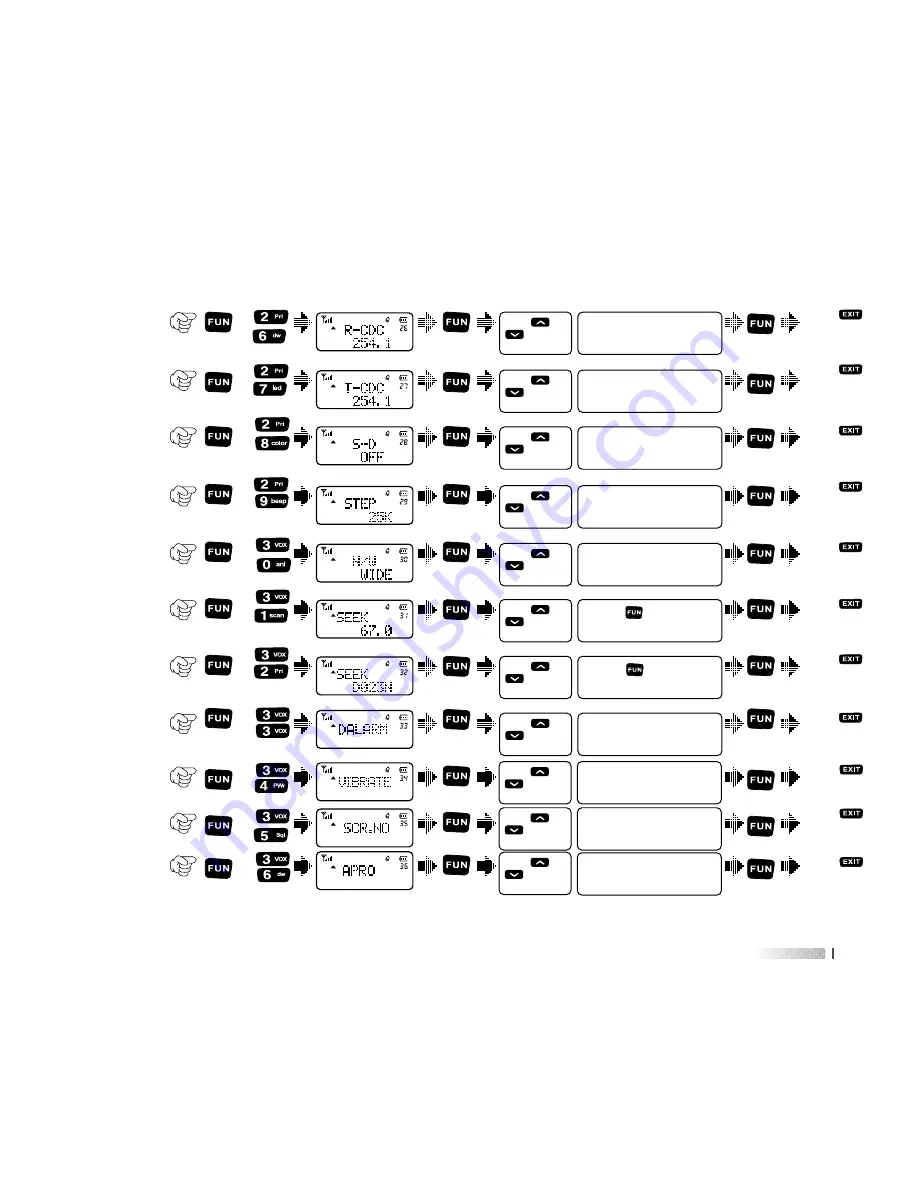
27
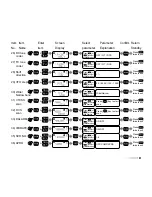
Item
No.
Item
Name
Enter
item
Screen
Display
Parameter
Explanation
Confirm Return
Standby
Select
parameter
+
RX tone
coder
26)
+
TX tone
coder
27)
+
Shift
direction
28)
+
VFO step
29)
+
Wide/
Narrow band
30)
Press [ ] or
[ ] to select
available values
OFF / QT / DCS
Press [ ] or
[ ] to select
available values
OFF / QT / DCS
Press [ ] or
[ ] to select
available values
+ / -
Press [ ] or
[ ] to select
available values
5K / 6.25K / 10K...100K
Press [ ] or
[ ] to select
available values
Wide/Narrow
+
CTCSS
scan
31)
+
DCS
scan
32)
+
DALARM
33)
Press [ ] or
[ ] to change
scan direction
Press [ ] key to start
scan
Press [ ] or
[ ] to change
scan direction
Press [ ] key to start
scan
Press [ ] or
[ ] to select
available values
ON/OFF
+
VIBRATE
34)
Press [ ] or
[ ] to select
available values
ON/OFF
+
SCR.NO
35)
Press [ ] or
[ ] to select
available values
1-8
+
APRO
36)
Press [ ] or
[ ] to select
available values
OFF/COMP/SCRA
Press [ ]
twice to exit
Press [ ]
twice to exit
Press [ ]
twice to exit
Press [ ]
twice to exit
Press [ ]
twice to exit
Press [ ]
twice to exit
Press [ ]
twice to exit
Press [ ]
twice to exit
Press [ ]
twice to exit
Press [ ]
twice to exit
Press [ ]
twice to exit
Summary of Contents for AHT-9-UV
Page 2: ......
Page 4: ......
Page 6: ......
Page 7: ...Professional FM Transceiver User s Manual USING TIPS UNPACKING AND CHECKING EQUIPMENT...
Page 8: ......
Page 10: ......
Page 11: ...05 05 AHT 9 UV 1500 7 4V CHARGING BATTERY PACK Charging Precaution...
Page 12: ......
Page 14: ......
Page 15: ...09 Picture 5 Picture 6 Installing Belt Clip PUSH PUSH...
Page 16: ......
Page 17: ...Professional FM Transceiver User s Manual GETTING FAMILIAR...
Page 18: ......
Page 20: ......
Page 22: ......
Page 24: ......
Page 26: ......
Page 28: ......
Page 30: ......
Page 32: ......
Page 34: ......
Page 36: ......
Page 38: ......
Page 40: ......
Page 42: ......
Page 44: ......
Page 46: ......
Page 48: ......
Page 50: ......
Page 52: ......
Page 54: ......
Page 56: ......
Page 58: ......
Page 60: ......
Page 62: ......
Page 64: ......
Page 66: ......
Page 68: ......
Page 70: ......
Page 72: ......

