WHIRLPOOL ON/OFF
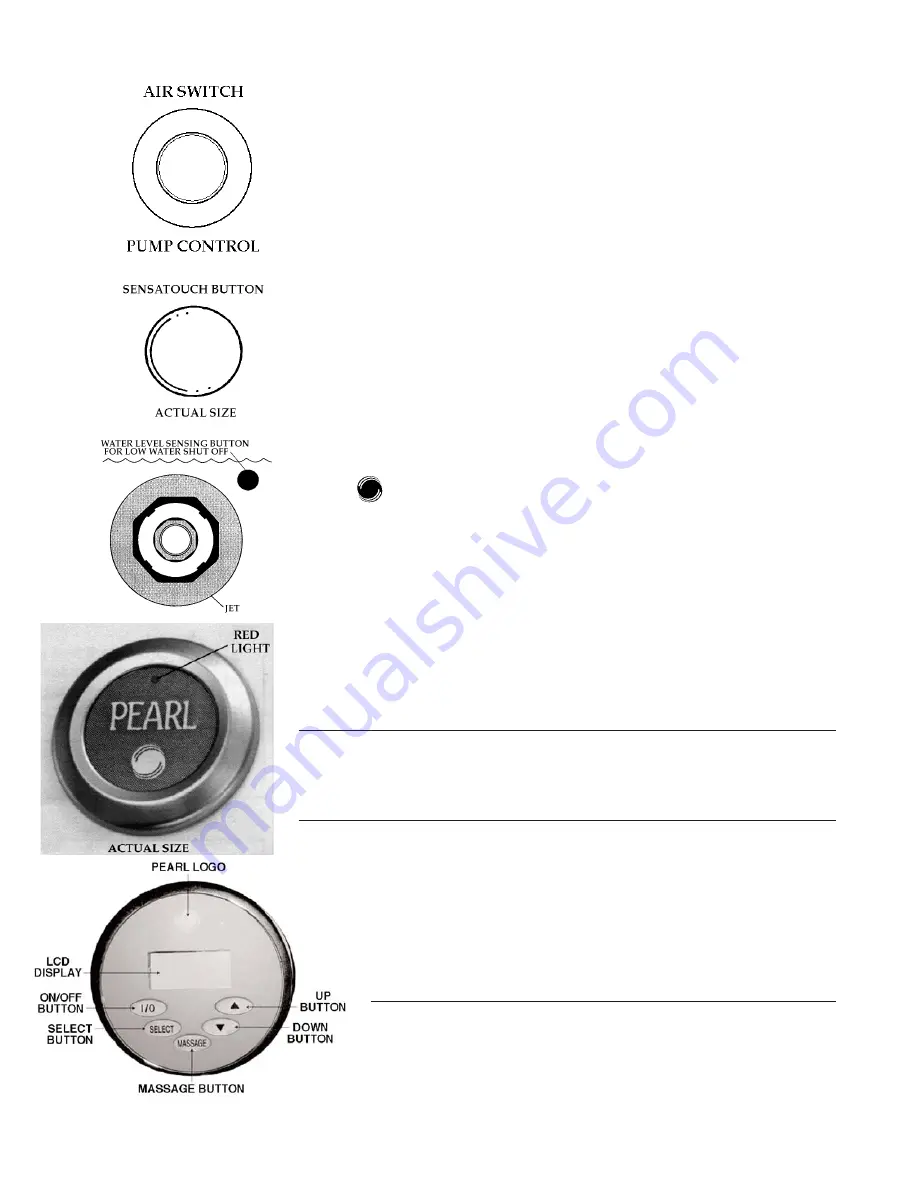
AIR SWITCH PUMP CONTROL
Essence - NA
Designer - NA
Classic - S
The air switch pump control (fig. 9a) allows on/off control operations from with-
in the tub.
SENSATOUCH™ ELECTRONIC WHIRLPOOL CONTROL
Essence - NA
Designer - S Classic - O
The SensaTouch electronic control (fig. 9b) allows touch on/off operation from
within the tub when water entirely covers the low water shut off button, (fig. 9c)
located near the highest jet. The low water shut off also protects the pump from
operating without water in the tub. This control includes an integral 20 minute
timing function.
If wall switch is required by code, it should be left on at all
times.
MULTISPEED PUMP AND CONTROL
Essence - NA
Designer - O Classic - O
Electronic control features on/off operation from within the tub when water is above
sensing button. An integral 20 minute timing function is included. The Multispeed
control (fig. 9d) allows the bather the choice of their own speed.
• Press to start the whirlpool. Press again to turn off.
• Press and hold to change speeds. Press and hold through all speeds for mas-
sage mode.
• Whirlpool will turn off by pressing the button a second time or automatically
after 20 minutes of operation. (Built in timer)
• Red light flashes four times if the water level in the tub is too low. Motor oper-
ates only when water is 2" over the highest whirlpool jet. A low water shut off
near this jet protects the pump from operating without water.
SMART-TOUCH CONTROL
Essence - S Designer - S*/O* Classic - NA
* Standard on Ducetta. Comes with optional Back Massage and PearlAir.
Note:
Not all controller features work with every model of bath. To determine the model
and accessories included with your bath, consult the documentation supplied
with it. The accessories included with your bath at the time of purchase determine
which controller features you can use.
Controller Operating Instructions
It is highly recommended that you familiarize yourself with the con-
troller features (fig. 9e & 9f) and read all the instructions before oper-
ating the controller. Unless otherwise stated, you should proceed
through the operating instructions in the order provide and in accor-
dance with the accessories available with your tub.
Note:
When the controller is initially powered up, the LCD and control but-
tons light up. After a few moments, “Config” appears on the LCD followed
by a number (for example, #10). The number is a code identifying the acces-
sories (pump, blower, lighting) included with your bath and is used for serv-
icing
(do not attempt to service the controller yourself)
. “Pearl Baths” then
fig. 9e
fig. 9d
fig. 9a
fig. 9b
fig. 9c
6


