14
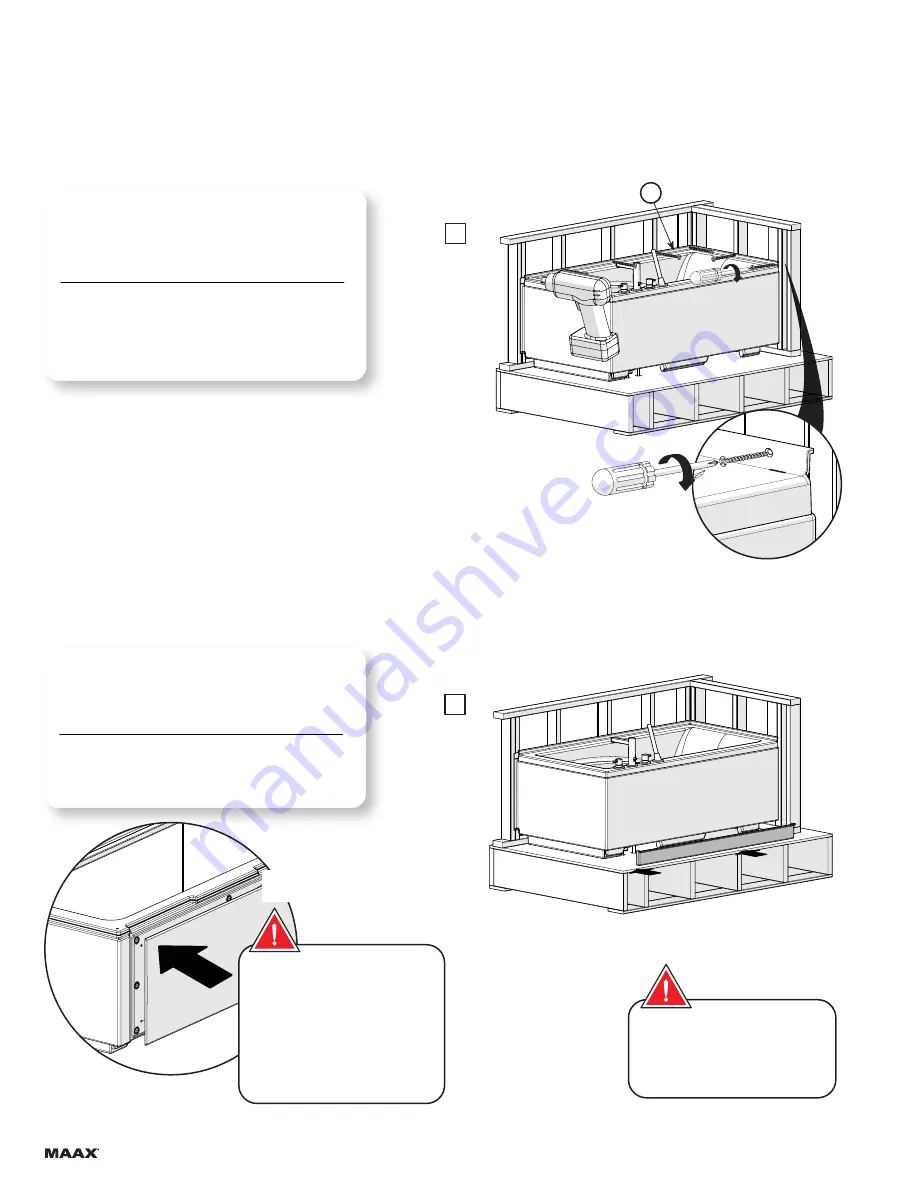
With a 1/8" drill bit, drill holes in the bathtub flange (3)
then secure the bathtub (3) to all the wall studs with
#8 x 1¾" screws (not included).
Only pre-drill the
flange not the studs.
HAND TIGHTEN ONLY!
Avec une mèche de 1/8 po, percer dans la bride du
bain (3) et visser le bain contre les montant avec des
vis #8 x 1 3/4 po (non fournies).
Percer les brides
seulement, et non les montants.
SERRAGE À LA MAIN SEULEMENT!
3
4
STEP
Bathtub preparation and installation (cont'd)
ÉTAPE
Preparation et installation de la baignoire (suite)
4.7
Check me!
Cochez-moi!
Install toe-kick as shown
. The toe-kick height can be
adjusted.
THE TOE KICK SHOULD BE TOUCHING THE
FLOOR
installer le coup-de-pied amovible.
La hauteur du
coup-pied est ajustable.
LE COUP-DE-PIED DOIT TOUCHER LE SOL.
4.8
Check me!
Cochez-moi!
The toe-kick must be stick on the
finishing wall to hide the gap between
the skirt and the wall.
Le coup-de-pied doit être collé sur le
mur fini pour cacher le trou entre la
jupe et le mur.
If ordered with the magnetic access
panel with frontal clip: Set up the ac-
cess panel with the help of magnets,
finish the positioning and use the
middle clips to secure it in position.
Si acheté avec le panneau d'access
magnétique avec clip central: Mettre
en place le panneau d'accès a l'aide
des aimants, finir le placement et
utiliser les clips au centre pour le fixer
en position.
ACCESS PANEL STEP
ÉTAPE PANNEAU D'ACCESS


