262391
87
Revision A
1020948
A
B
C
D
E
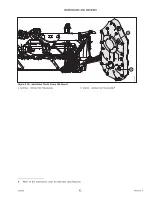
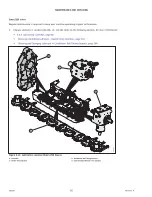
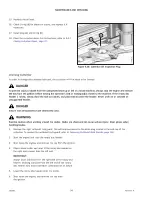
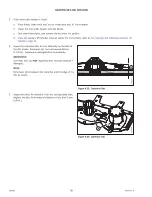
Figure 4.17: Cutterbar Curtain
4.
Insert seven cutterbar door stud bolts (B) into the precut
holes on curtain (A).
NOTE:
R1 SP for windrowers shown in the illustration; R1 FR
similar.
5.
Install seven large washers (C).
6.
Install liner panel (D) against the washers.
7.
Install seven nuts (E) onto the bolt studs. Torque the nuts
to 28 Nm (248 lbf in).
IMPORTANT:
To avoid damaging the bolt studs, do
NOT
overtighten
the nuts.
8.
Close the cutterbar doors. For instructions, refer to
Closing Cutterbar Doors, page 27
Removing Cutterbar Inboard Curtain
Remove the cutterbar inboard curtain if it is torn or cracked.
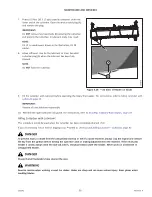
DANGER
To prevent injury or death from the unexpected start-up or fall of a raised machine, always stop the engine and remove
the key from the ignition before leaving the operator
’
s seat or making adjustments to the machine. If the rotary disc
header is raised, always close the lock-out valves, and place blocks under the header. Never work on or beneath an
unsupported header.
DANGER
Ensure that all bystanders have cleared the area.
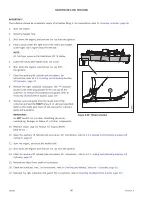
WARNING
Disc blades have two sharp cutting edges that can cause serious injury. Exercise caution and wear gloves when working
with, or near, blades.
1.
Position the rotary disc header at an appropriate height for the task.
2.
Shut down the engine, and remove the key from the ignition.
3.
If the rotary disc header is raised:
a.
Place blocks under each end, or just inside each end, of the cutterbar.
b.
Lower the rotary disc header onto the blocks.
c.
Shut down the engine, and remove the key from the ignition.
d.
Close the auxiliary lift cylinder lock-out valves. For instructions, refer to
3.2.1 Locking and Unlocking Auxiliary Lift
.
4.
Open the cutterbar doors. For instructions, refer to

