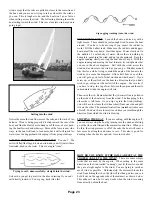
There should be no scallops or sagging between the clips on the
jib sail. A loose leading edge is a very common error and hurts
the boat’s windward performance.
GENOA (OPTION)
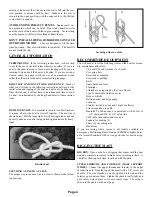
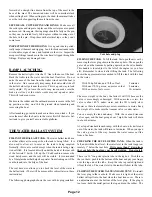
The genoa is similar to the jib, except that it is longer along the
base. It adds a lot of power and is particularly effective in light
winds. The genoa is installed and handled just like the jib, except
the genoa sheets go to the spring mounted standup blocks on the
coaming aft of the cabin as shown in the following photo. The
lines go outside of the shrouds that hold up the mast, and outside
the cockpit lifelines.
Genoa sheet blocks
REDUCING THE AREA OF THE MAIN-
SAIL (REEFING)
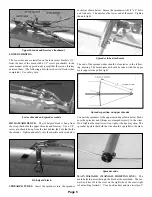
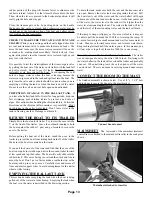
Don’t hesitate to reef when it blows hard. The boat will be more
manageable and usually faster. To reef, release the mainsail hal-
yard and lower the sail until the reefing eye on the front edge of
the sail (about as high on the sail as the first batten) can be hooked
into the hook that is attached to the gooseneck. Then re-tighten
the halyard. Release the line that holds the rear end of the sail to
the boom. Pass the line through the reefing eye on the sail (near
the bottom batten), around the boom, back through the reefing
eye, then to the cleat at the end of the boom.
Reefed mainsail, lower rear corner
DAGGERBOARD
The daggerboard slides up and down in a watertight compartment
(daggerboard trunk) just to the rear of the mast.
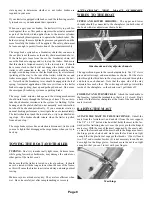
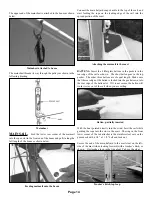
It is raised and lowered by a line attached to the top of the board.
The line then passes through a pulley that straddles the trunk,
through a cheek block on the cabin top, and then back to the winch
and cleat at the rear of the cabin. The line is shown below.
Daggerboard lifting line
The daggerboard should be fully lowered when sailing into the
wind, to keep the boat from sliding sideways. It should be raised
completely for sailing downwind. When sailing at right angles to
the wind, leave the board about half way down. At low speed
under power, the boat steers a lot better when the board is about
1/4 down.
When powering over 6 mph, the board must be all
the way up.
At high speed, water may splash out the top of the
trunk. Lower the board an inch, and it will stop.
Never let the top of the board go more than 57” below the level
of the deck. If it goes lower, it will not have adequate support
in the hull, and may be damaged.
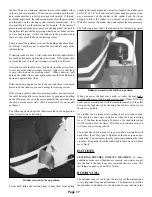
There is a knot in the lifting
line, and a large washer ahead of the knot that will come to rest
against the cheek block when the board is down as far as it should
go. Do not move the knot. If you replace the line, make sure the
knot is in the same exact position. There is also a safety line that
prevents the top of the board from going more than 57” below the
deck level. Do not remove this line.
To remove the board, lower the mast and remove the mast from its
mast step. The board can be lifted straight up and out.
The board has a few holes in the bottom and top that will let it fill
completely with water This eliminates its bouyancy and improves
the stability of the boat. When raising the board, do it slowly to
allow water to drain out and make it easier to retract. With the
board full of water, it is heavy.
RUDDERS
The rudders are lowered by pulling on lines that protrude from the
deck near the mooring cleats at the back of the boat. They are
raised by pulling on the lines that are secured to the rear end of the
Page 16
Summary of Contents for 26 M
Page 28: ...Page 28...


