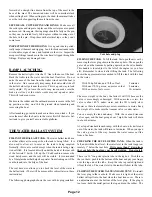
and people unless the rear of the trailer is blocked up. The weight
could cause the trailer and boat to tip backwards.
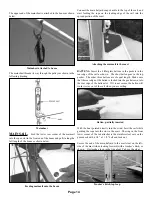
Make sure the outboard motor is secured in the up position for
trailering. Make sure the rudders are tied securely and pinned in
the full up position. Use 1/4 x 2 1/4” bolts and lock nuts. The rud-
ders will get a lot shorter if they drag on the ground.
SECURING THE BOAT TO THE TRAILER.
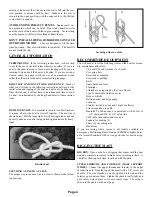
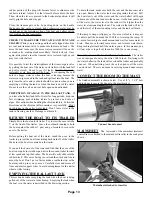
Secure the trail-
er winch line to the nose of the boat as shown.
Trailer winch line
While keeping tension on the line, winch the nose of the boat
snugly into the rubber bow support. Make sure these connections
are good. If the line comes loose, the boat could slide off the trail-
er and end up on the street, or worse.
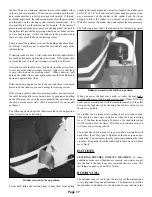
As an extra security measure, tie a line to one of the trailer side
rails near the rear end of the trailer. Pass the line across the boat
(under the lifelines). Pull it tight, and tie it to the other trailer rail.
PREPARING THE TRAILER
LUG NUTS.
It is the owner’s responsibility to check the lug nuts that secure the
wheels to the axle before using the trailer. The wheels may have
been removed in order to ship the boat to you or your dealer, and
it is important for you to check to see that the lug nuts have been
properly tightened. If they are loose, you may lose a wheel, with
serious consequences. They should be tight. The proper setting,
using a torque wrench, is 90 to 95 foot pounds. Don’t move the
trailer one foot before checking these nuts.
TIRE REGISTRATION.
It is a federal law that the first licensed purchaser of any trailer
must register the tires with the trailer manufacturer. Your dealer
will complete the tire data on your warrantee card. Your name,
address, tire serial numbers, trailer serial number and date of pur-
chase must appear on this card. Make sure the dealer completes
the warrantee registration card and sends it to us.
TIRE PRESSURE.
Before using the trailer, check the tire pressure. The recommend-
ed pressure can be found on the side wall of the tire near the tire
size. Always check the tire pressure when the tires are cold, at fre-
quent, regular intervals. Under inflation can cause excessive sway
at certain speeds and could cause loss of vehicle control. Over
inflation can cause a tire to blow out, which is also very danger-
ous. Check tire pressure at frequent, regular intervals.
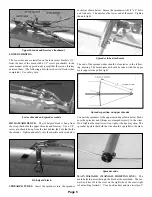
HITCHING UP.
Place the trailer coupler over the ball on your
car, and make sure the snap latch is all the way down and locked.
Try to lift the trailer off the ball to make sure the hitch is securely
fastened to the ball. Insert a 1/4” x 1 1/2” bolt and lock nut
through the locking hole in the tongue to make sure the trailer
doesn’t jump off.
Tongue weight should be between 250 and
300 pounds.
The ball should be 2” in diameter. You are respon-
sible for making sure that the trailer hitch ball is secured properly
to your car. Get some qualified help in mounting the hitch to the
solid structure of your vehicle. Get help to install proper wiring.
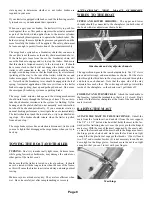
SAFETY CHAINS.
Secure the 2 safety chains to a solid bumper
brace or through the hole normally provided in your hitch. Leave
enough slack so that the trailer and car may turn without putting
tension on the chains. Secure the end of the chain to itself with
the locking device mounted on the end of the chain. This must be
solid. Remove the nose wheel caster and raise the jack.
TOTAL WEIGHT.
The weight of the boat, trailer and all other
items cannot exceed 4200 pounds. The empty boat, without mast
and cushions, weighs approximately 2600 pounds. The trailer
weighs 720 pounds.
LIGHT WIRES.
Our trailers come with a trunk harness (you
will find it plugged into the trailer harness near the hitch). The
exposed ends of the trunk harness must be wired into the light
wiring of your car. The other end should be plugged into the trail-
er wiring harness. The wires on the trunk harness and trailer
wiring are color coded as follows:
White - Ground
Brown - Running lights or tail lights
Yellow - Left turn signal and brake light
Green - Right turn signal and brake light
Blue - Backup switch
Make sure you have a good ground or you won’t have lights. The
light mounting brackets and ground wire must contact metal (you
may have to scratch through the paint). Don’t use the trailer
unless all lights are working. You must have the following:
One red tail light at each rear corner of the trailer.
One red clearance light as part of the above lights.
One clear license plate illuminator.
One amber clearance light mounted at the outboard
rear corner of each fender. (These must be visible
from the front.)
One 3 lens gang light centered on the rear of the trailer.
You must have a red light at the extreme rear end of the load (nor-
mally on the end of the mast). Use a red flag in the daytime.
If your trailer has brakes, make sure the ground wire is connected
to the trailer frame, and not to the moving portion of the brake
actuator.
HYDRAULIC SURGE BRAKES.
State laws concerning
brakes vary. Check with your dealer or with your appropriate
Page 7
Summary of Contents for 26 M
Page 28: ...Page 28...


