background image

9

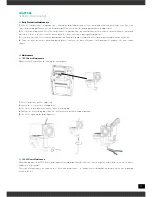
When printing bottom layer, Observe the print nozzle .If the material can not be pasted on the hotbed, you need to Adjusting nut coun-
terclockwise. If the tape was broken, you need to Adjust the nut clockwise. the best print state is that the material paste on hot bed is 
like flat ribbon rather than strips or flat shape.

CHAPTER3

PRINTING OPERATION 

3.1

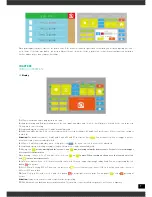
 Display

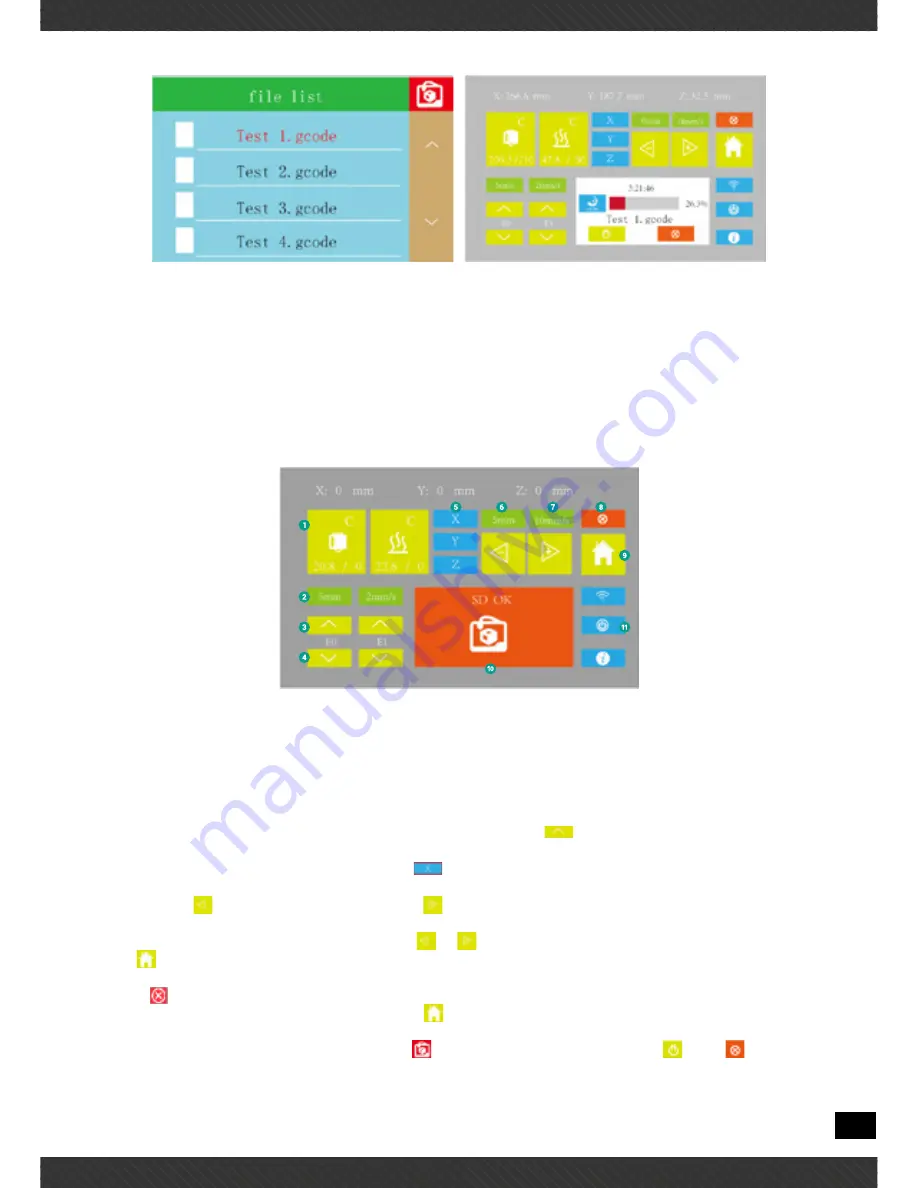
1.


XYZ axis coordinate values displayed in real time

2.

 Head preheating and Bed preheating: press the icon, input a number and click OK,  it will begin to heat while the icon turns red. 

Click again to cancel heating

3.

 Length and speed of extrusion: It can be manual adjusted

4.

 Extrusion and Retraction: E0 is to left extruder while E1 is to right extruder. E0 and E1 will be the same if there is only one extruder 

in machine. 

Attention:

 For double extruders , head 1 and 2 mean E0 and E1 in repetier host 

 Icon means retraction, we suggest not use 

retraction, it may cause extruder blocked 

5.

 XYZ axis: It will show red border when clicking the icon 


, then you can click to move the head or bed.

6.

 Length and speed of moving: moving settings of head, also it can be manual adjusted

7.

 Moving: Icon 

  means moving towards zero axis, icon  

 means moving outwards from zero axis. Zero axis is located in upper 

left corner of front print area.

When moving , choose X, Y or Z axis first, then click icon  

  or 

 to move. When coordinate shows zero, that you can only click 

icon 

 to move towards zero axis

8.

 Unlock the motors: If you click, the motors will be unlocked, then you can push printing head by hand. You can stop moving by click 

button 

 at any time.

9.

 Reset: When choosing X、Y or Z axis, you can press icon 

 to reset that axis you choose. If there is not any axis to be chosen, it 

will reset XYZ axis in turn.

10.

 Card: Click into SD card, select file ,and click button  


 on top right corner to print. You can pause 

 or stop 

  printing at 

ay time

Attention:

 It may need several seconds to preheat before printing.

11.

 Wifi, Automatic shutdown and system information: This machine is not installed components, not for use temporary

Summary of Contents for EB-3DP322-017

Page 1: ......

Page 2: ...2 REV 020817 ...

Page 3: ...ty Precautions Chapter 1 Overview 1 1 Overview 1 2 Front side and back view 1 3 Tool box accessories Chapter 2 Installation 2 1 Take Out the Machine 2 2 Install the Material Shelf 2 3 Dismantle the Model 2 4 Paste the Masking Tape 2 5 Install the Material for example PLA materials 2 6 Manual Calibration 2 6 1 Enter the adjust platform interface 2 6 2 Fine Tune the Printing Platform 2 7 Printing th...

Page 4: ... or electric shock Please use approved power cord replace damaged power cords Do not allow metal or liquids to touch the internal parts of the printer Otherwise it may result in fire electric shock or other serious injury 5 in any of the following cases please turn off the printer and then unplug the power cord from the power outlet Printer smoking or abnormal smell The printer makes strange noise...

Page 5: ...8 520 410 965 300 200 500 PRISMA Series Industrial 3D Printers have functions of resume printing with power off and resume printing with filament used out which can greatly save the client s losses Continue printing with power off please open the UPS switch when machine is printing if power off the machine will pause prin ting the storage battery will keep printing condition for 24 hours after pow...

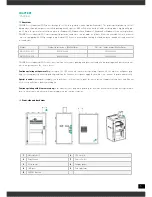
Page 6: ...rial shelf 10 Art knife 5 Tweezer 11 Diagonal pliers 6 Feeding tube 12 Power cable CHAPTER2 INSTALLATION 2 1 Take Out the Machine It may need two people to take out the machine with the handle beside the machine 2 2 Install the Material Shelf Step 1 Use the M3 screw which attached in the accessory box Step 2 Plugged in Step 3 Turn on the power switch ...

Page 7: ...e and paste a new one pay attention not to overlap and too large clearance If the tapeis are not broken it can be reused 2 5 Install the Material for example PLA materials 1 Hung filament on the shelf and insert the filament through the Material detector 2 Click the printing head button and input 200 that it turns red means beginning heating and the head temperature will auto matically rise to 200...

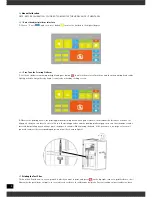
Page 8: ...latform printing nozzle has a gap of about 0 1 mm about the thickness of a sheet of A4 paper then you can insert a sheet of A4 into the printing nozzles and the printing platform gap to ensure that the paper can be inserted but printing nozzle will not press the paper is suitable While moving the head if the clearance is too large or too small you need to adjust the corresponding adjustment nut As...

Page 9: ...ause extruder blocked 5 XYZ axis It will show red border when clicking the icon then you can click to move the head or bed 6 Length and speed of moving moving settings of head also it can be manual adjusted 7 Moving Icon means moving towards zero axis icon means moving outwards from zero axis Zero axis is located in upper left corner of front print area When moving choose X Y or Z axis first then ...

Page 10: ...a minute so that you can remove the model easily 3 3 Pause or Continue to Print While printing files you can pause it at any time 1 Press the pause on the display panel the machine will be suspended to print 2 When printer pause press the start icon it will continue to print 3 If press stop icon the printer will stop printing 3 4 Power Outages If want to cut off the printer power please press the ...

Page 11: ...d extrusion materials 4 Clean the door do not use ammonia based glass cleaner on the door otherwise it will damage the window Use only ethanol cleaner 4 2 Maintenance 4 2 1 500 Hours Maintenance About every 500 hours should clean up the nozzle parts 1 Cut off the printer power completely 2 Loosen the screw on the heating blocks 3 Use sleeve to twist down the nozzle take out feeding tube 4 Take out...

Page 12: ...maged power tube damaged CHAPTER6 SUPPORT Products from PRISMA by MachPower make use of the legal warranty offered by the reseller Returns are only possible in case of integrity items that is not assembled lit or used The information in this manual is subject to change at any time without prior notice All information and contents contained in this manual are copyrighted To the extent permitted by ...

Page 13: ...13 NOTE ...

Page 14: ...14 ...

Page 15: ......

Page 16: ...16 ...

Reviews: