background image

Measurements

15

Spectrophotometer 

NANOCOLOR

®

 Advance 1.0, 11.2020

11.  Measurements

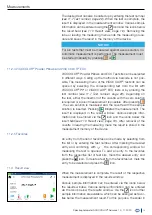
11.1  Basic Functions

Pressing the 

 icon will open the basic functions menu with six 

different measurement options to choose from. With the excep-
tion of the turbidity measurement, the tests in the 

Basic Functions


menu are independent of the cuvette size used.
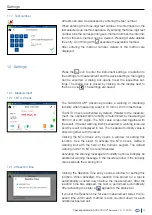
After a measurement, various sample information can be entered 
via the icons below the results window. 
Using the icon 

, further sample information can be added below 

the measurement result. For this purpose the desired sample in-
formation can be activated using the slider in front of the option. 
Further options are available via the 

 icon.

With the command 

Do not save 

the measurement result is not 

saved in the instrument memory when the cuvette is pulled out or 
when leaving the menu.

NOTICE

This function is only available in 

Open Mode

.

11.1.1 Factor

The basic function 

Factor

 enables the determination of measure-

ment results through the multiplication of an absorbance with a 
user defined factor. 
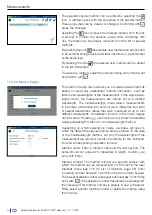
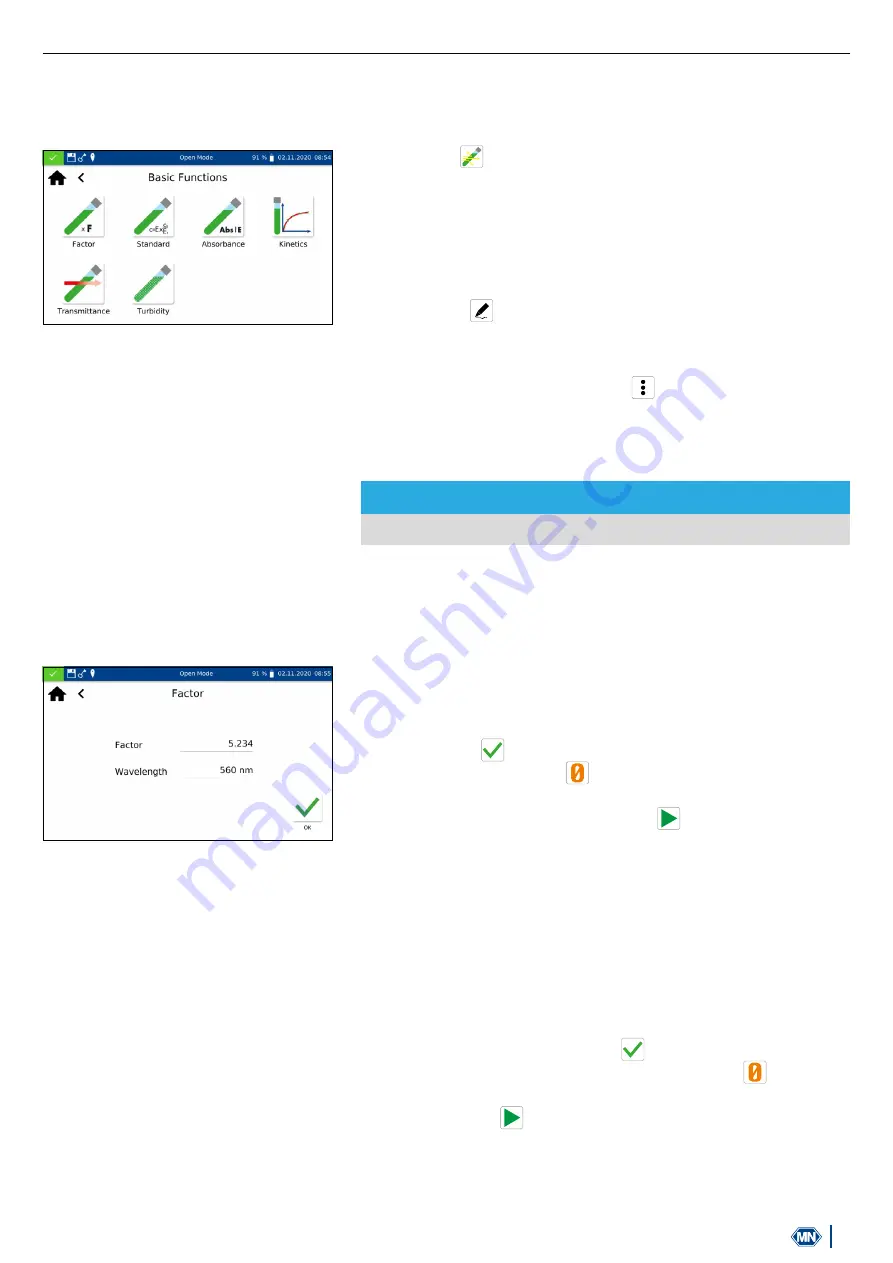
After having selected this method, a window will appear asking for 
the factor (max. 7 digits) and the wavelength for the measurement 
and calculation.
Confirming with 

 opens the measurement window. Inserting the 

zero solution and pressing 

 will initiate the zero measurement. 

After the successful measurement of the zero solution, the sample 
solution needs to be inserted. Pressing 

 will start the measure-

ment process. After the measurement has been completed, the 
measurement result will be displayed in the result window.

11.1.2 Standard

The basic function 

Standard

 enables the definition of a sample’s 

concentration on basis of the concentration of a standard solution 
and a zero solution. After having selected this method, a window 
will appear asking for the standard concentration (max. 7 digits) 
and the wavelength for the measurement.
Confirming the entries by pressing 

 will open the measurement 

window. Inserting the zero solution and pressing 

 will initiate 

the zero measurement. Then, the standard solution needs to be 
inserted. Pressing 

 will start the sample measurement.

Summary of Contents for NANOCOLOR Advance

Page 1: ...Water Analysis MACHEREY NAGEL Spectrophotometer NANOCOLOR Advance Operating instruction www mn net com www mn net com...

Page 2: ...xes and and sliders 14 10 2 5 List functions 14 11 Measurements 15 11 1 Basic Functions 15 11 1 1 Factor 15 11 1 2 Standard 15 11 1 3 Absorbance 16 11 1 4 Kinetics 16 11 1 5 Transmittance 17 11 1 6 Tu...

Page 3: ...3 7 IQC 35 13 7 1 System Monitoring 35 13 7 2 Standard Measurement 36 13 8 User Accounts 37 14 Results 39 14 1 Filter Results 40 14 2 Export from data memory 40 14 2 1 Export to CSV file 40 14 3 Delet...

Page 4: ...pectrum of water analysis 2 CE marking The CE marking declares that the product complies with the fol lowing European Community harmonisation legislation European Directive 2011 65 EU on the restricti...

Page 5: ...hibited to dispose of the device through public waste disposal systems Note also the information in the Disposal section The CE symbol indicates fulfillment of the applicable harmonization legislation...

Page 6: ...ce Do not work on internal parts of the unit Non compliance will invalidate any warranty claim Use of the hazard warning DANGER Indicates an imminent or potentially hazardous situation which if not av...

Page 7: ...f the test kit used During normal operation of this device it may be necessary to use chemicals that are hazardous to your health or biologically harmful samples Before handling these substances read...

Page 8: ...otometric range 3 0 Abs Photometric accuracy 0 003 Abs at 0 0 0 5 Abs 1 at 0 5 2 0 Abs Photometric linearity 0 5 at 0 5 2 0 Abs 1 at 2 Abs with neutral glass filters at 546 nm Stray light 0 5 Measurem...

Page 9: ...ce CAUTION Multiple hazards Only qualified personnel should perform the instructions described in this step WARNING Risk of electric shock Make sure that the power cord is not damaged Check the suitab...

Page 10: ...ttery Before the first operation the battery of the instrument should be fully charged 1 Remove the interface cover on the left side of the unit e g by using a coin Fig 1 2 Connect the power cord to t...

Page 11: ...REY NAGEL 9 Device views 9 1 Front and side view A B B D E F H G Fig 3 Front view Fig 4 Side view A Touch screen capacitive B Universal cuvette slot for rectangular cuvettes 16 mm OD 24 mm OD and rect...

Page 12: ...apacitive touch screen All entries are made via the touch screen Only switching on off is done via the button on the front of the device 10 2 1 Operating the touch screen The spectrophotometer is oper...

Page 13: ...ation If the white X is displayed against a red background the device is occupied with a measurement or there is an error The unit is controlled via the application bar During an ongoing measuring pro...

Page 14: ...are active as soon as a check mark is set If you touch an empty checkbox it is marked with a check mark and is activated If you touch a checkbox with a tick the tick is removed and the checkbox is de...

Page 15: ...e ment results through the multiplication of an absorbance with a user defined factor After having selected this method a window will appear asking for the factor max 7 digits and the wavelength for t...

Page 16: ...ple solution needs to be inserted Pressing will start the measurement process After the measurement has been completed the mea surement result is displayed in the result window The absorbance values o...

Page 17: ...ction Turbidity enables the measurement of a sam ples nephelometric turbidity You will be prompted to insert the sample solution Insertion of the test tube and pressing initiates the measurement After...

Page 18: ...ways It is however not possible to select a standard test by barcode identification The measuring menu of the rectangular cell tests can be opened by selecting the corresponding test from the list wit...

Page 19: ...or a direct measurement is possible After pressing the zero solution is measured and the cuvette with the sample solution is inserted Pressing initiates the measurement The result is displayed in the...

Page 20: ...ilution is displayed either as 1 X or 1 X The result of the measurement is converted automatically Further options are available via the icon The Submethod entry allows you to change the reference uni...

Page 21: ...measured value In many cases the reagents change the intrinsic color or turbidity of the sample All changes to the sample such as dilution addition of chemicals that influence pH or redox potential mu...

Page 22: ...or test 0 32 but instead of 0 5 mL R2 add 0 5 mL distilled water 0 34 Cationic surfactants 4 Proceed as described in the instructions for test 0 34 but instead of 0 5 mL R2 add 0 5 mL distilled water...

Page 23: ...ition correction values are determined as described above for test 0 64 0 84 Residual hardness 1 Open Residual hardness test tube add 5 0 mL sample solution close and mix 0 85 Starch 100 No correction...

Page 24: ...alues for NANOCOLOR standard tests with sample blank value For the tests in this category the correction can already be per formed during the measurement In these cases the following solutions are use...

Page 25: ...d entering any search term fil tering by test name or test number is possible a global search is performed in the list of predefined methods If a test is called up via the selection list there is no a...

Page 26: ...mode allows measurements to be made while taking into account sum difference and ratio of several absorbance values that were measured at up to four different wavelengths A calibration function to th...

Page 27: ...opening selection list The result will be displayed with the selected number of decimals A maximum of three decimals is possible Calculation formula Multi wavelength measurement In this section the wa...

Page 28: ...th range The measurement is performed against a zero solution After selecting the menu via a sample name can be entered The lower and upper limit of the measurement range must be selected The scan is...

Page 29: ...fault Parallel to the measure ment the nephelometric turbidity is determined by measuring at 860 nm at a 90 angle The NTU value is reported together with the result If the set warning limit is exceede...

Page 30: ...ar By setting the Menu entries setting information such as the last used scan area or LOT number is automatically called up the next time it is used 12 1 5 Dilution Format Clicking the Dilution format...

Page 31: ...that pops up After you have selected the desired region the list will close and the chosen region will be applied The currently selected region is displayed next to the setting and is highlighted in b...

Page 32: ...setting is 20 minutes The brightness of the display can be adjusted with the Display Brightness slider 12 3 1 Logging In case of problems the logging of the device can be exported via this menu and s...

Page 33: ...3 After pressing a dialogue with a confirmation prompt will open Confirming with Yes will reset the instrument to the default settings 13 4 Battery Clicking the Battery icon opens a window with inform...

Page 34: ...the supplied calibration cuvette into the cuvette shaft the calibration is continued automatically The calibration can be interrupted by clicking the icon When the calibration is finished the date of...

Page 35: ...triggered manually by pressing A lamp test wavelength accuracy test filter test and detector test are performed This can take a few minutes No measurements are possible during this time The result of...

Page 36: ...re available for purchase in the form of standard and spiking solu tions see also www mn net com Press the icon to open the window for specifying the desired standard opens Now either the desired stan...

Page 37: ...method The submethod can be selected via the Submethod field if there are several submethods for one method Via the fields Setpoint and Margin the target value and confidence range for the standard m...

Page 38: ...t user is only possible in Open mode To change the user mode press and select Turn on User Mode or Turn on Open Mode depending on the activated user mode After confirmation the device changes the user...

Page 39: ...general Measurement Results The IQC memory can be called up via the icon in the IQC menu see 13 7 IQC page 35 or by selecting the IQC Measurement Results tab in the measurement data memory Besides th...

Page 40: ...e name has the format mn nc advance_results_NADXXXX_YYYY MM TT_HHMMSS csv mn nc advance_results_NADXXXX_YYYY MM TT_HHMMSS_X csv Contains data of the scan with entry X mn nc advance_IQC_results_NADXXXX...

Page 41: ...ICE Make sure that there is no cuvette and no cuvette adapter in the cuvette shaft NOTICE Malfunction or damage of the device due to incorrect mainte nance Maintenance of the device may only be carrie...

Page 42: ...loth 15 3 Cleaning of Housing Wipe the outside of the device with a damp cloth Use water or a mild detergent Then dry the device with a soft cloth 15 4 Replacement of Halogen Lamp 1 Disconnect the dev...

Page 43: ...e Connect the device to a power source Charge the battery of the device Wavelength is outside the permitted range 340 800 nm The wavelength range of the device extends from 340 800 nm Enter a waveleng...

Page 44: ...908 Calibration cuvette 24 mm 916930 Mains adaptor for NANOCOLOR VIS II VARIO Mini and Advance 919156 Case for NANOCOLOR Advance 919757 Cuvette adaptor A and B for 16 mm and 24 mm for NANOCOLOR Advanc...

Page 45: ...ed These include in particular all claims for damages resulting from consequential or indirect damages In addition our general terms and conditions of sale and delivery apply in the currently valid ve...

Reviews: