background image


© Copyright. Machine Solutions Inc. All Rights Reserved 

PM-62319 REV B 


Equipment User Manual


Welcome


Machine Solutions, Inc. (MSI) would like to take this opportunity to thank you for 

purchasing your new 43-B Bench Top Die Necker. At MSI, we are dedicated to bringing 
innovative process development solutions to both medical device and nonmedical 
organizations.  MSI looks forward to helping your organization provide life-improving 
devices to your customers, today and tomorrow. 

Purpose


The purpose of this document is to describe the electrical and software design of 

the control system for the Split Die Thermal Bonder, 43-B. This document also includes 
operator instructions. 

Overview


The  Beahm  Designs  Die  Necker  progressively  reduces  tubing  diameter  by  means  of  a 

heated  die.    Tubing  is  manually  drawn  through  the  die  to  the  desired  length.    The  I.D.  of  the 
interchangeable dies controls the diameter of the neck tubing. 

Contents


1.


Benchtop Die Necker     


2.


Power cord


Installation


1.


Place the system on a level, sturdy surface at an ergonomically viable height for 
the user. 

2.


System power is in the OFF position. 

3.


Connect the power cord to the main control unit. 

4.


Connect the air supply to the system and then to a clean, dry, and filtered 
compressed air source. 

5.


Connect the electrical umbilical to the die base unit. 


Summary of Contents for BEAHM DESIGNS 43-B

Page 1: ...BEAHM DESIGNS BENCH TOP DIE NECKER MODEL 43 B...

Page 2: ...rations 5 Temperature Controllers Omega Platinum Model 6 PID Configuration PRoG PId S 6 Action Response PRoG PId ACtN 6 Autotune Timeout PRoG PId A to 6 Autotune PRoG PId TUNE 7 Adjusting Temperature...

Page 3: ...design of the control system for the Split Die Thermal Bonder 43 B This document also includes operator instructions Overview The Beahm Designs Die Necker progressively reduces tubing diameter by mean...

Page 4: ...ution hot surface Contact may cause burn Allow to cool before servicing Caution pinch point Keep hands and body parts clear while in operation User Alerts Do not use the equipment other than as prescr...

Page 5: ...r cooling air Off Cooling Air Flow Adjust Rotate the Cooling Flow valve counterclockwise to increase the cooling air flow and clockwise to decrease the cooling air flow System Operations CAUTION Die h...

Page 6: ...rs for manual tuning Lo Low clamping limit for Pulse and Analog outputs HI High clamping limit for Pulse and Analog outputs AdPt Fuzzy logic adaptive tuning Select the desired parameter Action Respons...

Page 7: ...characteristics If the process is hot or if the process is within 10 of Control Setpoint limit cycle oscillation will be performed with the tuning setpoint taken at the process value when the Autotun...

Page 8: ...refer to the following pages A full description of features can be found here https assets omega com manuals M5451 pdf Resetting the temperature controller NOTE Press to select the operator menu Oper...

Page 9: ...Copyright Machine Solutions Inc All Rights Reserved PM 62319 REV B 9 Equipment User Manual...

Page 10: ...Copyright Machine Solutions Inc All Rights Reserved PM 62319 REV B 10 Equipment User Manual...

Page 11: ...Copyright Machine Solutions Inc All Rights Reserved PM 62319 REV B 11 Equipment User Manual...

Page 12: ...Copyright Machine Solutions Inc All Rights Reserved PM 62319 REV B 12 Equipment User Manual...

Page 13: ...Copyright Machine Solutions Inc All Rights Reserved PM 62319 REV B 13 Equipment User Manual 2 Programming Mode Menu PRoG a The following table maps the Programming Mode PRoG navigation...

Page 14: ...Copyright Machine Solutions Inc All Rights Reserved PM 62319 REV B 14 Equipment User Manual...

Page 15: ...Copyright Machine Solutions Inc All Rights Reserved PM 62319 REV B 15 Equipment User Manual...

Page 16: ...Copyright Machine Solutions Inc All Rights Reserved PM 62319 REV B 16 Equipment User Manual 3 Operating Mode Menu oPER a The following table maps the Operating Mode oPER navigation...

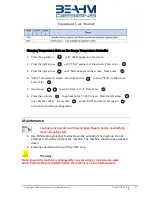
Page 17: ...h from C to F Press enter 6 Press the up arrow to go back to the 1 NI t screen Press the left arrow to go back to oPER Press enter to see RUN and press enter again to return to normal operating status...

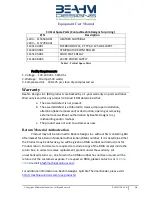
Page 18: ...er installation alteration label removal and or destruction opening or removing external covers without authorization by Beahm Designs Inc mishandling and or mishaps c The product was not sold to cust...

Reviews: