22
4-9 Auto Feed Operation
1) Shift Forward/Reverse Change Lever (4) on Headstock to decided the direction of
feeding.
2) Select proper Feed Speed by shifting Gear Box Feed Change Lever.
3) Push down Half Nut Engaged Lever (18) to proceed threading.
4) Push down Longitudinal Feed Select Lever (19) when it needs to feed the
tools crosswise.
5) Pull up Cross Feed Select Lever (19) when it needs to feed longitudinally.
4-10 Auto Feed Stop Operation
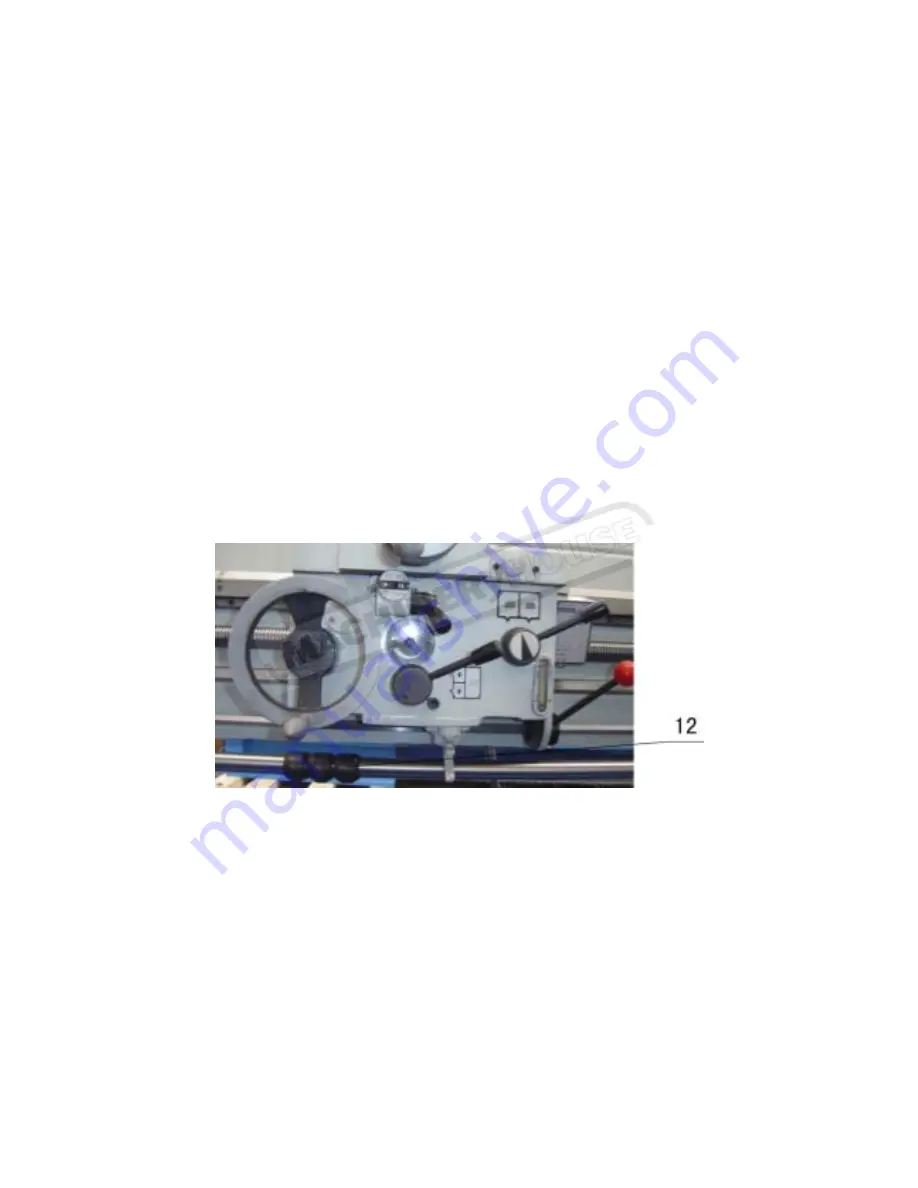
The machine is equipped with Auto Stop Feed in Apron. Screw up the screw on
Eccentric Centering Ring (12) and settle in appropriate position. Note that the highest
point of Eccentric Centering Ring have to be outward, and no mater it feed forward or
backward, you can both set the Eccentric Centering Ring in required position. Test
once before beginning to process in preventing to process in preventing unnecessary
damage or danger.
4-11 Four Position Auto Feed Stop Operation
If it requires processing the object to a certain length or object with steps, you may
use this utility to complete a multi-section cutting.
1) Place Eccentric Centering ring (12) to any require position, the highest point
indicates outward. Then fix it. Now you can try to operate Auto Feed of Apron to
make sure precisely position by adjusting Eccentric Centering Ring.
2) Secondly, turn Auto Centering Lever to second point. Fix second Eccentric
Centering Ring as per above method.
3) Same way to fix the third, the fourth.
4) While Apron is auto feeding forward, only the one Eccentric Centering Ring which
4 - 10
Page 21
Instructions Manual for CL-60A (L604)
07/09/2017
Summary of Contents for CL-60A
Page 11: ...12 illustration 2 3 Page 11 Instructions Manual for CL 60A L604 07 09 2017...
Page 12: ...13 illustration 2 3 Page 12 Instructions Manual for CL 60A L604 07 09 2017...
Page 17: ...18 4 Test Running 4 1 Operation Symbols Page 17 Instructions Manual for CL 60A L604 07 09 2017...
Page 26: ...27 C6246H Inch Page 26 Instructions Manual for CL 60A L604 07 09 2017...
Page 41: ...44 11 Parts List Assembly Headstock Page 41 Instructions Manual for CL 60A L604 07 09 2017...
Page 42: ...45 Page 42 Instructions Manual for CL 60A L604 07 09 2017...
Page 43: ...46 Page 43 Instructions Manual for CL 60A L604 07 09 2017...
Page 44: ...47 Page 44 Instructions Manual for CL 60A L604 07 09 2017...
Page 45: ...48 Page 45 Instructions Manual for CL 60A L604 07 09 2017...
Page 46: ...49 Page 46 Instructions Manual for CL 60A L604 07 09 2017...
Page 52: ...55 Gearbox Page 52 Instructions Manual for CL 60A L604 07 09 2017...
Page 53: ...56 Page 53 Instructions Manual for CL 60A L604 07 09 2017...
Page 54: ...57 Page 54 Instructions Manual for CL 60A L604 07 09 2017...
Page 55: ...58 Page 55 Instructions Manual for CL 60A L604 07 09 2017...
Page 60: ...63 Saddle Page 60 Instructions Manual for CL 60A L604 07 09 2017...
Page 61: ...64 Page 61 Instructions Manual for CL 60A L604 07 09 2017...
Page 62: ...65 Page 62 Instructions Manual for CL 60A L604 07 09 2017...
Page 67: ...70 Apron 134 Page 67 Instructions Manual for CL 60A L604 07 09 2017...
Page 68: ...71 Page 68 Instructions Manual for CL 60A L604 07 09 2017...
Page 69: ...72 Page 69 Instructions Manual for CL 60A L604 07 09 2017...
Page 74: ...77 Tailstock Page 74 Instructions Manual for CL 60A L604 07 09 2017...
Page 77: ...80 Bed Assembly Page 77 Instructions Manual for CL 60A L604 07 09 2017...
Page 78: ...81 Page 78 Instructions Manual for CL 60A L604 07 09 2017...
Page 79: ...82 Metric Page 79 Instructions Manual for CL 60A L604 07 09 2017...
Page 80: ...83 Inch Page 80 Instructions Manual for CL 60A L604 07 09 2017...
Page 86: ...89 Steady Rest Page 86 Instructions Manual for CL 60A L604 07 09 2017...
Page 88: ...91 Follow Rest Page 88 Instructions Manual for CL 60A L604 07 09 2017...


