background image

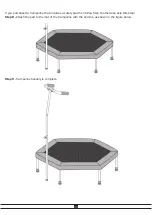
If you purchased a trampoline that includes a safety pad then follow Step 8 (otherwise skip this step)

Step 8 - 

Attach the pad to the mat of the trampoline with the Velcros, as shown in the figure below.

Step 9 - 

Trampoline Assebly is complete.

11

Summary of Contents for UPPERBOUNCE SK-HX50

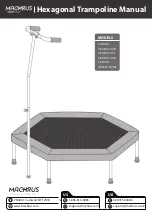
Page 1: ...Trampoline Manual MODELS SK HX50 UBG HX50 OR UBG HX50 YL UBG HX50 GR SK HX40 UB03EC 40HXE US 1 845 810 0083 support machrus com UK 020 3150 0484 support machrus co uk 2 Mill St Cornwall NY 12518 www M...

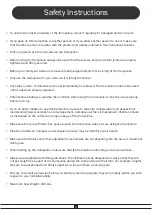
Page 2: ...t a toy If you do allow children to use this trampoline be sure to take into consideration and assess their mental and physical condition and developement and above all their temperament Children shou...

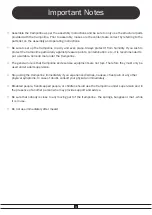
Page 3: ...mended to put a suitable non slip mat under the trampoline The general rule is that trampoline and exercise equipments are not toys Therefore they must only be used under adult supervision Stop using...

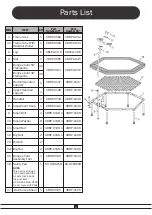
Page 4: ...ube With Handrail Holder UBRP 0082 UBRP 0104 UBLEG 10 6 UBRP 0095 UBRP 0137 UBRP 0138 UBRP 0139 UBRP 0140 UBRP 0108 1 UBRP 0108 1 UBRP 0108 1 UBRP 0108 1 UBRP 0108 1 UBRP 0143 SK HX40PAD UBRP 0105 UBR...

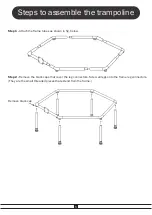
Page 5: ...ep 1 Attach the frame tubes as shown in fig below Step 2 Remove the black caps that cover the leg connectors Screw all legs onto the frame leg connectors They are the small threaded pieces that extend...

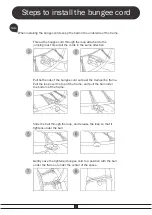
Page 6: ...Step 4 Fasten the bungee cords to the frame tube First fasten the two bungee cords closest to every corner as shown in the figure below You will then fasten the remaining cords in an alternating mann...

Page 7: ...ll the cords in the same direction Pull both ends of the bungee cord out past the trampoline frame Pull the loop over the top of the frame and pull the ball under the bottom of the frame Slide the bal...

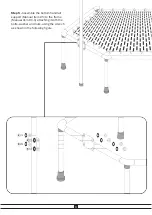
Page 8: ...1 A attaching it with the bolts washer and nuts using the wrench as shown in the following figure Step 5 Assemble the bottom handrail support Manual Item 5 to the frame Manual Item 1 A attaching it w...

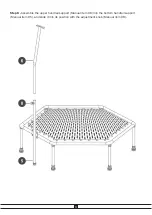
Page 9: ...Step 6 Assemble the upper handrail support Manual item 6 into the bottom handrail support Manual item 5 and slide it into its position with the adjustment knob Manual item 8 9...

Page 10: ...Manual item 7 to the upper handrail support Manual Item 6 Attach the handle by using the screws Manual items 12 and 14 and the reinforced sheet Manual Item 17 as shown in the picture below tighten the...

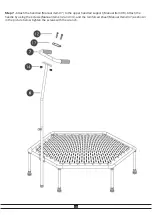
Page 11: ...trampoline that includes a safety pad then follow Step 8 otherwise skip this step Step 8 Attach the pad to the mat of the trampoline with the Velcros as shown in the figure below Step 9 Trampoline Ass...

Page 12: ...ement part for your trampoline Our Customer Service Department staff are trained in the details of all trampolines and will help you find the right part to get you bouncing again PLEASE GIVE US A CALL...

Reviews: