D8B Manual • Chapter 3 • page 68
Tape Banks
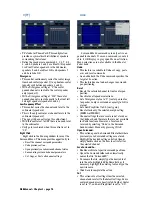
Any of the following tape I/O cards can be
installed in the three Tape In/Out slots and the
Alt I/O slot in the back of the Digital 8•Bus.
•
DIO•8:
This digital card provides input and output
connections via ADAT and T/DIF protocol. Tape
bank I/O selections are completely selectable on
both inputs and outputs. The DIO•8's provide
direct dubbing capabilities from ADAT optical to
T/DIF format, and vice versa. Powerful patching
options interconnect the Alesis ADAT format and
the TASCAM DA series format.
•
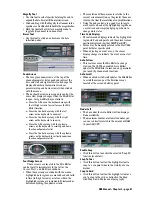
PDI•8:
The PDI•8 AES/EBU card connects to any
digital device that supports the AES/EBU digital
audio format. The PDI•8 allows for real-time
sample rate conversion and status bit designation
on its four pairs of inputs (click the Setup button
in the Digital I/O Setup window).
•
OPT•8:
The low-cost OPT•8 I/O card provides
8 channels of ADAT light pipe digital I/O.
•
AIO•8:
This analog card offers 8 balanced line-
level inputs and outputs per card through two
25-pin D-Sub connectors.
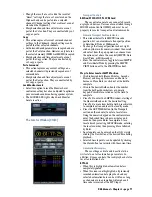
Alt I/O
• The Alt I/O 1–8 operates according to the type of
I/O card installed (AIO•8, DIO•8, PDI•8, OPT•8).
• The Alt Inputs feed the 8 Alt Return channels on
Fader Bank 3.
• The Alt Outputs are configured via the Alt I/O 1–8
pull-downs in the Network Setup window.
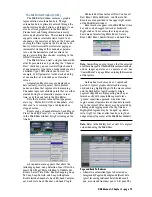
Stereo I/O
• These settings apply to the Stereo Digital I/O
AES/EBU and S/PDIF connections on the back of
the Digital 8•Bus.
• The Stereo I/O is configurable for three levels of
UV22 dither: Off, Low, and Normal.
• In addition, Status Bits can be designated as Pro
or Consumer, usually applicable to DAT mastering.
Check with the device manufacturer (i.e., DAT,
CD-R, MiniDisc) for the proper setting.
• The Digital In toggles between AES/EBU and
S/PDIF. This selection determines which Digital
source is displayed on the Pre Insert>Channel
Patch list, and which Digital In is available to the
Control Room section.
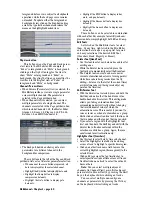
Licensing
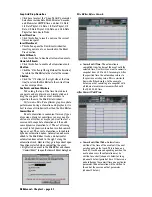
• This window provides an interface to install and
authorize plug-ins.
• Authorized plug-ins are indicated by an opened
padlock icon.
• Locked plug-ins are indicated by a closed
padlock icon.
• To authorize a locked plug-in, highlight it in the
Licensing window and click Authorize.
• Enter a valid UNLOCK CODE to authorize each
locked plug-in. Unlock codes are furnished by
Mackie Designs.
Unlock Procedure
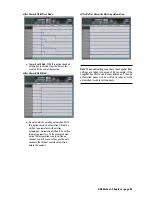
1. Locate your D8B’s Electronic Serial Number
(ESN). This is displayed at the bottom of the
Licensing window. The 12 digit ESN is made
from numbers 0–9 and letters A–F. It is unique
to the D8B console, and is not the serial number
label on the rear of the control surface or CPU
chassis.
2. You will also need your plug-in’s serial number
which is printed on the floppy disk label or on a
card that came in the plug-in’s box.
3. To obtain the unlock code, have the ESN and plug-
in serial number ready. Then you have two options:
• Log on to the Mackie plug-in authorization
web page:
(http://www.mackie.com/products/d8b_v5/
plugin_reg.html), or
• Phone Mackie Tech Support at 800-258-6883.
4. When you have obtained an unlock code, click
Authorize
in the Licensing window and enter your
unlock code in the UNLOCK CODE box. Click
Enter, restart the CPU, and enjoy your newly
expanded console.
Summary of Contents for d8B V5.1
Page 1: ...OWNER OWNER S MANUAL S MANUAL...
Page 9: ...D8B Manual Chapter 1 page 3 Chapter 1 Getting Ready...
Page 27: ...D8B Manual Chapter 2 page 21 Chapter 2 Where Is It...
Page 47: ...D8B Manual Chapter 3 page 41 Chapter 3 What s On TV...
Page 101: ...D8B Manual Chapter 4 page 95 Chapter 4 Applications...
Page 147: ...D8B Manual Appendices page 141 Appendices...
Page 198: ......


