25
FX
FX
View
FX: Introduction
The
FX View
looks and works
similarly to that of the EQ and
Compressor and Gate views.
To get to the
FX View
, simply
swipe the entire view up (again,
from any gray area) from the
Gate and Compression View
.
From here, you may swipe down
to get back to the
Gate and
Compression View
. Additionally,
you may swipe left and right in a
gray area to stay in the
FX View
,
but instead change the channel.
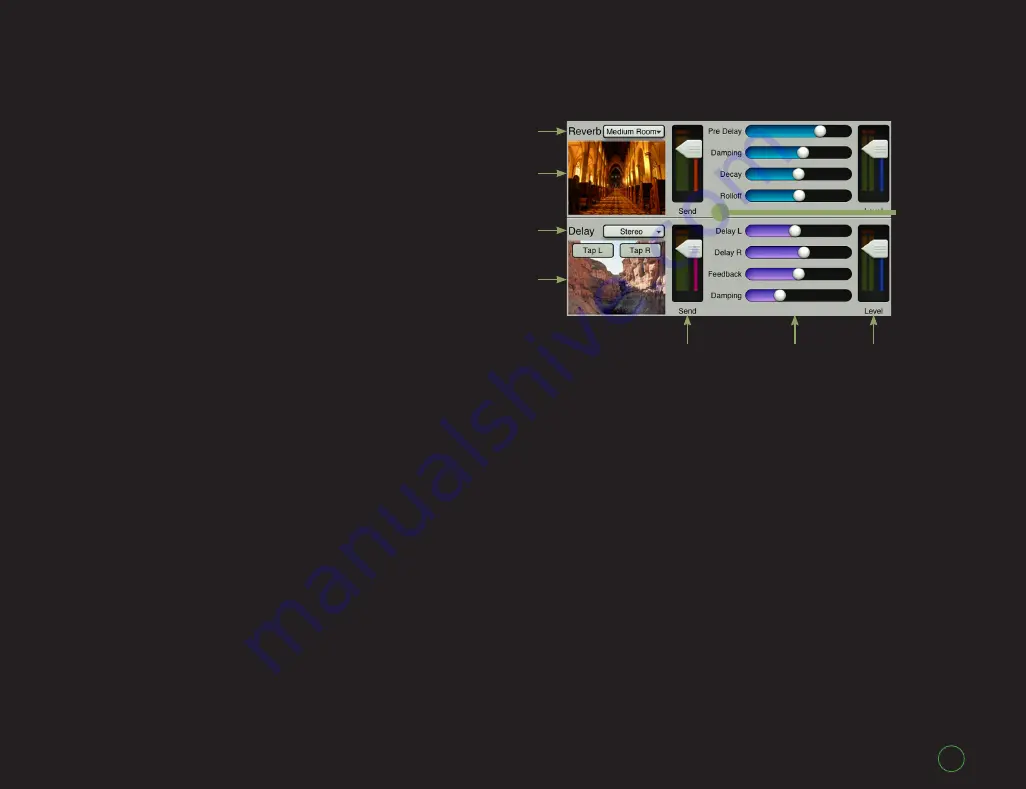
The Reverb and Delay are
presented together as one
view with the Reverb on top
and the Delay below.
As seen in the image to the
right, the Reverb and Delay sections
have similar layouts, so we will go
through their features left to right.
FX: Name & Image
On the far left is the Reverb and
Delay name and image displaying
what type of effect is currently in
use. This may be changed by
tapping the name of the currently
assigned effect and choosing a
new one from the popover.
FX: Sends
Directly to the right of each
image is a vertical send level
slider, one for each effect. This
controls the level being sent to
the effect from the current channel.
FX: Controls
To the right of each send level
are various FX controls which may
be slid horizontally, increasing in
value to the right. The FX controls
are not affected on a per-channel
basis, but rather globally.
FX: Returns
And residing on the far right
side of the
FX View
are the vertical
return channel level sliders and
meters. Again, one for each effect.
These control the return level from
the effect to the selected output.
You have seen these before as they
are the same faders displayed in
the
Mixer View
. A pair exists [one
for Reverb, one for Delay] for each
selected output.
FX
Sends
FX
Returns
FX
Controls
Reverb
Name &
Image
Delay
Name &
Image
The
Swipe
Zone


