52
MDR 24/96
MDR
24/
96
Making a Vocal Comp
When recording vocals, it is often necessary to record multiple takes and combine
them into a perfect vocal composite or comp. This can easily be done with the
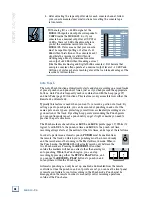
MDR24/96 virtual tracks. When recording, use the Auto Take function to record
seven good vocal takes on the first seven virtual tracks of your vocal track. Do
this by pressing the
AUTO TAKE
button. Let’s record the vocal on track 11;
record a take, return to the beginning and record again. The Auto Take function
will increment track 11 to the second virtual track. Repeat this until you have
seven good takes. If along the way you have a take that you know is not a keeper,
press the
DELETE LAST
button to remove it from the hard drive and press
RECORD
and
PLAY
buttons to record the virtual track again. When you perform
the Delete Last function in Auto Take mode, the MDR24/96 realizes that the last
take was thrown out and will not increment to the next virtual track until the
current virtual track is filled with an acceptable take. When all seven are finished,
press the
AUTO TAKE
button again to turn the function off.
We must now edit the seven virtual tracks into one master comp. We will place the
comp on Virtual Track 8. We will not cut any data from the first seven virtual
tracks; we will only copy it. This way, our first seven virtual tracks will remain
intact as we recorded them, in case we ever need them again. We must first listen
to all seven virtual tracks to determine which are our keepers. To begin, press the
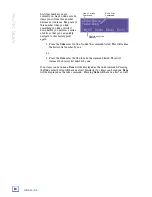
TRACK/EDIT
button, then press the
Virtual Track
select button. Listen through
all seven takes of track 11 by manually changing the virtual track for the vocal.
For this example, we will do a simple comp, we will use the first verse from virtual
track 2 and the first chorus from virtual track 7. Select virtual track 2 and leave
this menu.
Now choose
Copy
in the Track/Edit menu. Press the
REC
(Record Ready) button
on track 11 to tell the MDR24/96 that we wish to edit this track. Find a blank
space after the first verse and mark this as the out point of our edit by selecting
End
. Now use the transport to find a blank spot just before the beginning of the
first verse and mark this as the Start point. Now press the
Copy
select button. We
have now copied the first verse to the clipboard. Return to the Virtual Tracks
menu and change the virtual track for track 11 to virtual track 8, our comp track.
Navigate back to the Paste menu. Be sure the track 11 Record Ready light is still
lit. Because we have not advanced the transport since we last marked the start
point for the copy, the locator will read the exact same point where we want to
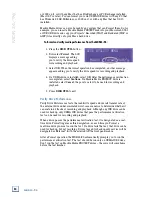
perform the paste. Press the
Start
button to mark this as the paste point and
press
Paste
. Our first verse has now been copied from the source track and pasted
on the comp track. We can now copy the chorus in the same way. Change the
virtual track to number 7, the source track for our first chorus. Go to the Copy
menu, select track 11, mark the end point and then the start point. Change the
virtual track back to number 8, go to the Paste menu, select track 11, mark the
start point, which again should be exactly where we want it already, and press
Paste
select button. We have now successfully created a vocal comp.
The key to this example is that we marked the End point of the copy first, and the
Start point second. After we mark the start point, the transport is already at the
exact position we want to start the paste. So if we simply do not change the
transport, we can perform the paste on whichever track we wish, on whichever
virtual track we wish, without moving in time whatsoever. This is how you can
move a track, or section of a track, from one track to another. This is why in most
situations it is a good idea to mark the end point of a copy or cut first, and the
start point second.


