


Owner’
s Manual
15
Owner’s Manual
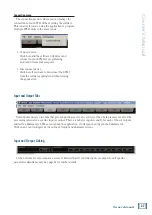
Ramps on changes
When engaged, sudden volume changes may be
avoided when changing parameter values, particularly
when using a Windows-based PC to control the unit.
Disengage this feature for live applications since instant
response to change is desired.
Turn the Edit2 [8] or Edit3 [9] Wheel to scroll
between
Ramps : On
and
Ramps : Off
[default]. If
changing, press the Enter Button [10] only once here.
The processor will return to the Ramps on changes
splash screen. Or press the ESC button [11] to return to
the System Utility menu without making any changes.
Software Version
Nothing may be changed here. Just press the Enter
Button [10] to view what version of software is installed
in this SP260. Press the Enter [10] or ESC [11] Button
to return to the Software Version splash screen.
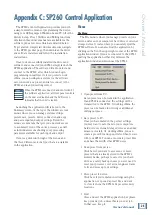
And that wraps up the System Utilities portion of the
SP260 training. Next we will take a look at the Preset
Utilities and what features are offered there.
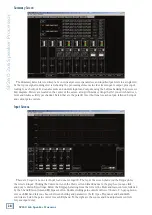
Preset Utilities
This is where to save, recall and delete presets
on the SP260. This is useful when the PA system
has multiple setups for different environments or
several loudspeaker systems utilizing varying setups.
Note:
As mentioned earlier, the SP260 will load up the last
state it was in when it was powered down.
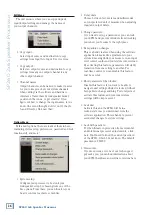
As discussed earlier, the way to get here from the
main menu is by pressing the Utility Button [12]. Once
inside the Utility Menu, scroll the Nav/Edit1 Wheel [7]
clockwise to Preset Utilities. One click should do the
trick. Now press the Enter Button [10] again to reach
the sub-menus as listed below:
• Recall a Preset
• Save a Preset
• Delete a Preset
Again, we will go through each of these sub-menus,
one-by-one (and in order), but know that...
(1) The Nav/Edit1 Wheel [7] is used to navigate
between the three Preset Utilities.
(2) The ESC button [11] is used to return to the
Preset Utilities menu.
(3) The Enter Button [10] is used to enter and edit
the chosen Preset Utility.
Without further ado, press the Enter Button [10] to
enter Recall a Preset.
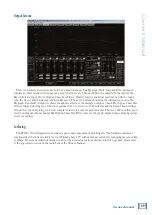
Recall a Preset
If a preset has been saved earlier, it may be recalled
here. If no presets are stored in the unit, the processor
will return to the Recall a Preset splash screen.
If presets are available, turn the Edit2 [8] or
Edit3 [9] Wheel to select which preset to recall. Press
the Enter Button [10] to select a preset and again to
confirm recall. The preset will load and the processor
will return to the Recall a Preset splash screen.
Save a Preset
Once the perfect system settings have been
dialed in, save it to the SP260 for recall later. Turn
the Edit2 [8] or Edit3 [9] Wheel to scroll between
presets 1 – 24. Press the Enter Button [10] once you
decide where to save the preset.
Now you get to name the preset. The Nav/Edit1
Wheel [7] moves the cursor left and right while the
Edit2 [8] and Edit3 [9] Wheels change the text.
Once satisfied with the results, press the Enter
Button [10] twice: once to select and again to
confirm. The processor will return to the Save a
Preset splash screen.
It is possible to save over an existing preset.
If attempted, you will need to confirm by pressing
the Enter Button [10] again. Or press the ESC
Button [11] to return to the Preset Utilities menu
without overwriting the preset.
Delete a Preset
Those “perfect” settings weren’t so “perfect” now, were
they? If a preset is no longer needed for recall, it may be
deleted here. It will help avoid confusion down the road
and keep the SP260’s memory clutter-free.
Turn the Edit2 [8] or Edit3 [9] Wheel to scroll
between presets 1 – 24. Press the Enter Button [10]
once you decide on which preset to delete.
Press the Enter Button [10] twice: once to select and
again to confirm. The processor will return to the
Delete a Preset splash screen.
And that wraps up the Preset Utilities portion of the
SP260 training. Next we will take a look at the Security
Utilities and what features are offered there.