background image

32

(tip-sleeve) connections. The nominal line
level at the 

AUX SEND

 jacks is 0dBu.

Depending on how you have decided to use

your aux functions, you could connect the

AUX SEND

 to headphone amplifier inputs,

monitor speaker amplifier inputs, reverb,
delay or other effects inputs, and so on.

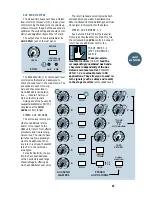
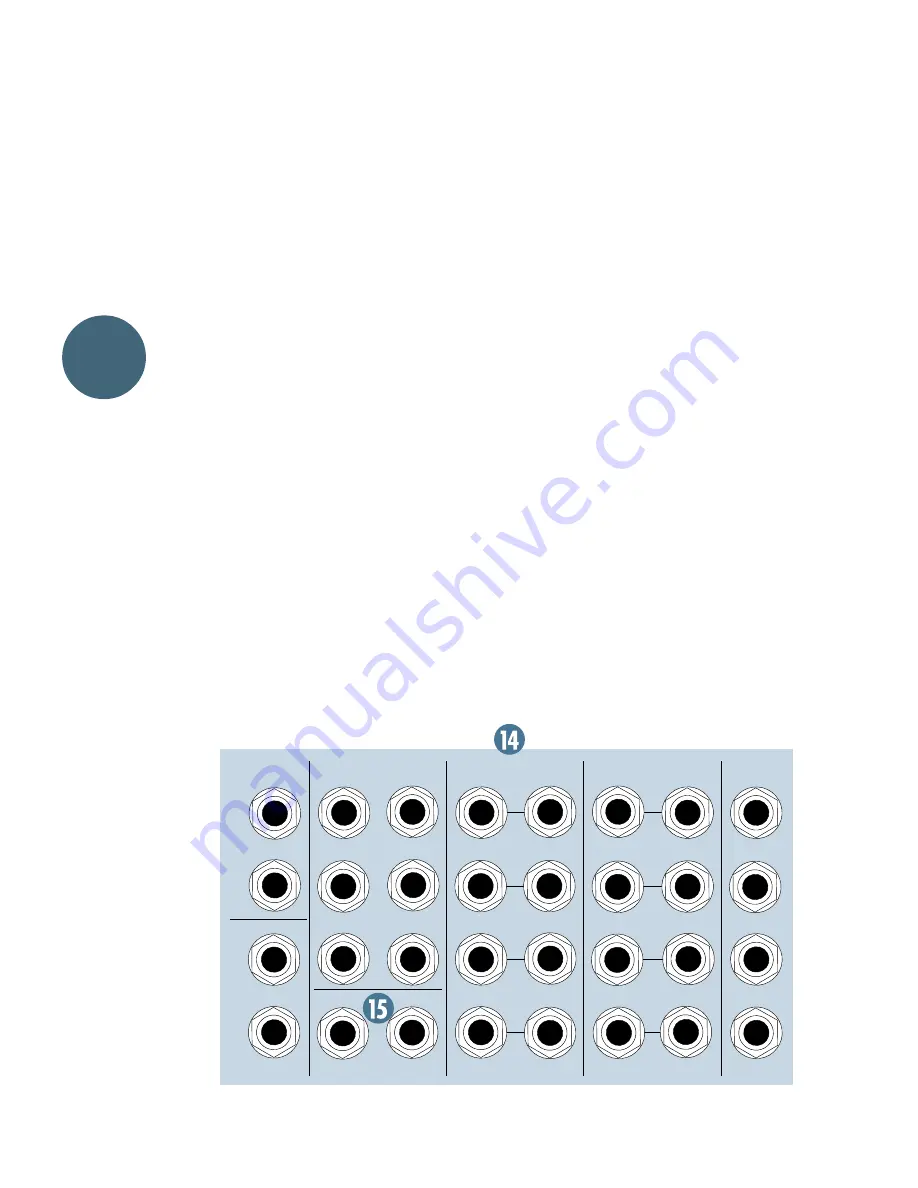
STEREO AUX RETURNS

If you are using effects such as delay or re-

verb, you must first send a signal to the effect
with an aux send, and then remix the output
of the effect back into your final mix. The
SR24•4 provides four stereo auxiliary return
inputs for this purpose.

The inputs to each stereo aux return are

made through a pair of 

1

/

4

" TRS (tip-ring-

sleeve) phone jacks [14]. These are balanced
line inputs which will accept input levels from
–10dBu to +22dBu, and will also accept un-
balanced cables. Return input clipping is at a
level of 22dB.

The sleeve of each jack is connected to

ground, the tip is signal “hot” (or “high” or “+”),
and the ring is signal “cold” (or “low” or “–”).

AUX RETURN ROUTING OPTIONS

You have several routing options with the

Aux returns. Please see “STEREO AUX
RETURNS” on page 21.

If you need even more assignment flexibility,

you can use one of the stereo line inputs.

Please read the 

TO AUX SEND 1–2

 con-

trols section on page 21 for more information
on the special tricks that these jacks can do.

NOTE: 

A very common arrangement is to

use a line input (mono or stereo) for effects
returns. This neat trick allows you to EQ your
EFX returns, route EFX to monitors, and as-
sign EFX to any output.

STEREO OR MONO PATCHING

For stereo operation, just plug balanced

1

/

4

" TRS (tip-ring-sleeve) or unbalanced 

1

/

4

" TS

(tip-sleeve) left and right phone plugs into the
left and right jacks. If you only have a mono ef-
fects return, insert that plug into the “

L

” input

jack. With no plug in the “

R

” jack, an internal

jack switch will automatically route the signal
in the “L” jack to both the left and right circuits
of the aux return for mono operation.

NOTE: 

The numbering systems for the aux

sends (1–6) and the aux returns (1–4) have
no correspondence with each other. In other
words, there is no reason that you must send
to a particular effects device with Aux Send 1
and then return that device in Stereo Aux
Return 1. As long as you can keep track of
what is where, you are free to intermix send
and return numbers. Send on 1, return on 4;
send on 5, return on 3, etc.

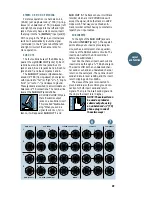
TAPE IN and OUT

For convenience, the main mixer outputs

that appear at the 

RIGHT

 and 

LEFT MAIN

OUTS

 (XLR) and 

MAIN OUTS L

 & 

R

(

1

/

4

" connectors) are also provided on unbal-

anced RCA-type jacks for connection to tape
recorder inputs [16]. Nominal level is 0dBu.

R

R

R

R

L

L

(MONO)

4

L

L

3

2

1

L

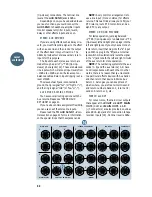
CONTROL ROOM OUT

AUX SENDS

STEREO AUX RETURNS

SUB INSERTS

MAIN INSERTS

3

6

2

5

1

4

R

R

L

R

L

7

3

8

4

6

2

5

SUB OUTS

3

4

2

1

1

MAIN OUTS

Layout

and Function

Summary of Contents for SR24 4

Page 1: ... O O 15 U O O 15 U O O 15 U O O 15 U O O 15 U O O 15 U O O 15 U O O 15 U O O 15 U O O 15 U O O 15 U O O 15 20 20 8kHz 100 8kHz 100 8kHz 100 8kHz 100 8kHz 100 8kHz 100 8kHz 100 8kHz 100 8kHz 100 8kHz 100 8kHz 100 8kHz 100 8kHz 100 8kHz 100 8kHz 100 8kHz 100 8kHz 100 8kHz 100 8kHz 100 U 20 20 U 16kHz 16kHz 16kHz 16kHz LAMP 12k HI 3k MID HI 800Hz MID LOW EQ STEREO AUX RETURNS AUX SEND MASTERS LEVEL 5...

Page 2: ...es Connect the SR24 4 or SR32 4 Audio Mixer only to a power supply of the type described in these operation instructions or as marked on the SR24 4 or SR32 4 Audio Mixer 8 Power Cord Protection Route power supply cords so that they are not likely to be walked upon or pinched by items placed upon or against them paying particular attention to cords at plugs convenience receptacles and the point whe...

Page 3: ...ech support return authorization etc Date of purchase TABLE OF CONTENTS Section 1 Introduction 2 Sensitivity Adjustment Procedure 3 Section 2 Making sound come out right now 4 Hookup Diagrams 7 Section 3 Panel layout 12 Front Panel 12 Channel Strips 1 20 12 Stereo Channel Strips 21 22 23 24 18 Output Section 20 Subs 1 4 20 Master Left Right Fader 22 Tape Return 22 Aux Send Masters 23 Stereo Aux Re...

Page 4: ...se lines Too late bud we ve already printed and shipped thousands of manuals We ll put you on the Manual Review Committee next time But seriously now we know that a lot of people just plug things right in and wait un til something doesn t work right before they even take the manual out of the bag Then they only look up the 800 number and call Customer Service Well we can t be your mother here but ...

Page 5: ...enterdetents TRIMcontrolsfullycounterclockwise off 4 Applyanaudiosignaltothatchannel sinput Theaudiocontentandlevelyouuseshouldbe representativeofwhatyouwillreallybedoing whenthetapestartsrolling orthecrowd startsdancing Forinstance makesure vocalistsdon twhisperduringthesound check forcingyoutosetthegainhigh onlyto havethemscreamduringtheshow causing anoverloademergency 5 Thatchannel s 20dB LED s...

Page 6: ...ed yourmixer grabyour stopwatchandgo Thisprocedurewillrequireasetofheadphones 1 PlugintheSR24 4 or32 4 andturniton 2 SettheSOLOmastercontrolto U This contolisthesmallwhiteknobontheright underthemeters 3 PlugyourheadphonesintothePHONES 1 jackontheback 4 PlugamicrophoneintotheMIC 1connector ontheback Onthefront makethefollowing settingsonchannelstrip1 MUTEbuttonup theredMUTE SOLOLEDshouldnotbelit SO...

Page 7: ...itor something youcanuseeitherthemicrophone inyourSR24 4 schannelstrip1ortheCDor cassetteplayerinchannelstrip23 24 31 32 onthe32 4 whicheveryou vechosen We thinkyoushouldusethetapeorCDandthat youputonsomemusicyoureallyloveand whichwillalwaysremindyouofwhata positiveexperienceyouhadonyourfirstday withyourSR24 4 Meanwhile 5 Push the SR24 4 channel strip fader that hastheCDinputuptothe U mark Engage ...

Page 8: ...sion you dliketomix 10 Decidewhichtapetrackisthebusiest which trackhasthemostconstantactivityand highestlevels Now onthechannelstripfor thattrack presstheSOLObuttonandturn theTRIMcontrolclockwiseuntilyougeta goodlevelontheSR24 4mainmeters A goodlevel mightbeaveragemeterreadings ofperhaps 7dBto0dB withoccasionalpeak readingsof 4dBto 7dB SeeSensitivity Adjustment Procedure page5 Now releasetheSOLOsw...

Page 9: ...ETURNS SUB INSERTS TAPE IN STEREO CHANNELS TAPE OUT SUB OUTS MAIN INSERTS TALKBACK 2 L R L 1 2 3 4 L R L R 1 2 L R L R L R 22 L R 24 21 23 L R L R 3 4 5 6 L R R L R MONO 1 1 2 1 2 3 4 3 4 5 6 7 8 AUX SENDS CNTRLRMOUT Right PA Speaker Zone Speaker Left PA Speaker Sonic Maximizer Stereo Digital Delay Harmonizer Stereo Compressor Stereo Reverb 2 Stereo Reverb 1 Stereo EQ Stereo EQ Power Amplifier Pow...

Page 10: ...UAL DIFFERENTIAL HIGH CURRENT DESIGN Power Amplifier Studio Monitors CH 1 CH 2 FULL SYMMETRY DUAL DIFFERENTIAL HIGH CURRENT DESIGN OL PWR HIGH RESOLUTION STUDIO MONITOR ON OFF OL PWR HIGH RESOLUTION STUDIO MONITOR ON OFF ch device input insert assignment 1 kick mic all optional submix 1 2 2 snare mic submix 1 2 3 drum overhead mic L mic submix 1 2 4 drum overhead mic R mic submix 1 2 5 bass direct...

Page 11: ...RESOLUTION STUDIO MONITOR ON OFF ch device input insert assignment 1 kick mic gate submix 1 2 2 snare mic gate submix 1 2 3 hi hat mic submix 1 2 4 hi tom mic gate submix 1 2 5 lo tom mic gate submix 1 2 6 drum overhead mic L mic submix 3 7 drum overhead mic R mic submix 3 ch device input insert assignment 8 bass mic EQ submix 4 9 bass direct line compressor submix 4 10 guitar close mic mic gate a...

Page 12: ...Amplifier Studio Monitors CH 1 CH 2 FULL SYMMETRY DUAL DIFFERENTIAL HIGH CURRENT DESIGN OL PWR HIGH RESOLUTION STUDIO MONITOR ON OFF OL PWR HIGH RESOLUTION STUDIO MONITOR ON OFF ch device input insert assignment 1 mic 1 mic compressor all optional 2 mic 2 mic compressor 3 keyboard L 4 keyboard R 5 sampler L 6 sampler R 7 synth module L 8 synth module R ch device input insert assignment 9 VTR L all...

Page 13: ...YMMETRY DUAL DIFFERENTIAL HIGH CURRENT DESIGN Power Amplifier CH 1 CH 2 FULL SYMMETRY DUAL DIFFERENTIAL HIGH CURRENT DESIGN Power Amplifier CH 1 CH 2 FULL SYMMETRY DUAL DIFFERENTIAL HIGH CURRENT DESIGN Power Amplifier CH 1 CH 2 FULL SYMMETRY DUAL DIFFERENTIAL HIGH CURRENT DESIGN Power Amplifier CH 1 CH 2 FULL SYMMETRY DUAL DIFFERENTIAL HIGH CURRENT DESIGN Power Amplifier CH 1 CH 2 FULL SYMMETRY DU...

Page 14: ...icons Everyone else the tour leaves at the next para graph in about 5 seconds Shirts and shoes are recommended but not mandatory cameras and recorders are allowed Please please do not feed the Chihuahua no matter how much it begs SECTION 3 OFFICIAL GUIDED TOUR PANEL LAYOUT FUNCTION VERY LOW IMPEDANCE DESIGN VERY LOW IMPEDANCE DESIGN dB 30 20 10 O O 40 50 5 5 U 60 10 dB 30 20 10 O O 40 50 5 5 U 60 ...

Page 15: ...the channel strip just after the EQ circuit If the channel strip amplifiers are being driven too loud into over load the OL light will flash bright red This is to be avoided Overloading a mixer circuit forces the audio signal to clip and seri ously distort the sound When the OL light flashes it means something is too loud It could be the level from the microphone or tape track plugged into the SR2...

Page 16: ... PAN pot the bus assignment switches 5 next to the fader route the signal out of the channel strip With no assignment switches depressed it doesn t make any difference which way you have the signal panned It doesn t go any where unless you have some Aux sends turned up Sometimes this is a good thing if you are using the INSERT jack as a direct output and want to keep the signal out of the main mix...

Page 17: ...witch is pressed the chan nel MUTE SOLO LED 7 will blink to indicate the channel s solo status So steady on MUTE SOLO LED means mute blinking MUTE SOLO LED means solo OK As an additional clue soloing a channel will also start the RUDE SOLO LIGHT in the Moni tor Output Section to blinking madly More explicit details about the RUDE SOLO LIGHT later NOTE The channel s MUTE switch must be in the up po...

Page 18: ...it does not affect the signal HI EQ The HI section 9 is a fixed 12kHz shelving EQ with 15dB of equalization available This is a great treble control with the same range as the HI EQ in the Mackie 8 Bus console Shelving equalizers work on a very broad range of frequencies and consequently are very musical In a 12kHz shelf like this section that means that all the upper harmonics of a sound are rais...

Page 19: ...m rumble traffic noise wind noise P popping and other un wanted very low frequency sounds It also saves amplifier power which might be useful if you don t have a 100 000 watt quint ampli fied PA system LO CUT can also be combined with LO EQ boosts to produce interesting bass curves as shown above It is highly recommended that this switch be engaged for closely held vocal micro phones especially in...

Page 20: ...one sends while post fader sends are usu ally routed to reverb echo and other effects devices Don t worry about having mono effects sends most effects units mono or stereo have mono inputs Even if there are two input jacks on the effects unit labeled LEFT and RIGHT they are often combined into mono In the cases when an effect actually has true stereo inputs it is often more convenient to ignore th...

Page 21: ... The LOW MID EQ section 16 is a peak ing dipping equalizer with a fixed center frequency of 800Hz and a range of 15dB Adding a little EQ at this frequency can put warmth and full ness into vocals and instruments Cutting can really help some sounds by reducing boxy and boomy tones LOW EQ The LOW EQ section 17 is an 80Hz shelving equalizer exactly the same as the mono channel strip LOW EQ section LO...

Page 22: ...ned on the panel The fader is located in the circuit after the bus insert jack but before the final line amplifier dB 30 20 10 O O 40 50 5 5 U 60 10 dB 30 20 10 O O 40 50 5 5 U 60 10 dB 30 20 10 O O 40 50 5 5 U 60 10 dB 30 20 10 O O 40 50 5 5 U 60 10 dB 30 20 10 O O 40 50 5 5 U 60 10 O O U O O 15 U O O 15 O O U O O 15 MAX MAX U O O 20 U O O 20 U O O 20 U O O 20 U O O 20 U O O 15 U O O 15 U O O 15 ...

Page 23: ...SOLO level control flashes when this SOLO is used As in the channel strips the SUB SOLO mode can be switched from PFL to Solo in Place SIP via the solo MODE switch There s a catch though in SIP mode submixes cannot be soloed until you depress the L R ASSIGN switch AIR Here s a nifty new Mackie feature As usual Greg couldn t stand to leave too much blank space on the front panel First he held a con...

Page 24: ...evelofthetapeplayback TheTAPE RETURN TO PHONES C R 11 button next to the PHONES C R LEVEL routes the tape playback signal into the monitor system and meters This allows you to listen to the playback signal off tape and to check the playback levels on the SR24 4 meters even while you are recording TheTAPE RETURN TO MAIN MIX switch 12 nexttotheMAIN MIX faderactu ally routes the tape playback signal ...

Page 25: ... lights For extra flexibility the aux returns have been designed with an extremely wide range of available gain offering as much as 20dB boost over unity The return jacks are wired to provide both stereo and mono operation See Stereo Aux Returns Stereo Or Mono Patching underRear Panel later in this section for the details STEREO AUX RETURNS 1 2 Aux Returns 1 2 16 17 are special Not only do they fe...

Page 26: ... still more When you are soloing an input track and you want to hear the reverb applied to that track as well simply push the GLOBAL AUX RETURN SOLO 24 switch to add all the effects returns to your solo mix SOLO MASTER SECTION LEVEL The solo LEVEL control is the master for the solo buses and it sets the volume for the solo signals routed to the phones control room monitor section When the LEVEL co...

Page 27: ...nector on the rear panel hit the appropriate switch and speak into it when you have something to say Engaging either switch will light the yellow LED in the TALKBACK area so you don t accidentally leave it on The MAIN MIX talkback button 27 as signs the talkback signal to the main LEFT and RIGHT output buses In an SR situation this allows you to put your voice on the main house speakers When you a...

Page 28: ... grace of your own Magic Mixing Moments are dis turbed by the RSL you can order a Mackie RUDE SOLO LIGHT OBSCURING OCCULTANT ATTENUATOR KIT hand woven from Pygmy African Hedgehog underhair and tape it right over that bright blinking sucker A note about all this flashing As the RSL flashes the channel s that you soloed will also flash If the channel s is muted the SOLO function will not operate but...

Page 29: ...G RETURN FROM EFFECTS STEREO PLUG RISK OF ELECTRIC SHOCK DO NOT OPEN CAUTION SERIAL NUMBER MANUFACTURING DATE REPLACEWITHTHESAMETYPEFUSEANDRATING DISCONNECTSUPPLYCORDBEFORECHANGINGFUSE UTILISEUNFUSIBLEDERECHANGEDEMÊMETYPE DEBRANCHERAVANTDEREMPLACERLEFUSIBLE INSERT INSERT INSERT INSERT INSERT INSERT INSERT INSERT INSERT INSERT INSERT INSERT INSERT INSERT INSERT INSERT INSERT INSERT INSERT LINE IN B...

Page 30: ...connection but the channel strip signal is interrupted at that point Thereisnothirdclick We reworkingonit STEREO INPUT CONNECTORS 21 22 and 23 24 Stereo input channel strips 21 22 and 23 24 29 30 and 31 32 on the SR32 4 are identical and so are their input and out put connections Each of these channels has a left and right line input jack 4 The line inputs to each stereo channel strip are made thr...

Page 31: ... at SUB OUT 1 and SUB OUT 5 The tracks on your multitrack recorder which are in RECORD mode will accept the signal while the tracks in SAFE mode won t That way you can feed an 8 track recorder without having to constantly repatch your input cables SUB INSERTS To the right of the SUB OUT jacks are the submix INSERT jacks 7 These patch points allow you to insert a processing de vice such as a compre...

Page 32: ...utput level is 4dBu MONO MAIN OUT The MONO MAIN OUT output 9 is a sum of the left and right mix buses buffered with its own electronically balanced output amplifiers Like the right main mix and left main mix the MONO MAIN OUT appears on a male XLR type connector near the center of the rear panel Pin 1 is ground pin 2 is hot or high or and pin 3 is cold There is an OUTPUT LEVEL control 10 to trim t...

Page 33: ... CONTROL ROOM OUT AUX SENDS STEREO AUX RETURNS SUB INSERTS MAIN INSERTS 3 6 2 5 1 4 R R L R L 7 3 8 4 6 2 5 SUB OUTS 3 4 2 1 1 MAIN OUTS Insert the plug just to the FIRST click Do not push the plug all the way in This connection allows you to tap a direct out without interrupting the channel strip signal or Insert the plug all the way in to the SECOND click This also provides a direct out connecti...

Page 34: ...n do NOTE A very common arrangement is to use a line input mono or stereo for effects returns This neat trick allows you to EQ your EFX returns route EFX to monitors and as sign EFX to any output STEREO OR MONO PATCHING For stereo operation just plug balanced 1 4 TRS tip ring sleeve or unbalanced 1 4 TS tip sleeve left and right phone plugs into the left and right jacks If you only have a mono ef ...

Page 35: ...h common ground con nected to the sleeve left channel to the tip and right channel wired to the ring PHONES 1 and PHONES 2 are parallel and provide the same signals You ll get maximum smoke with 60 ohm headphones See tinnitus in the Glossary TALKBACK MIC Remember the talkback function we talked about before Here is where you plug in the microphone This is a balanced mic input 18 using a standard X...

Page 36: ... we came up with the name yet Here in Section 4 we ll give you the basic plan and some specific ideas for connecting the SR24 4 for sound reinforcement Take a look at the diagrams starting on page 9 They represent the most common generic typical SR hook ups In general sound reinforcement connec tions follow this pattern Microphones wireless mics electronic instruments and other sources are con nec...

Page 37: ... the effects to monitor control 1 to bring effects to monitor 1 If you want to Applications Connection Destination LEFT MAIN MIX Mains power amplifier left input RIGHT MAIN MIX Mains power amplifier right input TAPE OUT L DAT recorder left input TAPE OUT R DAT recorder right input TAPE IN L DAT recorder left output TAPE IN R DAT recorder right output AUX SEND 1 Stage monitor amplifier input AUX SE...

Page 38: ...ble on this page for your output connections Set all the faders and the AUX SEND MASTERS to U Depress the solo MODE switch to activate IN PLACE AFL Now solo each input and adjust the TRIM control to obtain a good reading on the main meters If you d like to hear the channels as you solo them you must use headphones or connect an amplifier and speakers to the CONTROL ROOM OUT jacks Carefully raise t...

Page 39: ... recorder For basic tracks you will have a three piece band with drums bass and guitar The lead singer will put down a scratch vocal and later all three of the band members will overdub vocals They want two different headphone mixes during basics and a rough mix on DAT to take home right after the overdub session You will eventually fill the eight tracks with stereo drums guitar and bass plus 4 tr...

Page 40: ...s they will not be recorded but will be played by your sequencer in real time When you have finished your basic tracks record the final vocals and erase the scratch vocal track When the vocals are done you re ready to mix Just tweak up your monitor mix adjust the reverb and push Record on the DAT machine Viola A rough mix to take home In fact if you are really on that night a final mix for masteri...

Page 41: ...p high enough and you will hear the noise HEADROOM Every electronic circuit also has a point of overload a clip point where the voltage sim ply cannot rise any higher no matter what the input signal and your fader move would like This overload or clipping will show up as tooth grinding distortion Somewhere between the noise and the clipping is an optimum level for your signal high enough above the...

Page 42: ... a standard console function which allows you to listen to one or more sources all by themselves soloed You can check EQ possible distortion or buzz or just listen to see if a particular mic is open or not When soloing more than one source you can listen to the blend of just part of your mix only the sopranos for example or just the tom mics on the drums The solo circuits are designed not to inter...

Page 43: ...n SUBs 1 4 are bandpass equalizers with the center set at 16kHz The AIR controls are set for boost only not for cut CONNECTORS If you ve used a Mackie mixer you re famil iar with the various kinds of connectors used If you re new to the whole thing we have a whole appendix of info on connectors coming up right after this Station ID SR24 4 MID Peaking EQ Boost and Cut SR24 4 MID Peaking EQ Sweep Ra...

Page 44: ...aracteristics with respect to ground Balanced input circuits can offer excellent rejection of common mode noise induced into the line and also make proper no ground loops system grounding easier Usually termi nated with 1 4 TRS or XLR connectors bandwidth The band of frequencies that pass through a device with a loss of less than 3dB expressed in Hertz or in musical octaves Also see Q bus An elect...

Page 45: ... measured in similar terms using a logarithmic scale Many audio system parameters measure over such a large range of values that the dB is used to sim plify the numbers A ratio of 1000V 1V 60dB When one of the terms in the ratio is an agreed upon standard value such as 0 775V 1V or 1mw the ratio becomes an absolute value i e 4dBu 10dBV or 0dBm delay In sound work delay usually refers to an electro...

Page 46: ...eak looks like a hill a dip is a valley a notch is a really skinny valley and a shelf looks like a plateau or a shelf The slope is the grade of the hill on the graph Graphic equalizers have enough frequency slider controls to form a graph of the EQ right on the front panel Parametric EQs let you vary several EQ parameters at once And a fil ter is simply a form of equalizer which allows certain fre...

Page 47: ...ver disable the safety ground to reduce noise problems ground loop A ground loop occurs when the technical ground within an audio system is connected to the safety ground at more than one place Two or more connections will allow tiny cur rents to flow in the loops created possibly inducing noise hum into the audio system If you have noise in your system due to ground loops check your manual for wi...

Page 48: ...Setting the mic preamp gain correctly with the trim control is an essential step in establishing good noise and headroom for your mix mixer An electronic device used to combine various audio signals together into a common output Different from a blender which combines vari ous fruits together into a common libation monaural Literally pertaining to or having the use of only one ear In sound work a ...

Page 49: ...s safe to use with non condenser microphones as well especially dynamic microphones However unbalanced microphones and equipment some electronic equipment such as some wireless microphone receivers and some ribbon microphones can short out the phantom power and can be severely damaged Check the manufacturer s recommendations and be careful phasing A delay effect where the original signal is mixed ...

Page 50: ...ts rather than the returns reverberation Reverberation or reverb is the sound re maining in a room after the source of sound is stopped It s what you hear in a large tiled room immediately after you ve clapped your hands Reverberation and echo are terms which can be used interchangeably but in au dio parlance a distinction is usually made reverberation is considered to be a diffuse continuously sm...

Page 51: ...rt jacks used for in serting an external processor into the signal path In Mackie mixers the tip is send ring is return and sleeve is ground TS An acronym for Tip Sleeve a scheme for connecting two conductors through a single plug or jack 1 4 phone plugs and jacks and 1 8 mini phone plugs and jacks are com monly wired TS Sometimes called mono or unbalanced plugs or jacks A 1 4 TS phone plug or jac...

Page 52: ...ways unbalanced The tip is connected to the audio signal and the sleeve to ground earth Some examples Unbalanced microphones Electric guitars and electronic instruments Unbalanced line level connections XLR CONNECTORS Mackie mixers use 3 pin female XLR con nectors on all microphone inputs with pin 1 wired to the grounded earthed shield pin 2 wired to the high hot or positive polarity side of the a...

Page 53: ...INE In most studio stage and sound reinforce ment situations there is a combination of balanced and unbalanced inputs and outputs on the various pieces of equipment This usuallywill not be a problem in making connections Whenconnectingabalanced output toan unbalanced input besurethesignalhigh hot connections are wired to each other and that the balanced signal low cold goes to the ground earth con...

Page 54: ...with the Balance control A stereo signal having two plugs should be patched into the Left MONO and the RIGHT input or return jacks A jack switch in the RIGHT jack will disable the mono function and the signals will show up in stereo A mono signal connected to the RIGHT jack will show up in the right bus only You probably will only want to use this sophisticated effect for special occasions wedding...

Page 55: ...nesrequireseveraldifferent voltagesforoperation Thisinvariablymeansa multi conductorcableandnon standard not XLR connectors Atubemicrophonewillalways haveanassociatedexternalpowersupply Inthelate1960 s Neumann youknow the folks that brought you the U47 and U87 microphones converteditsmicrophonestosolid state adoptingasystemofremotepoweringthat theycalled andtrademarked PhantomPowering Becauseofthe...

Page 56: ...ophones will sputter and crackle when phantom power is applied and will work fine when you turn off the phantom power Get the microphonerepaired Do s and Don ts of Fixed Installations Ifyouinstallsoundsystemsintofixedinstalla tions there are a number of things that you can do to make your life easier and that increase the likelihoodofthesoundsystemoperatinginapre dictablemanner Evenifyoudon tdofix...

Page 57: ...otherthanmicro phoneinputsatstage altarlocations Supplyinglineinputsattheselocationsisan invitationformisuse Makeallsourceslook likemicrophonestotheconsole 11 Balance oratleastimpedancebalance all connectionsthatareremotefromthe console simmediatelocation 12 Ifyoubridgeanamplifier don tuse1 4 inch phoneplugsforspeakerconnectors Grounding Groundingexistsinyouraudiosystemfortwo reasons productsafety...

Page 58: ...y and thenfindaplacetostowtheexcess Leaving theexcesscoiledonlyhelpsthecablepickup hummoreefficiently 6 Don trununbalancedlinestoorfromthe stage It snottheimpedance it sthefactthat they reunbalanced It sagoodideatousea directboxtomaketheunbalancedsource looklikeamicrophone Appendices Appendices 7 Forreallyextremecases youmayneedto insert1 1orisolationtransformersintoeach returnlinefromthefront of ...

Page 59: ...TPUT INSERT MIX 0dBu 0VU METERS OUTPUT FADER INSERT MIX AUX RETURN CH LEVEL MIX O P LEVEL OUTPUT 60dB gain to point B level up 15 0 0 to point B or C gain up 15 fader up 10 fader up 10 gain up 10 gain dn 15 level up 15 level up 15 0 0 A 0 0 0 0 B TAPE IN pan ctr 4 5dB from point A AUX SEND SR24 4 and SR32 4 Specifications Noise 20Hz to 20kHz bandwidth Line inputs to Main L R outputs all channels a...

Page 60: ... FIRST TALKBACK XLR INPUT LEVEL TB TO AUX 1 2 TB TO L R MIX 1 2 3 4 L R SUBS LEVEL AUX RET 4 IN AUX RET 3 IN AUX RET 1 2 IN LEVEL LEVEL SOLO SOLO LED AUX SEND 1 OF 6 AUX 1 OUTPUT L L L R R R L R PHONES OUTPUTS PHONES AMPS RELAY AUX SEND 1 2 SOLO LEVEL PFL SIP LEVEL RUDE SOLO LED TAPE TO MONITOR L R CONTROL ROOM OUT SOLO RELAY TAPE IN R MIX L MIX INSERTS FADER RIGHT XLR OUT LEFT XLR OUT MONO XLR OU...

Page 61: ... 1 80 2 80 0 50 19 20 19 20 V 1 0 7 94 24x4x2x1 4BUS MIXING CONSOLE 1995 MACKIE DESIGNS INC SR24 4 WEIGHT 31 lbs 39 25 19 20 V 1 0 8 95 32x4x2x1 4BUS MIXING CONSOLE 1995 MACKIE DESIGNS INC SR32 4 WEIGHT 41 lbs Appendices Appendices ...

Page 62: ...cent repair modifica tionshopthatguaranteesitsownworkinwriting eventhen yourMackieLimitedWarranty can be in jeopardy Better yet wait until the Warranty expires A note about adding jumpers during these modifications When a jumper or jumpers are called for they should NOT go into holes in the PCB Rather they should be soldered to the flat tinned area around the hole called a pad and bowed slightly o...

Page 63: ... the mixer with the proper screws 9 Replace the plastic end caps 10 Hooray you re done Modification 3 Aux Sends 5 and 6 to Pre fader Pre EQ This modification converts Aux 5 and Aux 5 into pre fader pre EQ monitor sends 1 Remove all cords from the SR24 4 and place it face down 2 Remove the five screws from the two plastic end caps on both sides of the mixer 3 Remove the end caps 4 Remove the 20 bot...

Page 64: ... may get slapped with a service charge plus shipping costs Wecouldwriteawholemanualontrouble shooting but our main point is that there are a fewobviousthingsyoucaneasilylookfor Power connections Thissoundsinsultingly simple butifthewholemixeriscompletely dead it stimetomakesurethat thepower cableisconnectedintoalivesourceofpower themixeristurnedon thefuseisOK etc Intermittent signal problems Fault...

Page 65: ...eing sold in your local area during band breaks at clubs or via mail order Nohand lettereddubs please Savethosefor ourinfrequentMixedonaMackiecontests To get your genuine 100 cotton Made in USA MackiecelebrityT shirt sendyourcassette or CD to Mackie Designs FREE T SHIRT OFFER attn Communications Department 16220 Woodinville Redmond Road NE Woodinville WA 98072 Make sure to specify L XL or XXL size...

Page 66: ...O O 15 U O O 15 U O O 15 U 15 15 U 15 15 U 15 15 U O O 15 U O O 15 U O O 15 U O O 15 U O O 15 U O O 15 U 15 15 U 15 15 U 15 15 U O O 15 U O O 15 U O O 15 U O O 15 U O O 15 U O O 15 U 15 15 U 15 15 U 15 15 U O O 15 U O O 15 8kHz 100 8kHz 100 8kHz 100 8kHz 100 8kHz 100 8kHz 100 8kHz 100 8kHz 100 8kHz 100 8kHz 100 8kHz 100 8kHz 100 8kHz 100 8kHz 100 8kHz 100 8kHz 100 8kHz 100 20 OL PRE 1 PRE PRE 2 3 ...

Page 67: ...I C G A I N 10 U 60 10dB 40dB 1 0 U O O 15 U O O 15 U O O 15 U O O 15 U 15 15 U 15 15 U 15 15 U O O 15 U O O 15 8kHz 100 L R M I C G A I N 10 U 60 10dB 40dB 1 0 U O O 15 U O O 15 U O O 15 U O O 15 U 15 15 U 15 15 U 15 15 U O O 15 U O O 15 8kHz 100 L R M I C G A I N 10 U 60 10dB 40dB 1 0 U O O 15 U O O 15 U O O 15 U O O 15 U 15 15 U 15 15 U 15 15 U O O 15 U O O 15 8kHz 100 L R M I C G A I N 10 U 60...

Reviews: