background image


IM213D-MC Issue 10 © 2017                                                                                                                                                                 Page 7 of 8 

Troubleshooting Guide 

Problem 

Cause 

Remedy 

Fluid will not flow 
through meter


a) Foreign matter blocking rotors


b) Damaged rotors


c) Meter connections over tightened


d) Fluid is too viscous


a) Dismantle meter, clean rotors 


b) Replacement rotor assembly required.


c) Re-adjust connections


d) See specifications for maximum viscosity


Reduced flow 
through meter


a) Partially blocked


b) Fluid is too viscous


a) Check and clean meter. 
b) See specifications for maximum viscosity


Meter reading 
inaccurate


a) Fluid flow rate is too high or too low


b) Air in fluid.


c) Excess wear.


a) See specifications for minimum and maximum flow rates


b) Bleed air from system


c) Check meter body and rotors. (see instructions)


Meter not giving a 
pulse signal


a) Faulty hall effect sensor


b) Faulty reed switch


c) Magnets failed


a) Replace PCB Board


b) Replace PCB Board


c) Replacement rotor assembly required


LCD register not 
working


a) Battery flat


b) Faulty LC Display


a) Replace battery


b) Replace PCB module 


WEEE Directive - Waste Electrical and Electronic  Equipment 

The WEEE Directive requires the recycling of waste electrical and electronic 
equipment in the European Union.  

Whilst the WEEE Directive does not apply to some of Macnaught’s products, we 
support its policy and ask you to be aware of how to dispose of this product.  

The crossed out wheelie bin symbol illustrated and found on our products signifies that 
this product should not be disposed of in general waste or landfill.  

Please contact your local dealer national distributor or Macnaught Technical Services 
for information on product disposal.  
 

Summary of Contents for IM012E-01

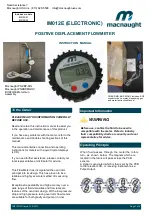
Page 1: ...w Exceptional repeatability and high accuracy over a wide range of fluid viscosities and flow rates are features of the oval rotor design With a low pressure drop and high pressure rating oval rotor f...

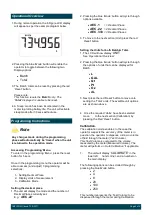
Page 2: ...s shown above 4 Once the required Units have been selected move to the next section Calibration by pressing the Red Reset button Programming Instructions Note Any changes made during the programming p...

Page 3: ...ng the rotors the top face of the rotors should be flush with the sealing face of the meter body If they sit higher than the sealing face remove turn over and replace 2 Replace the rotors Item 6 onto...

Page 4: ...bly procedure Follow step 1 to isolate the Electronic module 2 See Photograph below Remove the PCB from clear plastic housing by unscrewing the 3 retaining screws 3 The battery can now be removed by p...

Page 5: ...Order for replacement Item no No off Part or Set Description 1 1 IM215s Protective boot 2 7 Screw M3 x 8 Pan Hd 3 1 DKIT IM012 MC Electronic module 4 1 O ring BS040 5 1 n a Body 6 2 MKIT IM012 01 Rot...

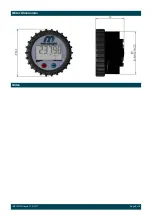
Page 6: ...IM213D MC Issue 10 2017 Page 6 of 8 Meter Dimensions Notes...

Page 7: ...tors see instructions Meter not giving a pulse signal a Faulty hall effect sensor b Faulty reed switch c Magnets failed a Replace PCB Board b Replace PCB Board c Replacement rotor assembly required LC...

Page 8: ...Wetted Materials Acetal Aluminium Steel Nitrile Rubber Connections 1 2 BSPT or 1 2 NPT Maximum Temperature 55 deg C 131 deg F Minimum Temperature 14 deg C 6 8 deg F Maximum Viscosity 1000cP Centipois...

Reviews: