Hydra LAN User Guide
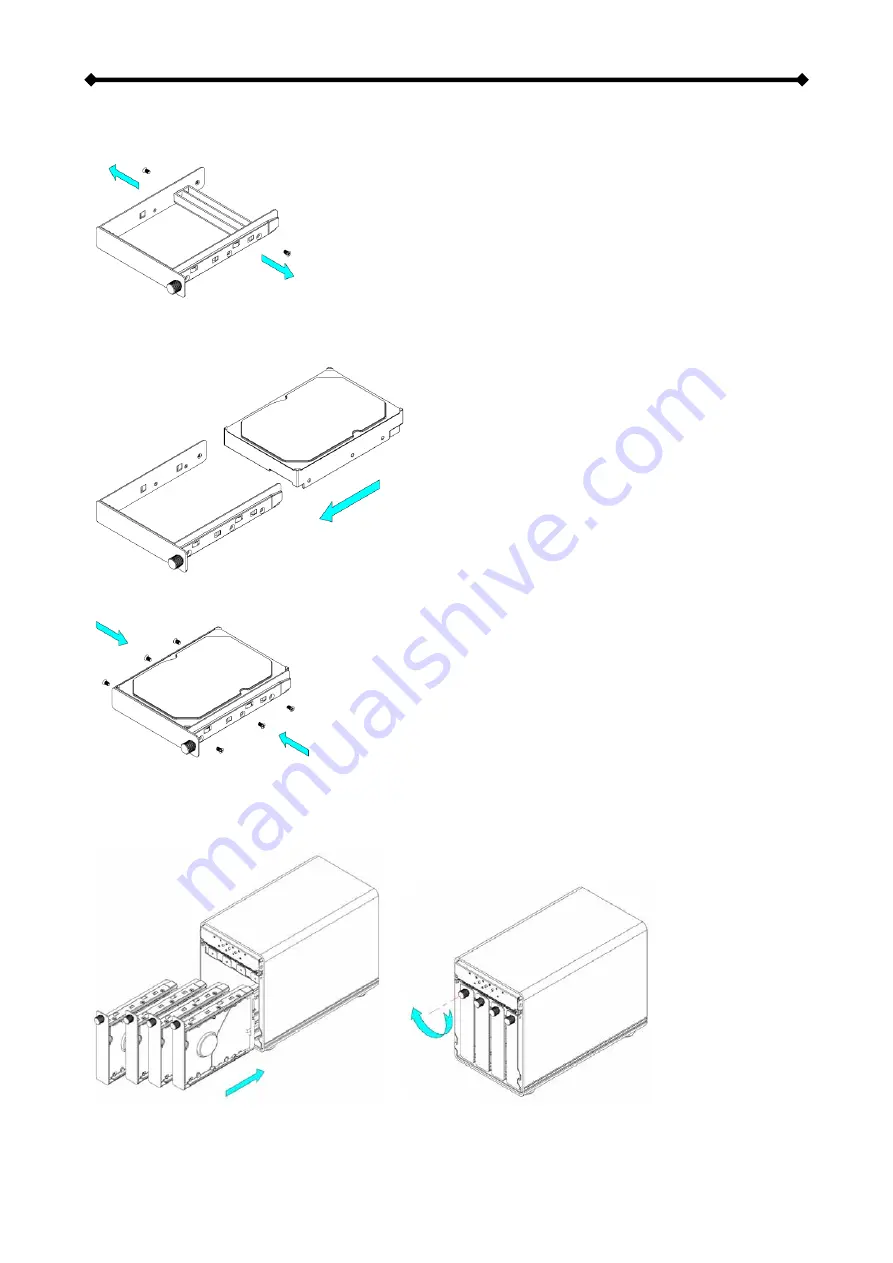
4. Remove the screws that are holding the plastic bracket in place.
5. Install the hard drive as illustrated below with the SATA connector facing away from the
front.
6. Mount the drive with the six screws from the side.
7. Repeat the previous 3 steps for each hard drive cassette you are planning to install.
8. Slide the hard drive cassettes back into the HDD rack and fasten the screws by turning
them clockwise.
Page 6 / Chapter 2 - System Setup


