Hydra LAN User Guide
Page 4 / Chapter 1 - Introduction
1.4 Quick Installation Guide
Following is a quick installation guide to get you up and running. For further details on
each of the settings, please refer to chapter 2 and subsequent chapters.
1. Install at least two hard drives.
2. Connect the Ethernet cable from your network router or switch to the Hydra LAN.
3. When everything is connected, turn the Hydra LAN on and give it about two minutes
to start up.
4. Access the web configuration interface via your web browser. See “How to login” in
chapter 2.
5. Go to the “RAID Setting” section in the maintenance menu and create your
preferred RAID array.
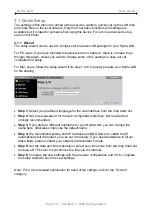
6. Once the RAID array has been built and the drives formatted, go to the “Basic”
menu and follow the quick setup wizard. This will help you to set up the IP
configuration, add the first user and prepare file sharing.
7. You are now ready to start sharing and downloading files.
Note: Set the speed for your network card to AUTO and not full or half speed.
Note: Without installing and formatting the hard drives first, none of the other functions of
the Hydra LAN can be used.
1.5 About Data Backup
To protect your files and help prevent the loss of your data, we strongly recommend that
you keep two copies of your data, one copy on your Hydra and a second copy either on
your internal drive or another storage media such as a CD, DVD, Tape or an additional
external drive.
Any loss or corruption of data while using the Hydra is the sole responsibility of the user,
and under no circumstances will the manufacturer be held liable for compensation or the
recovery of this data.


